Expecting the Expected | My Favorite Blueberry Lemon Muffins


One lesson that I’ve recently been taught by life is that it (life) does not always turn out as you expect it to. Life is a long and winding road, full of unexpected turns, unanticipated road blocks, and even annoying construction. The route that you map out – your plan – does not always work out, and sometimes you need to reroute. I can imagine that lady’s voice – you know, the one that seems to be present on all GPS systems – saying, “Turn around! Wrong way! Recalculating…” Her voice is so annoying.


Figuring out a new route can be difficult, stressful, frustrating. Life tossed me a curve ball a few months back, and I am doing my best to find a new way, to challenge myself and figure it all out. And figuring it out? Well, that’s a whole different ball game. Last week, another curve ball was thrown into my world. A good friend was killed in an accident. A kind, wonderful, sweet, beautiful friend, suddenly taken at age 27. Aren’t you supposed to attend the funeral of your friend when you’re both old and gray, after living a full life? That was my expectation.


I’m not quite ready to write about my friend. It all feels a bit too surreal right now. So instead, I bake. Because with baking, you can have expectations. I can be certain that if I combine the right amount of flour with the right amount of baking powder, sugar, eggs, milk, butter…and if I bake it all up at this temperature for that amount of time…I can expect a delicious outcome. Sure, things can go wrong in the oven from time to time. Cakes can flop, cookies can burn, bread might not rise. But most often, the science of baking delivers expected results. And if a great batch of muffins is all I can count on right now, then so be it.


You can count on these muffins. You can count on them being delicious, and you can count on them being eaten in short order. And you can probably count on the fact that you have blueberries sitting in your fridge or freezer right now.

Win! Use ’em up friends, and make these reliable little muffins. For once, expect the expected.


Blueberry Lemon Muffins  (slightly adapted from Enjoy, The Best of Bridge Series)

2 cups flour

1/2 cup sugar

3 tsp. baking powder

1/2 tsp. salt

Zest from one lemon

1 egg

1 cup milk

1/2 cup butter, melted

1 tsp. vanilla

1 cup fresh (or frozen) blueberries

Topping:

1/4 cup butter, melted

Juice from one lemon

1/3-1/2 cup sugar

Preheat the oven to 425°F. Prepare a muffin tin (12) by greasing or lining the cups. Mix together the flour, sugar, baking powder, salt, and lemon zest in a large bowl. Beat the egg, milk, and butter in a separate bowl. Add the vanilla. Add the egg mixture to the dry ingredients and stir until just mixed (the batter will be lumpy). Fold in the blueberries. Fill muffin cups 2/3 full. Bake for 20-22 minutes.

For the topping: Combine the melted butter and lemon juice in a small bowl. Put the sugar in a separate bowl. When the muffins are slightly cooled (but still warm), dunk the top of each muffin into the butter/lemon juice mixture, and then into the sugar. Enjoy!

Savor the Moment | Being Grateful

I like blogs. Particularly food blogs.

I read lots of them. I peruse photographs of delicious food, read stories that go alongside these fabulous recipes, laugh at the wit of my fellow food bloggers. We communicate with each other. We comment on each other’s recipes and stories. There’s a sense of community here. I connect with people through our shared love of food. These are people that live in other countries, on other continents. People that I never would have the opportunity to connect with, except for here, in the foodie world. I love that.

It’s amazing what you can learn about someone through reading their blog. Favorite ingredients, favorite TV shows, pet peeves, exciting trips, family, friends, love, heartache. Because it’s not just about food. It’s about life, and looking at the world through the lens of someone else. Their view of the world via taste and smell. What goes on in life can affect everything. Celebrations call for cake, heartache can cause a loss (or gain) in appetite, busy days demand quick and easy meals.

I had never come across Jennie’s blog before, but happened to land there by coincidence a few days ago. And I learned that Jennie had lost her husband, Mikey suddenly to a heart attack just days before. I learned that Mikey loved peanut butter pie. Jennie asked us all to make a peanut butter pie to honor Mikey. And to cherish the ones we love. To stop putting off things we could do today until tomorrow. Because life is short, and everything you love can be gone, in an instant.

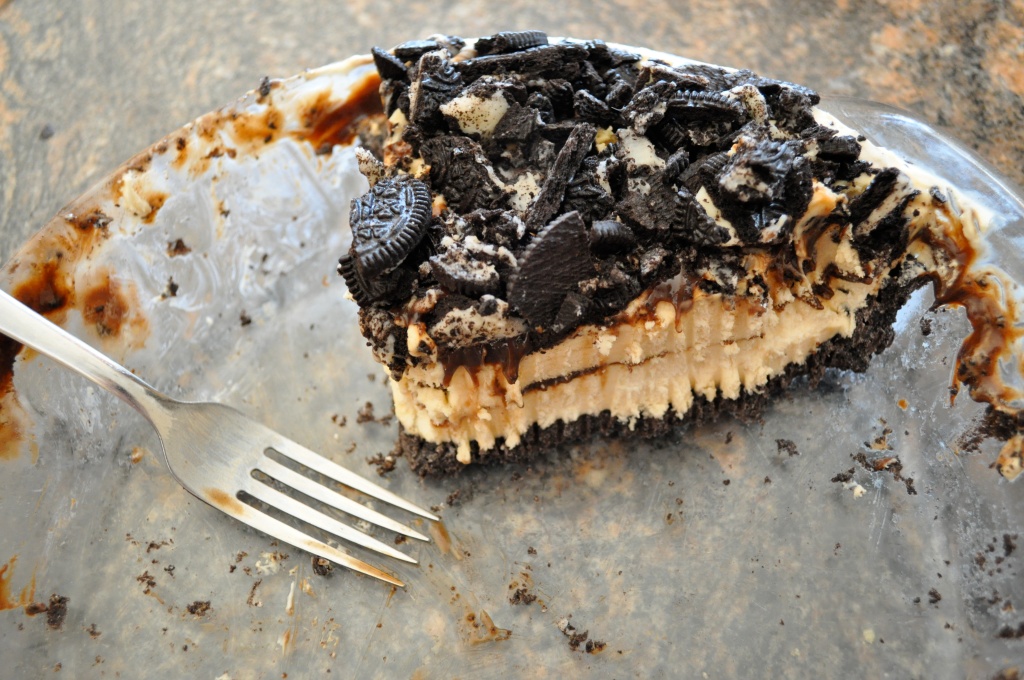
Coincidentally, baking a peanut butter pie was already on my agenda. I had come across a recipe a few days before – and I knew it would be perfect for my mom’s birthday (a peanut butter fanatic). It was delicious, rich, totally amazing. And clearly enjoyed, as evidenced by the fork marks in the leftover pie. I may or may not have sat on the kitchen floor yesterday afternoon, eating forkfuls directly out of the pie plate. Please don’t judge me.

Make yourself some peanut butter pie. Share it with someone you care about. Heck, make it for yourself if you’re so inclined. You deserve it. Today. Hug your loved ones a little tighter. Tell people how you feel, every day. And be grateful for what you have.

This + Beer + a Patio | Smoked Paprika Popcorn

Aloha! I have a proposition for you.

Ready?

You + Me + Summer…

Add in a patio. AKA. A table and chairs. Outside in the beautiful summer sun.

You bring the beer. Cold beer.

And I’ll bring this.

Deal?

I was inspired to replicate this dish at home after munching on it at a local cafe/bar here in Edmonton called Sugarbowl. One of my favorite spots in the city, with a great atmosphere, amazing beer selection, and creative belly-filling options. They’ve had a popcorn appetizer on their menu for as long as I can remember. More recently, Smoked Paprika Popcorn caught my eye and won over my taste buds. I figured it couldn’t be too hard to replicate at home, it’s just popcorn after all! Here’s what I came up with after a couple of tries, and it tastes pretty darn close to the real thing.

This popcorn is great for snacking, and tastes best when served freshly popped, coated, and given a spritz of fresh lime juice. The smoked paprika gives it a wonderful smoky flavor that will have you reaching your hand into the bowl until it’s clean. Finger lickin’ good. Don’t forget the beer.

Smoked Paprika Popcorn

2 TBSP. olive oil

1/2 cup popcorn kernels

1 TBSP. smoked paprika*

1 tsp. garlic powder

1 tsp. salt

1 tsp. white sugar

Fresh lime

Combine the smoked paprika, garlic powder, salt, and sugar in a small bowl. Set aside. Pop your corn. I use a big pot, heat up my oil, throw in the popcorn kernels, let it heat up and pop away, giving the pot a good shake every 15-20 seconds (until the popping is finished). But if you have an air popper, or use another method, go with that. Sprinkle the hot popcorn with the spice mixture, using as much or as little spice as you like (taste test along the way). I usually use all of the mixture, but that’s just my preference. Give the popcorn a squeeze of fresh lime and enjoy!
* Smoked paprika can be found at most local supermarkets in the spice aisle or the bulk section. The smoked paprika really is the star in this little snack, so don’t even bother without it!

If you’re looking for a little kick, I bet this would also be fabulous if you added a pinch of cayenne pepper to the spice mixture.

When You Love Someone | Chocolate Skor Cookie Dough Toasted Marshmallow Cupcakes


When you love someone…

You do nice things for them. Things that will make them happy. Because seeing them happy makes you happy too.

Like…making them a CD of their favorite music. (That is, if they still own a CD player. In this day and age, maybe you make them a playlist and put it on their iPod. I still like CDs. Call me old-fashioned).


Like…writing a special note or card to them, and mailing it to them, or leaving it in their mailbox.

Like…surprising them with tickets to a concert with their favorite band.

Like…leaving a package of their favorite candy in their coat pocket when they’re not looking, so that when they reach into their coat pocket later that day, they will find a sweet little surprise.


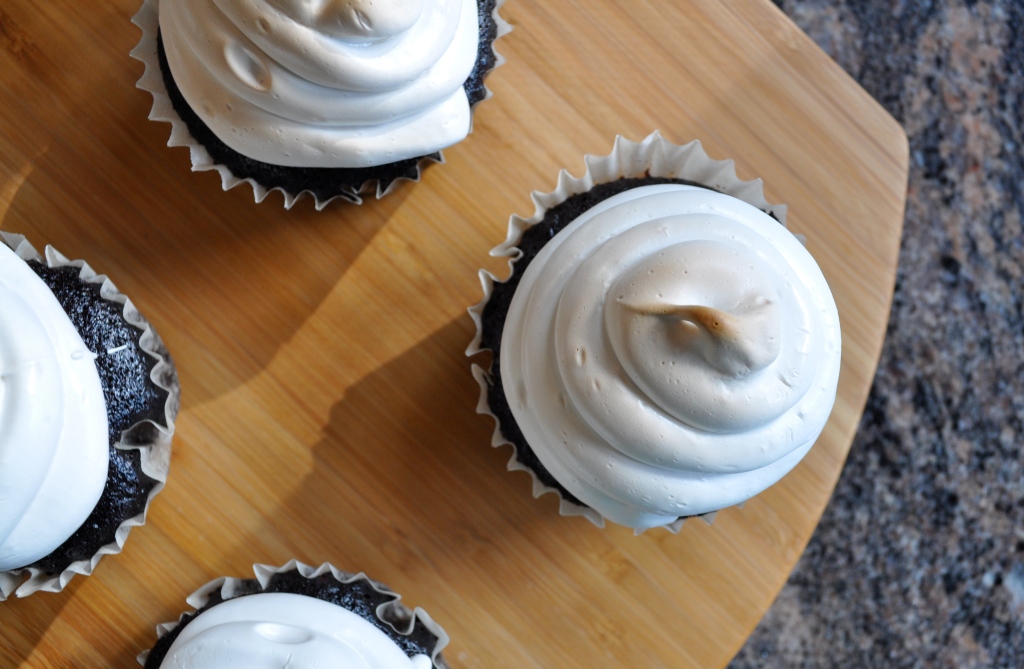
Like…making the most ridiculously and absurdly delicious cupcakes for them, and delivering them to that special person’s door on their birthday.

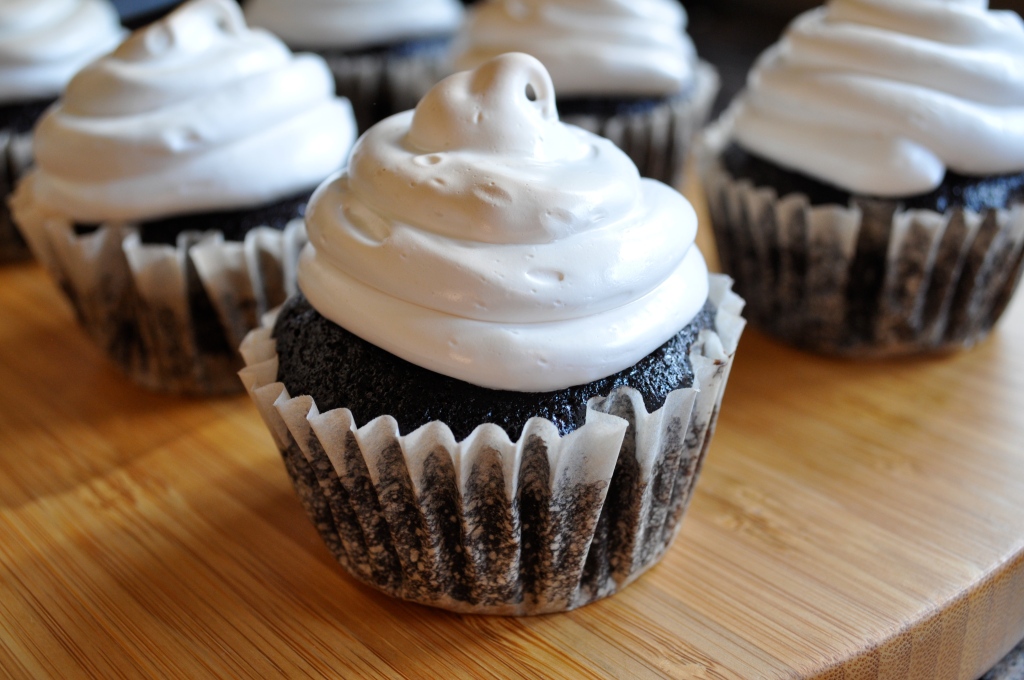
These are the kind of cupcakes you make for someone that you care about very much. They take some time to make. They’re a labor of love. But they are totally worth it.

I know because I did it. I made them, and I delivered them, and I helped eat them, and I put a smile on a very special somebody’s face. Family, friends, significant others…make these for someone special in your life.


This recipe was adapted ever-so-slightly from Joy’s version. Joy is the creator of always-fabulous recipes. But I did my own thing with the cookie dough, since I was making these for a Skor chocolate bar lover. The cookie dough options are endless! The end result was a rich, decadent, and over-the-top cupcake. They tasted extra wonderful straight out of the fridge, cold and moist, ridiculously good.


Chocolate Skor Cookie Dough Toasted Marshmallow Cupcakes (slightly adapted from Joy the Baker)

For the cupcakes:

2 1/4 cups all-purpose flour

2 cups cane sugar

1 cup cocoa powder

2 tsp. baking soda

1/2 tsp. salt

1 TBSP. vanilla

2/3 cup canola oil

2 tsp. white vinegar

2 cups cold water

Preheat your oven to 350°F.  Prepare two cupcake pans with cupcake liners. In a large bowl, sift the dry ingredients together and set aside. In a medium bowl, whisk together the oil, water, vanilla and vinegar. Slowly combine the wet ingredients with the dry ingredients. Do not overmix.  The mixture will be quite runny, but it’s all good! Fill each cup two-thirds full and place in the oven for 22-24 minutes or until a toothpick inserted into the center comes out clean. Cool in the pan for 10 minutes then place on a wire rack until completely cool.

For the cookie dough (I got some help here):

2 cups all-purpose flour

1/2 tsp. salt

3/4 cup butter, melted

1 cup brown sugar

1/2 cup white sugar

1 TBSP. vanilla

4 TBSP. milk

1 cup chopped Skor chocolate bar (about 2-3 bars)

Mix everything together and refrigerate until you’re ready to use. This cookie dough is safe to eat without cooking because there are no eggs in it. Delightful!

And finally, for the meringue:

4 large egg whites

1 1/2 cups white sugar

1/2 cup light corn syrup

A large pinch of salt

2 tsp. vanilla

In a large pot, bring a couple inches of water to a simmer. Place a large, heat-proof bowl over top (to create a double-boiler). In the bowl, whisk together the egg whites, sugar, corn syrup and salt.  Keep whisking as the mixture heats. The sugar will dissolve after about 5 minutes. Be careful, we don’t want to cook the eggs. Transfer the  mixture to the bowl of an electric mixer. With a whisk attachment, beat the mixture on high until stiff peaks form (about 5 minutes). The mixture will be sticky and glossy and look like melted marshmallows. Finally, beat in the vanilla. Set aside.


Putting it all together:

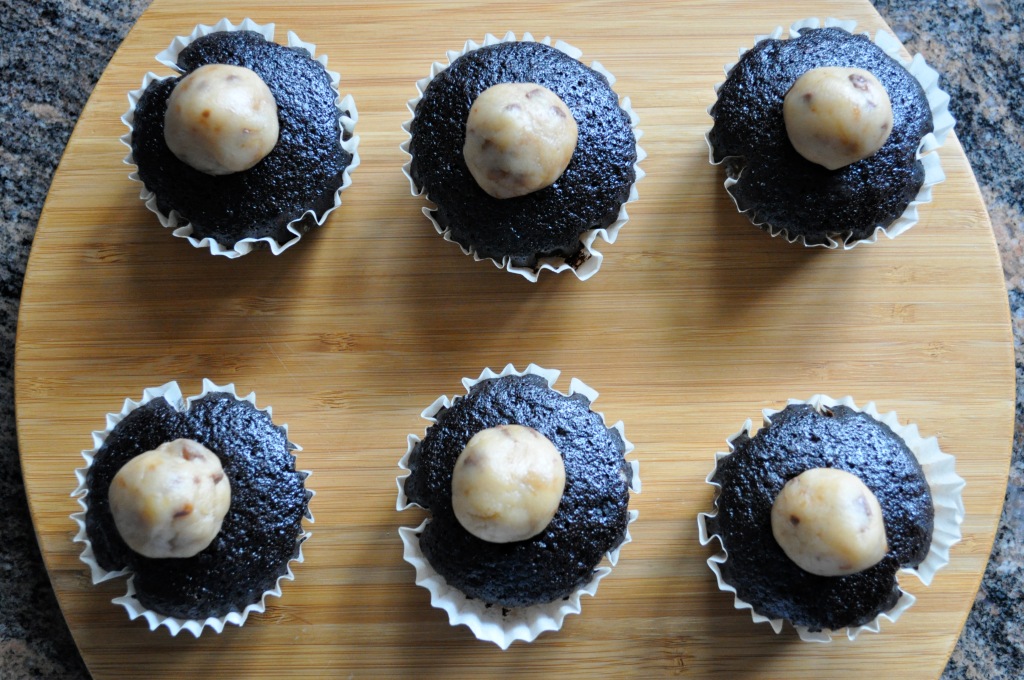
Use a small spoon to scoop a small indent out of the top/center of the cupcakes (see above). The indent will help the cookie dough balls rest on the cupcake without falling off. Now, it is absolutely imperative that you eat each spoonful of cupcake. You need to keep up your strength on this long journey. Do it.

Roll your cookie dough into walnut size balls, and place one ball in the centre of each cupcake. Are you still with me?

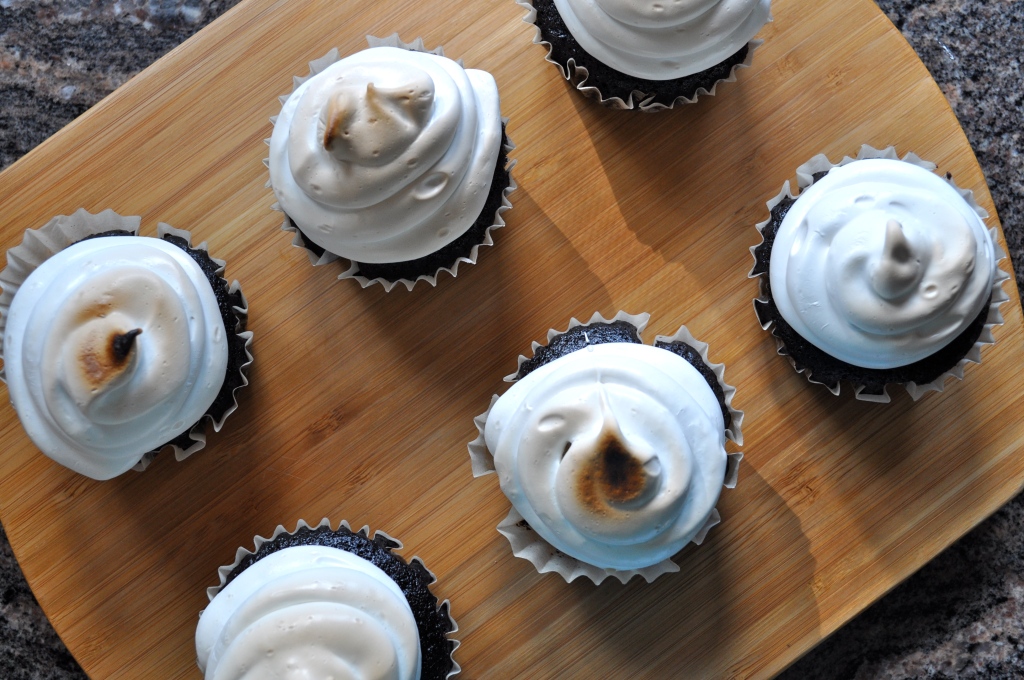
Place the meringue frosting in a large ziplock bag (or in a pastry bag, if you’re fancy). Cut a small hole out of one of the bottom corners of the bag. Pipe frosting around the edges of the cupcake and over the dough ball in a circular motion like you’re topping a cone with soft serve ice cream.

And finally, turn your oven on to broil. Place 12 cupcakes on a baking sheet. Place cupcakes under the broiler for about 1 minute. Keep a very close eye on them, they can burn in an instant. As Joy suggests, you may need to remove the cupcakes and rotate the pan to ensure that they cook evenly.  Once toasted, remove the cupcakes from the oven, and toast the other batch. These can be served right away, or cold from the fridge, whatever tickles your fancy. Amazing.


Get baking friends.

And share the love.

A Match Made In Heaven | Baked Apple and Brie in Puff Pastry

Holla friends.

Just a quick little ditty for you, I’m off to a family reunion this weekend. In a wee little hall, in a fairly little town.

After I finish making 6 dozen of these. My kitchen is a mess of flour, butter, and cinnamon. I have brown sugar on the bottoms of my feet. It’s delightful.

Speaking of cinnamon and delightful things, check this out.

I came across this recipe on Annie’s Eats a few months ago. Annie calls it Baked Brie en Croûte with Apple Compote. I’m calling it Baked Apple and Brie in Puff Pastry. I’m keeping it simple. I’m a simple girl.

But whatever you call it, the combination of apples, sugar, brie, and puff pastry is delicious. Total party in your mouth. I added a little cinnamon for some extra dimension. It works.

This is an appetizer, to be served with crackers and of course, wine. However, I could honestly eat this for dessert. Or as a meal. It is just so good.

Good good good.

Take it to a party and I guarantee everyone will love it. The peeps at the party I took this to sure did.

Now, if you’ll excuse me, I have some family reunioning and wine drinking to do. Ciao!

Baked Apple and Brie in Puff Pastry (slightly adapted from Annie’s Eats)

1 TBSP. butter

3 golden delicious apples, peeled, cored, and diced small

1/4 cup white sugar

1/2 tsp. cinnamon

A pinch of nutmeg

1 pkg. puff pastry (round or square), rolled to 1/4-inch thickness

1 round of brie (6-8 oz.)

1 egg beaten with 1 TBSP. water

Crackers of your choice, for serving

In a medium saucepan, melt the butter over medium heat. Add the diced apples and cook, stirring occasionally for about about 5-7 minutes. Add in the sugar, cinnamon, and nutmeg. Mix well and continue to cook, stirring occasionally, until most of the liquid has evaporated, about 12-15 more minutes. Remove from the heat and let the mixture cool to room temperature.

Preheat the oven to 375˚F. Prepare a baking sheet (or pie plate, like me) by coating it lightly with cooking spray, or lining it with parchment paper or a silicone baking mat. Transfer the puff pastry to the prepared baking pan. Cut the brie in half horizontally to create two thinner rounds. Place the bottom half of the brie in the center of the puff pastry. Top with about half of the apple mixture. Place the other round of the cheese over top, covering with the remaining apple mixture. Bring the puff pastry up around the edges of the brie-apple tower. Fold and pinch the edges in the centre to hold everything together. Brush the surface of the puff pastry lightly with the egg wash. Bake for about 40-45 minutes, or until the puff pastry is golden brown, crisp, and bubbling with goodness. Your kitchen will smell amazing. Remove from the oven and allow it to cool for about 10 minutes before serving. Eat!

An Anytime Treat | Best Ever Rice Pudding

I never really liked rice pudding as a child. Something about the texture turned me off. And hello, rice was a side dish. To be eaten only with soy sauce. Not touching anything else on the plate.

I look back at my food tastes as a child and almost laugh. Children are such particular beings – little food critics that require imaginative reasons for eating certain things. I remember when my brother was little, we had to call broccoli “tree stars,” because the dinosaurs in The Land Before Time movie ate tree stars and enjoyed them to boot. As a result, my brother could not get enough broccoli. Mission accomplished, I suppose.

Many of the foods that I hated as a child have become some of my favorites as an adult. There is not a single vegetable I don’t enjoy nowadays, and salmon is no longer a stinky, disgusting main dish (but rather one of my very favorite things). And I hated rice pudding, or so I thought, until a couple of years ago when one of my coworkers started chowing down on rice pudding from the hospital cafeteria as a post-lunch dessert. Yes, I just said hospital cafeteria.

Fear not, it was a prepackaged rice pudding, not something made on site. She raved about it and ate it so often that my curiosity got the best of me, and I grabbed one for myself one day. Now, the rice pudding was certainly not rave-worthy, but it was enough to shift my feelings about rice pudding from grotesque to tolerable. It also gave me some encouragement to try making it myself. If a packaged rice pudding could taste good, the chance of homemade rice pudding knocking my socks off became a bit more likely.

Eventually, I gave a few recipes a try, but nothing really blew my taste buds away. I tried baked rice pudding, but became a little skeeved out by the eggs that seemed to do their own thing and create a scrambled egg-like custard alongside the rice. I tried a couple of stovetop recipes, but they always glommed together like play-doh once the pudding had cooled. Rice pudding failure.

And then one day, I was feeling sorry for myself and decided to treat myself to a cooking magazine while at the grocery store. Even pity parties require refreshments. I grabbed a copy of Fine Cooking, leafed through it quickly, saw a few interesting recipes, and threw it into my basket. It wasn’t until a day later when I was flipping through the magazine with a little more care that I came upon this recipe. “Best-Ever Rice Pudding” it said. Now, if you’re going to call something “best-ever,” you had better be able to deliver. And this creamy, sweet, rich pudding certainly does that.

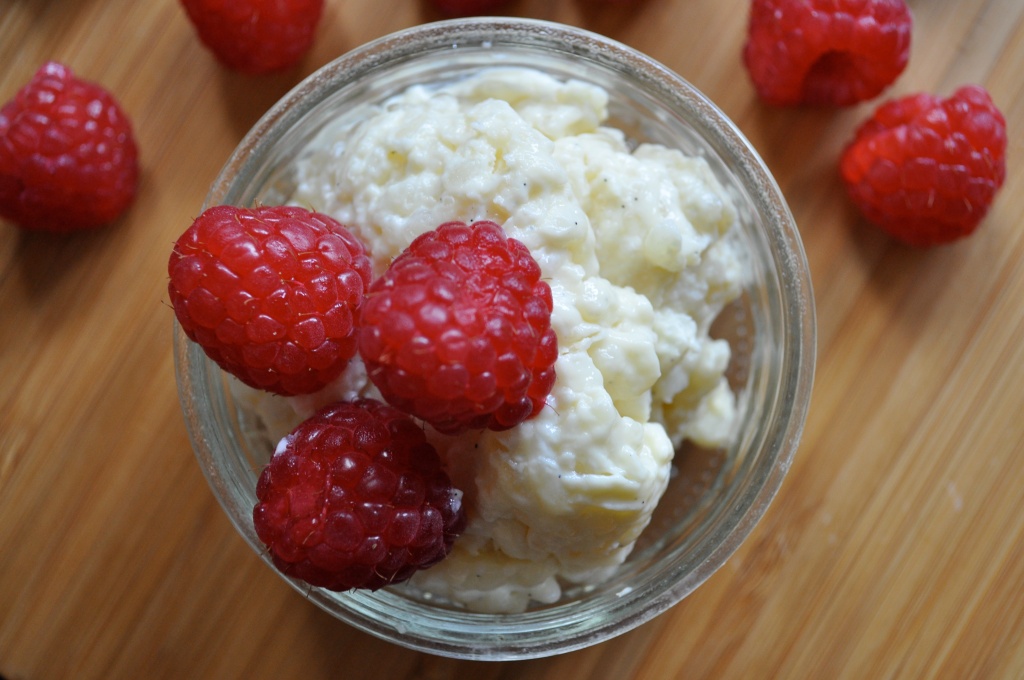
Make this rice pudding. Whether you love rice pudding already, or are a skeptic like I was. It’s so worth it. The blue photos were taken right after the pudding came off the stove, and it was incredible when still warm, all on its own. The red photos were taken the next day, when the pudding was cold out of the fridge. It was amazing with fresh raspberries, and I imagine that any fresh fruit would be delicious company for this creamy treat. Or throw in some raisins if you want to be more traditional. I found myself going back to the fridge over and over, standing in the open door, eating it spoonful by spoonful. Best. Ever. Indeed.

Best-Ever Rice Pudding (slightly adapted from Fine Cooking magazine, June/July 2011)

4 cups whole milk

1/2 cup arborio rice*

5 TBSP. granulated sugar (add another TBSP. or two if you want it to be sweeter)

1 vanilla bean

2 cinnamon sticks

2 large egg yolks

In a medium saucepan, combine the milk with the rice and sugar. Split the vanilla bean lengthwise and scrape out the seeds. Add them to the saucepan, along with the scraped vanilla bean and the cinnamon sticks. Bring the mixture to a boil over medium heat. Reduce the heat to the point where the mixture can continue to simmer, and cook until the rice is tender, about 25 minutes. Stir frequently during this time. Remove the pan from the heat.

In a small bowl, whisk the egg yolks until smooth and pale yellow. Whisk about 1 cup of the hot rice mixture into the yolks, then put the egg mixture back into the pan. The eggs need to be tempered, to avoid that scrambled egg effect. Scrambled eggs for breakfast = super-duper. Scrambled eggs in rice pudding = blech. Stir until well blended, and put the mixture back over medium heat. Cook, stirring constantly, until the mixture just starts to boil, about 2 minutes. Take the pan off the heat and allow to cool for 5-10 minutes. Remove the vanilla bean and cinnamon sticks.

If you’re going to enjoy the pudding right away, spoon into bowls or ramekins and get eating. If you’d prefer to eat the pudding cold, transfer the pudding into a bowl or container and refrigerate for a couple of hours. Try to stay away from the fridge.

*You can use other varieties of rice (ie. long grain, basmati, jasmine), but arborio rice really helps to create a creamy and sticky texture.

Back In The Saddle | Cravings

Hi.

How are you?

Amazing? That’s so wonderful to hear.

Have I fallen off the face of the planet?

No, I’m here. Just crawling out of my cave. But I’m so happy to see all of your smiling faces. I’ve been thinking about you. A lot.

I’ve also been spending a lot of time with this little beauty. Isn’t she pretty? Whenever I point a camera at her, she always looks off to the side, just like a little model. I love it.

One thing I haven’t been doing is cooking. Or baking. But I am going to get my butt back in the saddle, immediately. I’ve been salivating over some other blogs in the past few days, and I’m getting inspired to take over the kitchen again.

I want this.

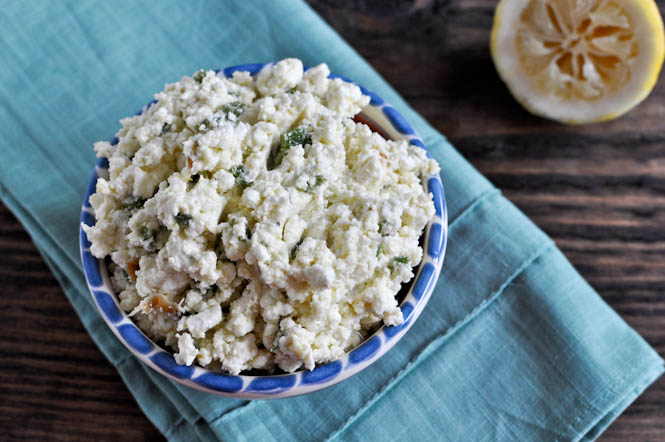
Crazy Feta by How Sweet It Is. Jessica, can I come live with you? Please?

Creamy Avocado Pasta by Oh She Glows. Angela makes seriously delicious and healthy food. Plus, I really need to get my glow back.

Homemade Churros with Warm Dark Chocolate Sauce by Joy The Baker. Joy never disappoints. I think if I lived with Joy, I would always be happy because there would always be something delicious to eat.

And this. Chocolate Squared Banana Bread by Geni from Sweet And Crumbly. This delicious bread has been on my mind since I first read Geni’s post about it weeks ago. I need to make this, stat.

I think my appetite might be back. Thank goodness there are such talented foodies to help my taste buds get going again!

The question is, what to make?

I have an idea. A really, really good idea. Here’s a hint.

It’s sweet. And creamy. And very good for the soul.

Stay tuned.

Tear Soup

Dear friends,

Hopefully you’re still here. I know that my lack of contribution here has made for very little sharing lately. But I haven’t forgotten about all of you lovelies. Unfortunately, today I have some sad news to share. I know this blog isn’t about my personal life, but it is my creative outlet, and it will be affected by what has happened.

Honey ended our relationship a week ago. It was sudden and unexpected, and it has been so incredibly hard to process and understand. Without going into details, after 4 years together, living together, with a puppy, preparing to sell my condo and invest in a home together, I feel that my life has been completely shattered.

Accompanying my heartbreak is a loss of appetite, a loss of joy in food altogether. Honey was my taste tester, my food critic, my photo critic and sometimes assistant, my cheerleader. Not to mention, in my eyes, the love of my life and my partner in all of life’s coming adventures. Now I must try to get my life back on track, I must try to adjust to being alone, and to cooking for one. I have no idea how to make this transition, but everyone keeps telling me that my life will move forward somehow, and that no matter how deep, time eventually heals all wounds.

So please friends, new and old, don’t give up on me. I will try my hardest to get back to cooking, baking, and sharing with all of you. But first, my heart requires a little mending.

Take good care, eat, drink, and be well.

See you soon,

Amanda

This One’s For Nana | Cinnamon Buns

I made you a promise yesterday. I like to keep my promises.

Raise your hand if you like cinnamon buns.

I don’t know about you, but my hand is in the air.

One of my fondest memories is making cinnamon buns with my Nana when I was a little girl. While it was a long process, especially for a child, I loved the fact that at the end of it all, we had such a special treat waiting for us to eat. We cheated a little and used a breadmaker to make the dough, but Nana taught me the care and patience required to roll the dough out into a perfect rectangle, spread it generously with butter, sprinkle it with brown sugar and cinnamon, and then wait until the little rolls had blossomed into pillowy buns waiting to be baked. The sweet aroma would fill the kitchen, and I would anticipate that first delicious bite of a freshly baked, warm cinnamon bun.

Shortly after Nana passed away, just over 4 years ago, I tried to make our cinnamon buns again. I followed the same recipe, even used the same breadmaker, and the buns were a total flop…twice. The first batch never rose, and the second batch just didn’t taste anything like I remembered. Clearly I was missing Nana’s special touch. I decided that cinnamon rolls were better left as a wonderful memory of Nana, and that I would stop trying to replicate those special treats that Nana and I created together.

And then, a few days before this past Mother’s Day, I asked my mama what she wanted for the Mother’s Day brunch I wanted to make her. “Cinnamon buns,” she replied. And I knew that store-bought cinnamon buns would not cut it. I started my search for an amazing cinnamon bun recipe, one that would live up to my Nana memories. I remembered how Pioneer Woman’s recipe for Cinnamon Rolls had called out to me the first time I saw it. And I decided that there was no time like the present to give it a try, adding my own little twist, one that Nana taught me.

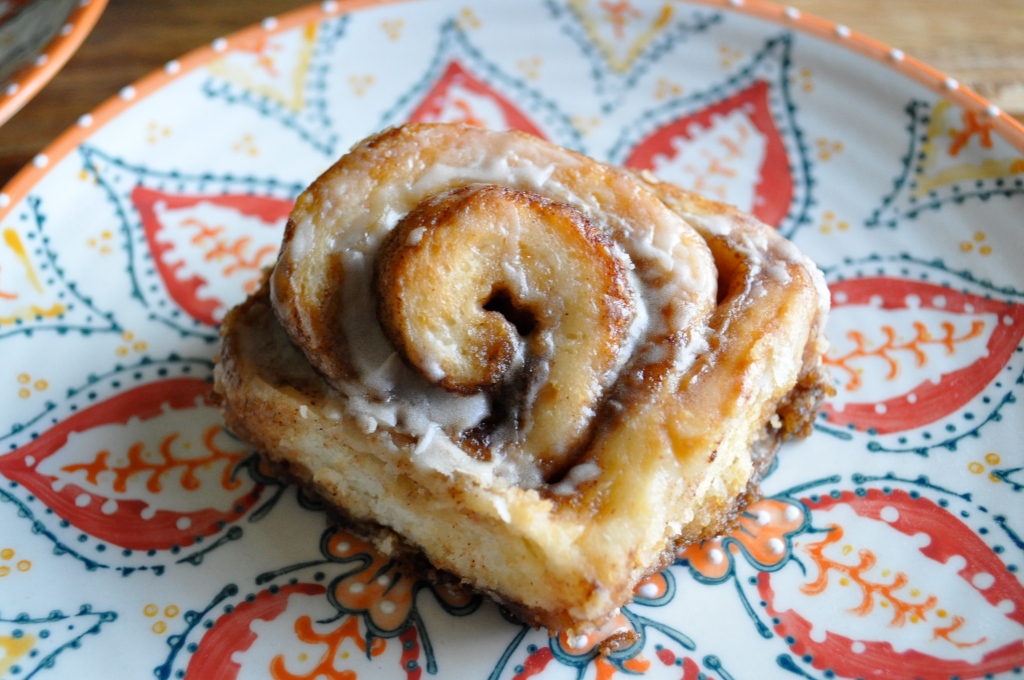
The cinnamon rolls exceeded my expectations, and were declared by my mom as the best cinnamon buns she ever had. Nana would be proud.

Cinnamon Buns (adapted from Pioneer Woman)

2 cups whole milk

1/2 cup canola oil

1/2 cup white sugar

1 package  active dry yeast (2 1/4 tsp.)

4 1/2 cups all-purpose flour, divided

1/2 tsp. baking powder (heaping)

1/2 tsp. baking soda (scant)

1/2 TBSP. salt

3/4 cup melted butter

1 1/2 cups brown sugar

Lots of cinnamon

For the glaze:

1 1/2 cups icing sugar

1 tsp. vanilla

1 TBSP. (plus extra if needed) milk

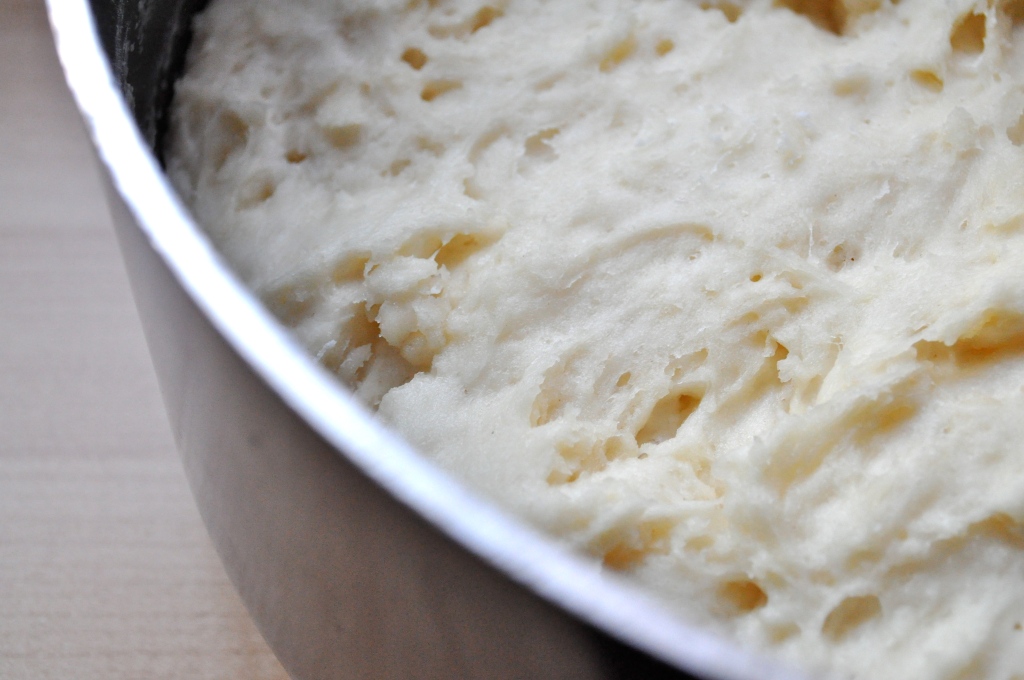
To start, I follow Pioneer Woman’s recipe for the dough to a tee, except that I cut it in half. In a saucepan over medium heat, mix together the milk, canola oil, and white sugar. Scald the mixture (take it off the heat just before boiling), remove from heat, and allow to cool for about half an hour. When I can stick my pinky finger into the mixture without burning it, I know it’s ready! Sprinkle the package of yeast over top, and let it mingle with the milk mixture for a couple of minutes. Add 4 cups of all-purpose flour, and mix together with a wooden spoon. Cover with a towel and allow it to rise for at least an hour.

Then add the remaining 1/2 cup of flour, the baking power, baking soda, and salt. Stir the mixture together, or do as I did and mix it together with your hands. Once everything is blended together, you’re ready to make some cinnamon buns!

Sprinkle your work surface with flour to prevent the dough from sticking. Using a rolling pin, roll the dough out into a large rectangle. I roll my dough out quite thin (about 1/8″ thick). Drizzle it with about 1/2 cup of melted butter. You’re not allowed to think about how many calories these cinnamon buns have while you do this. Deal?

This is where I started to add my own spin. First, I used brown sugar instead of white sugar for the filling of the rolls. Sprinkle about 1 cup of the brown sugar over the butter, and top it with a very generous coating of cinnamon. You’ll also want to prepare your pans. I used one 9 x 13″ pan and one 9″ pan. I used the remaining 1/4 cup of butter to coat the bottom of the pans. Then I used the remaining 1/2 cup of brown sugar to sprinkle into the bottom of the pans, finishing with another healthy dose of cinnamon. My Nana taught me this trick of coating the bottom of the pans with the same mixture that fills the cinnamon buns. The end result is cinnamon buns with a lovely oooey-gooey bottom. Yum!

Begin rolling the dough up, trying to keep it tightly rolled. Once finished, pinch the end of the roll into itself, so that it doesn’t start to open up when you begin cutting. Using a sharp knife dipped in hot water (to make the job easier), slice the rolls about 1 inch thick and lay them flat into your pans. I fit 12 rolls in the larger pan, 9 rolls into the smaller pan. Cover the pans and let them rise again, for at least half an hour (or longer if you have time).

Preheat your oven to 350°F, and bake the rolls for about 15-20 minutes, or until lightly browned. Mix together the glaze ingredients. Add more milk if the mixture is too thick, or more icing sugar if too thin. Pour over warm cinnamon buns so that the glaze can seep into them. Enjoy while warm. You’ll find it hard to stop at one. Happy eating!

Thinkin’ Bout You | The Promise

Hi.

I’m worried that you might think I forgot about you.

But, don’t worry.

I didn’t.

Some things are keeping me very busy. Some…people too.

Doesn’t the universe know that I’ve got recipes to share? Delicious treats to make? Photos to take?

Yeesh.

To be honest, I had something all lined up to share with you, something that I’ve been wanting to share since I started this blog. Last time I made the recipe, I was hosting a Christmas party and got too caught up in being a hostess to take photos of the finished product. So I made it again this past weekend for a potluck. I saved a wee bit so that I could take a nice photo the next day (as I was rushed), and when I went to grab it out of the fridge the next day for my little photo shoot, it was gone. Honey had eaten it. Argh. But at least it’s proof that it’s delicious. 🙂

Alas, I will have to share that recipe with you another time. But I’ve got a humdinger for you tomorrow. I’ll give you two hints. 1. I promised it to you days and days ago.

Hint #2.

Stay tuned!

Happy almost Friday!