A Healthy Dose of Optimism | Lentil and Mushroom Bourguignon


Life is full of good days and bad days, and in-between days. Some days you might have difficulty putting one foot in front of the other, other days you might have limitless energy. Some days are productive, others less so. Some days might bring good moods, others might bring sour moods. Some days you might have tunnel vision, other days you’re capable of seeing the bigger picture. That’s just how life works.

But for those less-than-optimal days, I have a suggestion. Actually, Jessica does. Please take a moment to watch.


Seriously, don’t even try to tell me that you’re not smiling right now.

Or giggling.

Or thinking about what you like about your life.


The part where she claps authoritatively after saying “I like my whole house!”…I just can’t not giggle. It’s impossible. Thank you Jessica, for that little dose of optimism – that reminder of all of the good things in my life. I like my haircuts too…well, usually…

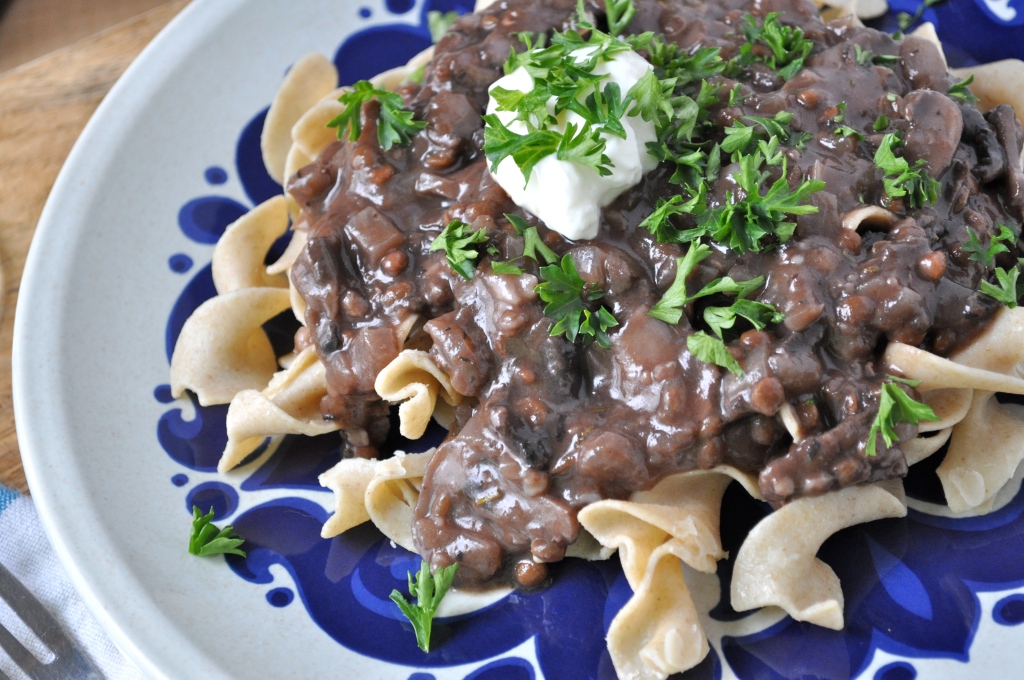
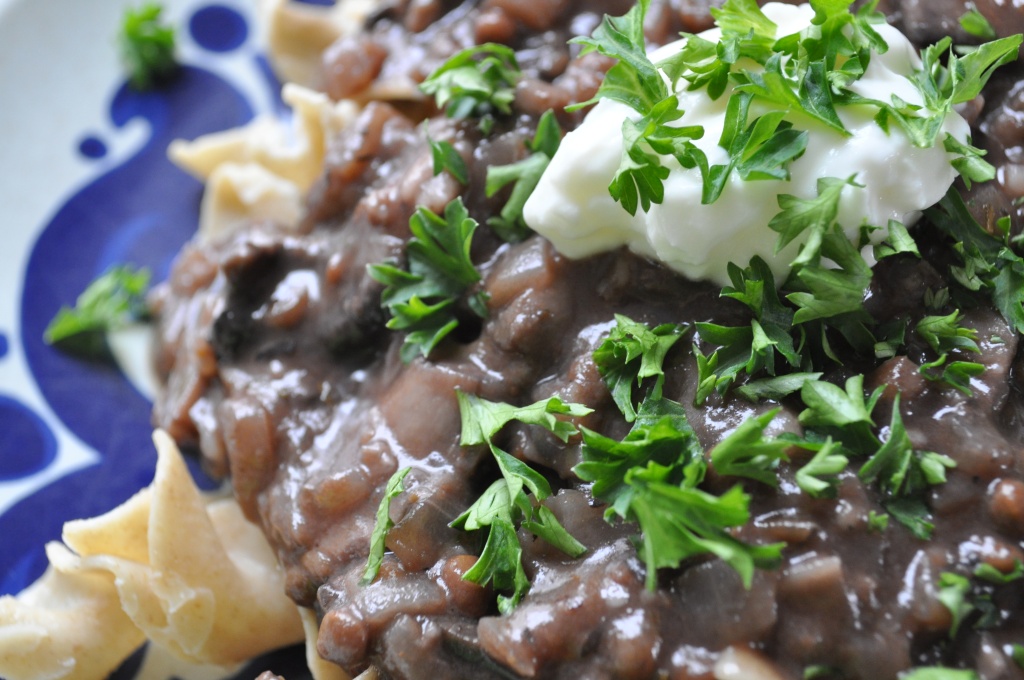
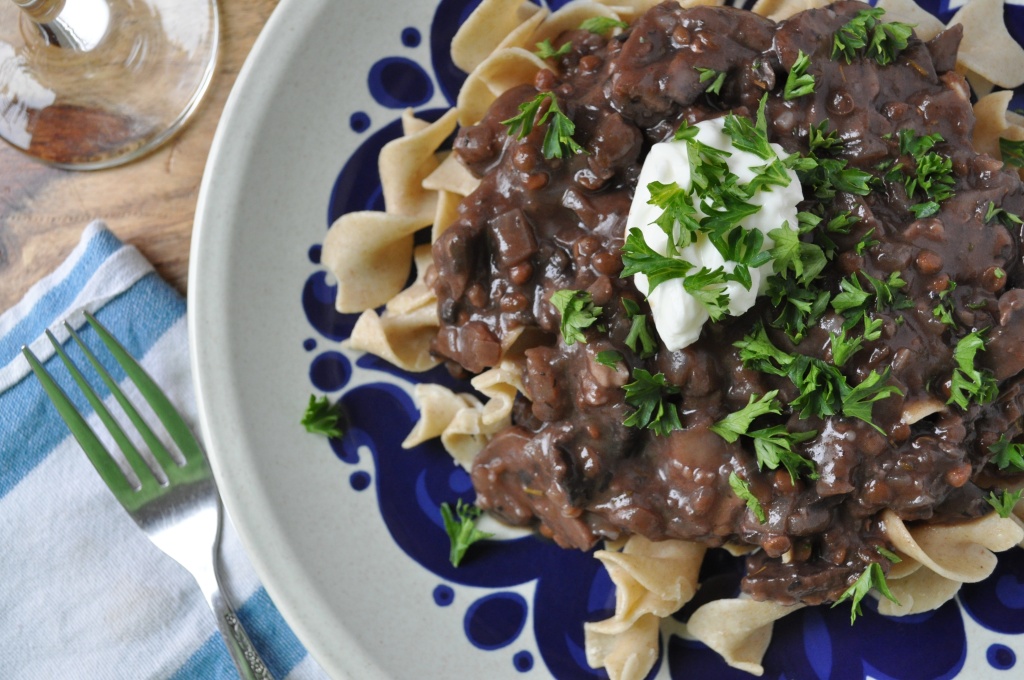
Now that we’re smiling, let’s make some dinner, shall we? I think this hearty lentil and mushroom bourguignon will leave you smiling too…with a happy belly to boot.


Lentil and Mushroom Bourguignon (adapted from Treehugger)

1 TBSP. olive oil
1 small onion, finely chopped
2 TBSP. butter
4 garlic cloves, crushed
1 tsp dried thyme
2 large portobello mushrooms, sliced
3 cups cremini mushrooms, sliced
1 cup cooked brown lentils
1 cup red wine
1 TBSP. flour
2 cups vegetable broth
1 TBSP. tomato paste
Salt and pepper to taste
Sour cream and parsley for garnish (optional)

In a large skillet, heat the olive oil and sauté the onion for 2 to 3 minutes, until soft. Add the butter, garlic, thyme and mushrooms and cook until the mushrooms release their liquid, soften and then just start to brown. Add the lentils and cook for 1 or 2 minutes, then add the wine and cook for a few minutes more, scraping the bottom of the skillet, until the wine has almost cooked off. Sprinkle the flour over the lentil and mushroom mixture and stir to blend, then add the broth and tomato paste. Bring to a simmer and cook, stirring often, for about 10 minutes, or until the sauce is thick and dark and the mushrooms are tender. Serve hot over buttered egg noodles.


Have a great week friends! And remember, you can do anything good. 🙂
Eat and Be Merry | Caramelized Onion and Goat Cheese Tartlets


Ahoy mates! I am THIS happy (x 1000) to be back here!

One piece of advice for all of you lovelies…do NOT, ever, under any circumstances, plan a move for December 1. Now, I didn’t have a whole lot of choice in the matter, and consider myself lucky that things worked out the way that they did. It coulda been a lot worse, and so I’m not going to look a gift horse in the mouth, you know what I’m sayin’? But, please try to avoid a December move if at all possible.


‘Cause then, when all you want to do is enjoy the wonderfuness of this holiday season (the decorating, the baking, the parties, the eating, the shopping), you’ll be faced with the unfortunate task of unpacking and organizing. Not a good time my friends, not a good time.

However, should you find yourself in such a predicament, there is a solution. Listen close friends, this is golden advice. Ready?

Unpack and organize the essentials…your kitchen, your bedroom, and your living room…and shove everything else into a room, shut the door, and don’t go back in that dang room until January. Problem solved! 🙂 Don’t tell me I never gave you any good advice.


On to the good stuff! See these beautiful little tartlets?

Make ’em and take ’em to a party this holiday season. Or throw your own party and give ’em a place at your table. They are quick and simple, but big on flavor. The shallots become so sweet and caramelized, they don’t even taste like shallots! Not that I have anything against the little guys. Mega-delicious. A definite party hit!


Caramelized Onion and Goat Cheese Tartlets (from a friend of a friend)

6 shallots, chopped finely

2 TBSP. olive oil

2 TBSP. balsamic vinegar

3 TBSP. brown sugar

Salt and pepper, to taste

5 ounces of goat cheese, cut into 24 hunks

2 eggs, beaten

2/3 cup milk

24 mini tart shells

Preheat the oven to 350°F. Prebake the tarts for 10 minutes and set aside. Heat the olive oil in a frying pan over medium-high heat. Add the shallots, and sauté for a few minutes, or until they start to turn clear. Add the balsamic vinegar, brown sugar, and salt and pepper. Allow the mixture to reduce and the shallots to caramelize (about 6-7 minutes). Fill each tart shell with a small amount of the caramelized shallots. Top with a hunk of goat cheese. Mix the eggs and milk together, and season with salt and pepper. Fill the remainder of each tart shell with the milk/egg mixture. Bake immediately for an additional 20-25 minutes, or until the tarts are set and golden brown. Serve warm.


There’s just one problem with that awesome advice I was dishing out earlier. I can’t find anything.

Summer Lovin’ | Warm Balsamic Vegetable Salad with Feta and Basil

Spring is here. I can feel it.

I can smell it.

I can taste it.

Vegetables and fruits are starting to taste the way they are supposed to. I’m starting to crave lighter meals rather than hearty stick-to-your-bones soups and stews that warm you to your core. And best of all, it is possible to BBQ again. Meaning: 1) My BBQ is not buried beneath 3 feet of snow, and 2) I’m not at risk for catching hypothermia while standing next to it.

Hallelujah.

Honey and I bought a BBQ off of Kijiji for $100 last summer. Most awesome purchase ever. Minus the fact that it didn’t work when we tried to use it for the first time. Honey is such a handyman, he fixed it and we were in BBQ Bliss shortly thereafter. I love the flavors that the BBQ brings out in food. Flavors that just can’t be replicated in an oven or on a ceramic stovetop. Grilling vegetables is one of my favorite things to do on the BBQ. Just a little olive oil, some salt and pepper, and the magic of an open flame. We often eat our veggies this way throughout the summer.

And then I discovered this salad.

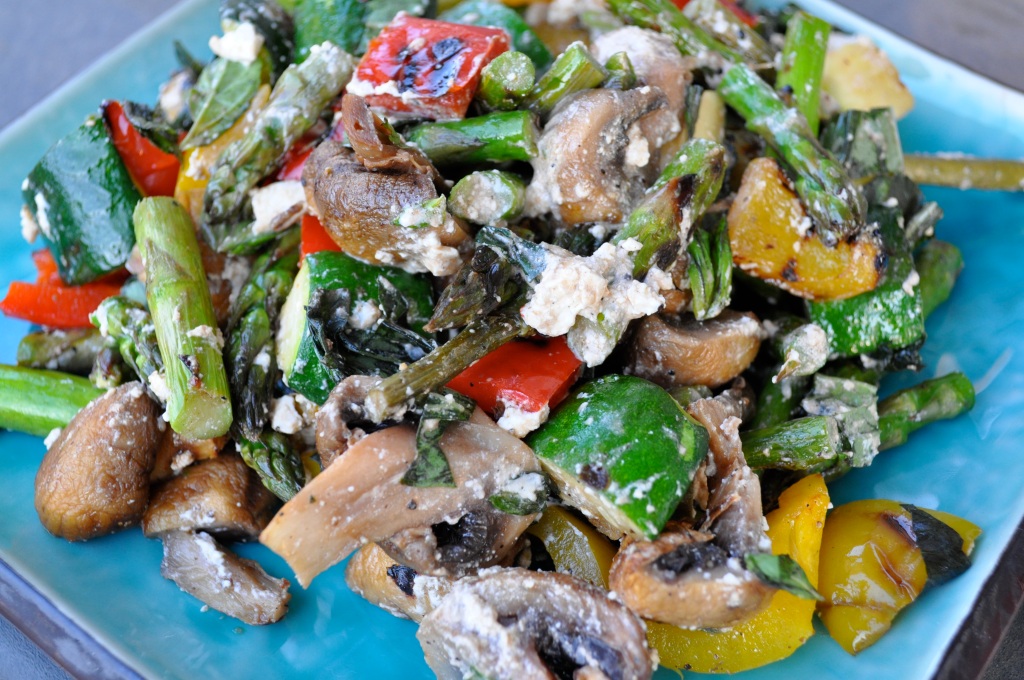
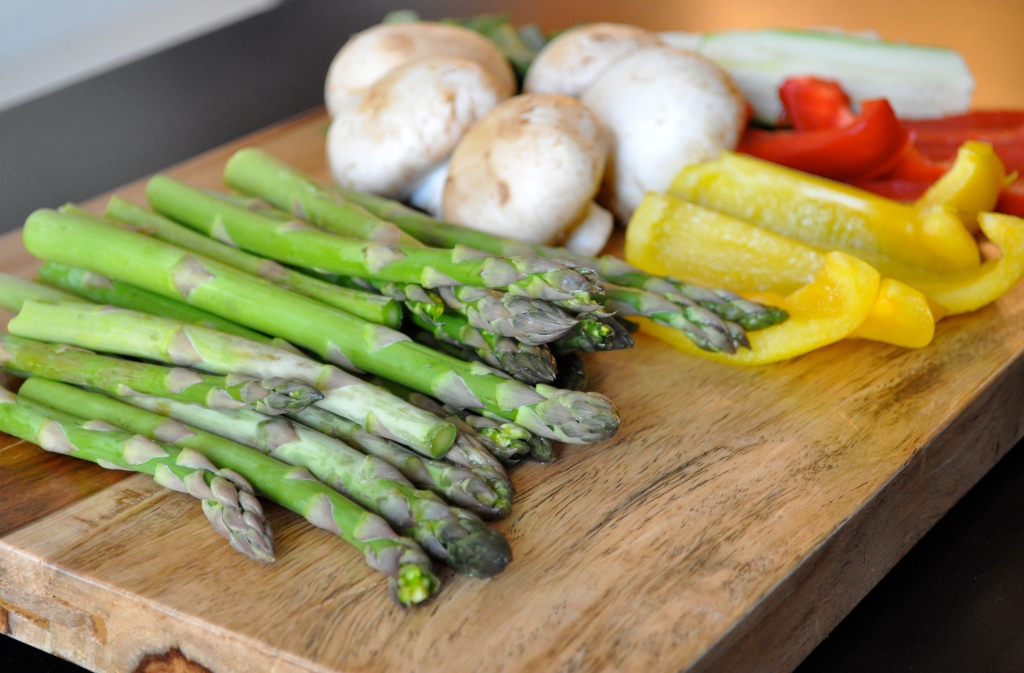
Veggies are grilled on the BBQ, then cut up into bite size chunks, tossed with a little balsamic vinegar and fresh basil, and topped with feta cheese. Oh. My. Mouthwateringly delicious. Please try this at your next available opportunity. And if you don’t own a BBQ, roast your veggies in the oven or cook on your stovetop, or on a little countertop grill. But I’m telling you, the BBQ = Bliss. You heard it here first.

Warm Balsamic Vegetable Salad with Feta and Basil 

Serves 4.

1/2 pound of asparagus

1/2 red pepper, sliced into 4 parts

1/2 yellow pepper, sliced into 4 parts

1 zucchini, sliced in half, then lengthwise into quarters

6 big white mushrooms

A splash of olive oil

Salt and pepper, to taste

1/2 cup chopped fresh basil

2 TBSP. balsamic vinegar

1/4 cup of crumbled feta cheese

Toss your prepared veggies in the olive oil and sprinkle generously with salt and pepper. Heat your grill to medium high and throw the veggies on. Watch them closely, turning every couple of minutes until al dente. Grill marks = beauty. Turn your grilled veggies onto a cutting board and chop them into bite-size pieces. In a large bowl, combine the chopped veggies with the basil and balsamic vinegar. Sprinkle with feta cheese. Chow down with still warm!

The beauty of this salad is that you can make as much or as little of it as you like. Just adjust the balsamic vinegar, basil, and feta accordingly. You can also change up the veggies if you prefer.

Dip It | Curried Cream Cheese Dip with Dried Cranberries, Pine Nuts, and Green Onion

Hello friends! Happy Monday. I hope you all had a lovely Easter/spring weekend filled with family, friends, good food, and sunshine. I sure as heck did. If you ate half as much food and chocolate as I did, you have probably been swimming in a food/sugar coma state, like me. And could there possibly be a better cure for such a coma than perusing and drooling over a new recipe? I think not.

Especially when it is an attack-the-tastebuds-in-a-good-way recipe. Enter this seemingly complex, colorful, flavor explosion dip.

Explaining this dip with words is impossible. But I’ll try anyway. It’s creamy, tangy, sweet, and spicy all at once. Plus chewy from dried cranberries and crunchy from toasted pine nuts. I first tried it at a work potluck a couple of years ago, but only recently rediscovered it. I don’t know where the recipe came from, or what the real name of this creation is, so I am calling it like it is.

Take this dip to your next potluck or serve it at your next party. Your guests won’t know what hit ’em.

In a good way of course.

Curried Cream Cheese Dip with Dried Cranberries, Pine Nuts, and Green Onions

8 ounces cream cheese, softened

2 tsp. curry powder

2 tsp. ground cumin

1/2 cup red pepper or red chile jelly, divided

1/4 cup dried cranberries

1/4 cup pine nuts, toasted

1/4 cup green onions, chopped (about 3 green onions)

Combine the cream cheese, spices*, and 3 TBSP. of the jelly until smooth. An electric or hand mixer will make this easy. Spread the mixture into the bottom of a shallow dip dish (roughly 5″ x 7″). Spread the remaining jelly over top of the cream cheese mixture. Combine the dried cranberries, pine nuts, and green onions in a small bowl to mix, then sprinkle evenly over top of the dip. Chill until you serve. I think this dip tastes great with plain rice crackers, but any small cracker will do! Enjoy!

*You can adjust the amount of curry powder and cumin depending on the level of flavor you would like. If you don’t want such strong flavors, use just 1 tsp. of each. If you want the flavors to be very intense you can use up to 1 TBSP. of each, but I find 2 tsp. of each to be a happy medium.


What are some of your favorite potluck or appetizer recipes?

Hello BBQ Season | Southwestern Black Bean Burgers

Black beans have been making many appearances on this little blog of mine lately, I just noticed. What can I say, I must be a fan of sources of dietary fiber and antioxidants. Black beans are also very versatile, partnering well with many different ingredients and flavors. I came across this recipe for Southwestern Black Bean burgers last summer when perusing one of my favorite blogs, Everybody Likes Sandwiches. My vegetarian best friend, and her vegetarian husband were coming over for dinner, and I wanted to knock their socks off with a delicious and unique vegetarian entree.

Despite a couple of failures during the assembly phase (a food processor that died halfway through its duties, and a new BBQ that wouldn’t work), the burgers came together in the end and were incredible! Great flavor, awesome texture, and easily adaptable to various toppings. I served the burgers with fresh avacado and tomato, salsa, and a chili-lime mayonnaise that I whipped up at the last moment. Coupled with homemade baked fries, the meal was a hit. However, these could easily be topped with run-of-the-mill burger condiments (ketchup, mustard, relish, even cheese), and would still be dynamite. You can throw the burgers on the BBQ or cook them stovetop, whichever you prefer. Keep this recipe in mind for your BBQs this season!

Southwestern Black Bean Burgers (adapted from Everybody Likes Sandwiches)

2 cans of black beans, drained and rinsed
4 cloves garlic, chopped
1 TBSP. cumin
2 TBSP. chili powder
1/4 tsp. cayenne powder (more if you like it spicy)
A few dashes of your favorite hot sauce (ie. tobasco)
1/2 tsp. salt
3 TBSP. greek low-fat yogurt
3/4 cup oat bran
1/4 cup wheat germ
1 TBSP. ground flax seeds
1/4 cup fresh cilantro, chopped
Juice of 1 lime
8 hamburger buns, warmed

Blend together 1 can of beans, garlic, yogurt and spices in a food processor or blender. Dump into a bowl and add the second can of beans, oat bran, wheat germ, flax, cilantro and lime. Stir everything together until well mixed. If your mixture is too soft to form patties, add a little bit more oat bran. If it is too stiff, add a little bit of water. Form into 8 patties and chill in the refrigerator for at least 15 minutes.

If cooking the burgers on the stovetop, heat 2 TBSP. of olive oil in a skillet over medium-high heat and brown each side, about 3 minutes per side or until slightly crispy. If cooking on the BBQ, throw the burgers on a medium-high grill, but line your grill with tin foil (brushed with oil or sprayed with cooking spray, to avoid sticking), and cook for 3 minutes per side, or until browned and crispy. Top cooked burgers with whatever your little heart desires and enjoy!

*For an easy chili-lime mayonnaise, combine 1/2 cup mayonnaise with the juice of half a lime, 1 TBSP. chili powder, and salt and pepper to taste. Add in a little cayenne pepper for some extra heat, if that tickles your fancy.

On another note, spring seems to have finally sprung around here. The sun is out, the temperatures are warm(er), and it feels like winter might finally be behind us. The little stinker is obsessed with the smells that are being uncovered by melted snow and warmth. She looks angelic here, but looks can be very deceiving. Happy Good Friday!


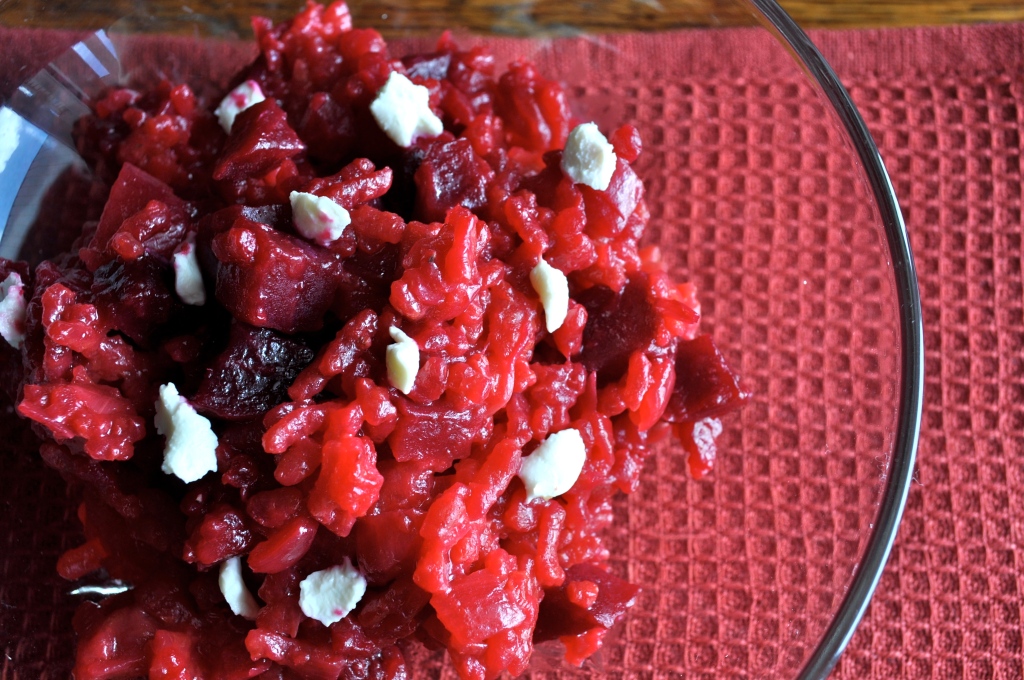
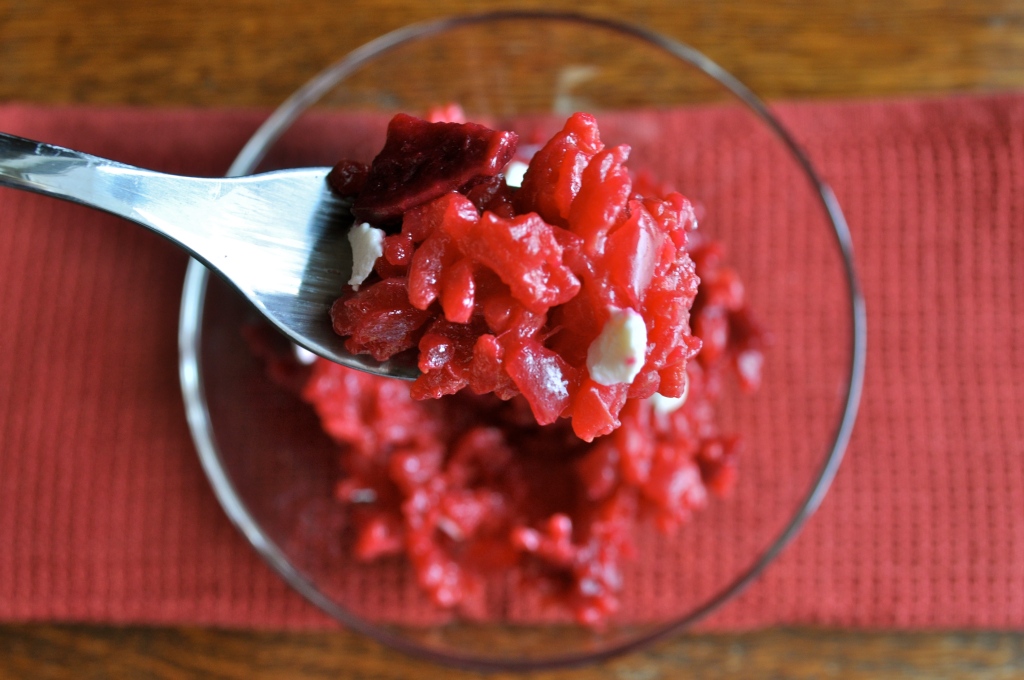
Creamy and Dreamy Amore | Beet Risotto

I wish I could tell you that the beets used in this recipe came from my garden. That I planted them, nourished them to grow, gave them my love, and harvested them myself. But you see, where I live, we are still shoveling snow. Snow that fell on April 14 to be exact. All 10 cm of it. There ain’t no vegetables growin’ round these parts. But I want you to know, that if I lived in a climate that was more conducive to growing anything for more than a few months out of the year, I definitely would have grown these myself.

Well…I would have tried to grow them myself. But unfortunately, I have a black thumb, the deathly version of it’s lively counterpart, the green thumb. I have a curse. I cannot keep plants or flowers alive. They wither as soon as they set root or stem on my property. I will never have the pleasure of telling people that the delicious vegetables they are tasting came from my garden. Thank goodness for farmer’s markets, or else I would be forever destined for a life of tasteless grocery store produce! Depressing eh?

Honey’s lovely sister (and fellow foodie) emailed me a few weeks ago with this recipe for beet risotto. I knew I had to try it as soon as possible when she described it as tasting like “f—ing amazing creamy lovestyle italian amore.” Whoa. Yes please.

So last night, with fingers stained red with beet juice, I tasted this heavenly dish, and totally echoed her sentiments. And added in a hell yeah. Now I don’t want to be pushy, but you might want to go to the store right now (or your garden, if you don’t live in Santa’s backyard or have a black thumb like me), and buy these ingredients, and make this for dinner. Tonight.

Because we can all use a little extra amore.

Beet Risotto

2 beets (about 3″ in diameter), peeled and diced small

1 onion, chopped small

1/4 cup butter

1 cup arborio rice

3 cups stock (chicken or vegetable)

1 TBSP. balsamic vinegar

1/4-1/2 cup goat cheese

Salt and pepper, to taste

Melt the butter over medium heat in a heavy-bottomed saucepan. Add the beets and onion, and cook for 8 minutes (stir to allow the onion to caramelize). Mix in the rice, broth, and balsamic vinegar. Increase the heat. Bring to a boil, and then reduce the heat to medium-low. Cover and simmer until the rice is tender and the risotto is creamy (like amore, as honey’s sister says), stirring occasionally (about 15 minutes). Season with salt and pepper. Sprinkle with the goat cheese. If you are not a goat cheese fan, you could substitute feta cheese, but trust me, the goat cheese really enhances the flavor of the beets. Enjoy!

Meatless Mexican | Black Bean Quesadillas

Meat and potatoes people. MAPPs.

People who think that a meal without meat cannot be filling and satisfying.

If you know any such people (*cough cough* ie. men *cough cough*), you must introduce them to Mr. Black Bean of the Legume family. Other members of the Legume family include lentils, peas, soy, and even peanuts. All are great sources of protein, and protein helps to give you that satisfied feeling (because protein takes longer to digest than carbohydrate). When taking meat out of a meal, or out of your diet entirely, it is important to replace the protein with other sources. Now, I know you didn’t come here for a science or nutrition lesson, so let’s get on to the good stuff! PS. Rattle off that scientific mumbo-jumbo to the MAPPs in your life when you make this recipe for them.


 A couple of years ago, when honey and I were in the throes of our vegetarian challenge (no meat for one year), we practically lived off of legumes. This black bean quesadilla recipe was one of the first dishes that I discovered during our challenge, and we have eaten it many times since then. It is so easy, so delicious, and I promise you won’t even miss the meat! Try it. Now.

Please and thank you. 🙂

Black Bean Quesadillas (slightly adapted from canadianliving.com)

1 TBSP. olive oil

1 onion, chopped

1 green pepper, diced

1 TBSP. chili powder

1 tsp. ground cumin

1/4 tsp. salt

1/4 tsp. pepper

2 cans black beans, drained and rinsed

1 cup salsa (mild, medium, or hot!)

1 can corn kernels

6-8 whole wheat flour tortillas

2 cups sharp cheddar cheese, shredded

Sour cream and salsa, on the side

Preheat the oven to 425°F. Heat the oil over medium heat in a large skillet. Add the onion, green pepper, chili powder, cumin, salt, and pepper. Cook until softened, about 8 minutes. Add the black beans, salsa, and corn, and stir until heated through (about 5 minutes).

Lay out your tortillas and spoon the mixture onto one half of each tortilla. I usually make 6 tortillas, so they end up being quite full. However, you can make 8 tortillas and fill each with a little bit less. Sprinkle the cheese overtop of the mixture, then fold the tortillas over. Place on a lined or greased baking sheet. Bake for 15 minutes, turning the tortillas over halfway through. Serve with sour cream and more salsa. Enjoy!

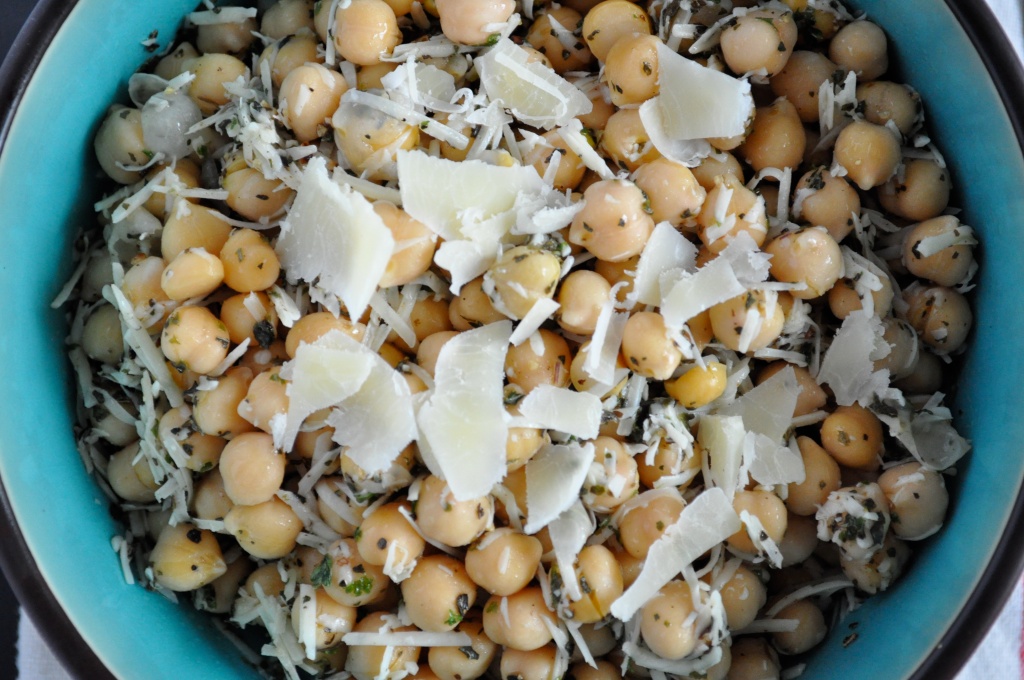
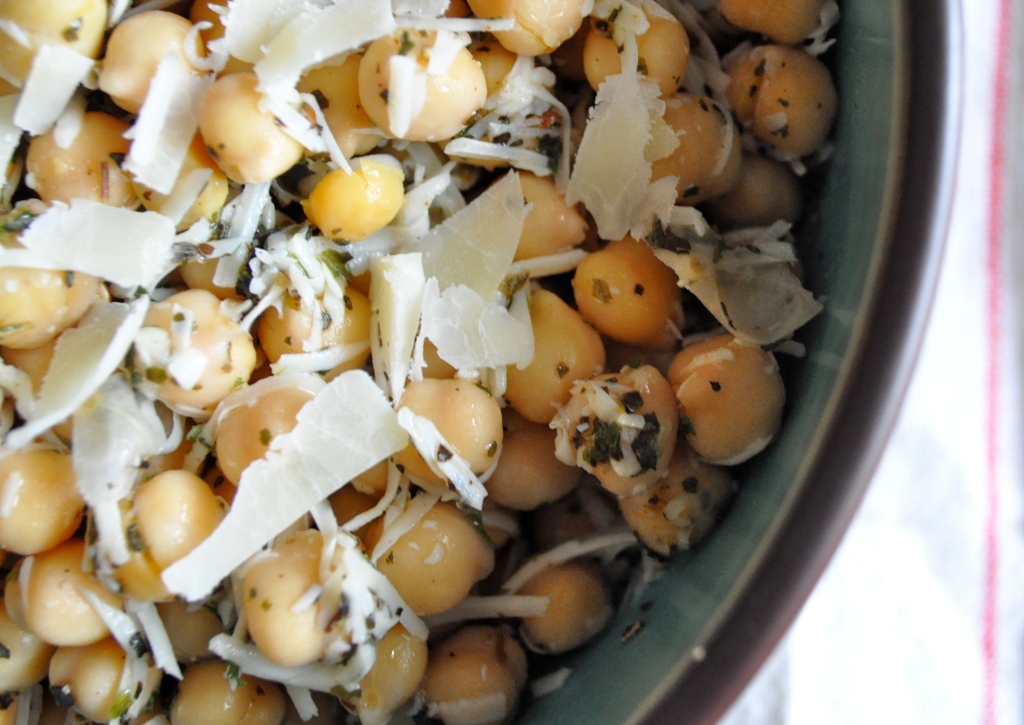
Less Is More | Chickpea Salad with Lemon, Parmesan, and Herbs

Dear Life,

You have been almost unbearably stressful lately. What did I ever do to you? I try to show you a good time as often as possible – I play fun sports like frisbee and soccer, I rock out at super awesome concerts, I bake delicious things to eat. And you just throw stressful experiences back in my face! Clearly I’ve done something to upset you, but I’m not sure what it is. Can we call a truce and be friends again? I’ll cook and bake you lots more wonderful things if you’re nice to me again.

Love,

Amanda

Sorry about that. I just had to have a little chat with life there for a moment. But I’m back to share a simple yet tongue-pleasing recipe with you. With Spring finally starting to show her face a little bit, I find myself craving lighter, fresh-tasting dishes. When I opened up this month’s Bon Appétit magazine and found this chickpea salad recipe, I immediately wanted to give it a try. You need just a handful of ingredients, most of which you might have sitting in your kitchen right now. The only thing I was missing was the fresh herbs, but I had the dried version of both, and considering the state of the fresh herbs around here at this time of year, dried was probably the best way to go. I can’t wait to make this again in a couple of months, when fresh basil is lush, fragrant, and easy to find. At least fresh parmesan is always in season.

Chickpea Salad with Lemon, Parmesan, and Herbs (from Bon Appétit magazine, April 2011)

1 can chickpeas, rinsed and drained

2 TBSP. chopped fresh basil (or 1 tsp. dried)

2 TBSP. chopped fresh Italian parsley (or 1 tsp. dried)

2 TBSP. fresh lemon juice

4 tsp. extra-virgin olive oil

1 garlic clove, pressed

1/3 cup freshly grated Parmesan

Salt and freshly ground black pepper, to taste

Combine all ingredients together in a bowl and toss gently. Season with salt and pepper. Enjoy immediately, or make ahead and refrigerate for several hours to allow the flavors to mingle and say hello to one another. This salad can be whipped up in no time. Happy eating!

Beans, Beans, the Musical Fruit | Black Bean and Corn Salad

 It is a miracle that I am able to post this recipe right now. That I can type these words to you on this laptop. You see, the sweet little puppy mentioned a couple of weeks ago continues to wreak havoc on my life. In fact, I think she came into my life to teach me how to be a more patient person. Unfortunately it is a rather difficult and damaging process. Damaging to my material possessions that is. For one thing, the carpet in our condo is going to need to be steam-cleaned about 40 times over in order to remove the invisible stains of approximately 2956 “accidents”. Shoes have been chewed, scarves and mittens have been ripped, tables and chairs have been munched on. Several books are missing parts of covers. My tea towels will never be the same. All of this, I have been able to take in stride. Quite easily I think.

However…there was an incident last night that almost put me over the edge. You see, my parents brought us back a bottle of delicious pineapple wine from a recent trip to Hawaii. Last night, honey and I decided to enjoy it with our dinner. We were feeling rather badass, so we decided to just drink the wine straight from the bottle. We were eating dinner in front of the TV (yes, we do that), and had left the bottle of wine sitting on the kitchen table. A certain little munchkin around here has a tendency to jump up on the coffee table if any food or beverages are within her sight. How tricky we were, leaving it on the kitchen table instead. And then there was a crash. I jumped up and ran the approximately 10 feet from the couch to the kitchen table to find that the aforementioned munchkin had jumped up onto the kitchen table and knocked the bottle of wine over, spilling it all over the table, floor, and…my laptop.

Now, I realize that it is dumb to leave your laptop sitting open on the kitchen table. But I do dumb things, rather often. Anyways, after one meltdown and many failed attempts at getting my laptop to start up again, honey advised me to shut it down, leave it overnight, and hope for the best. I’m happy to report that my laptop is working, although my keys are currently making a nice crunching noise with each keystroke, and my space bar wants to stick down every time I press on it. Small steps, I suppose. *sigh* The other miracle was that the wine bottle managed to stay half full following the catastrophe, as it landed on it’s side. Drinking the remainder of the wine was very helpful indeed. And now that I’ve wasted your time with this pointless story, I give you a delicious, fresh salad recipe, great for curing the winter blues. It has some fantastic colors going on, and is so simple and tasty. The original recipe comes from one of the Best of Bridge cookbooks. Happy eating!

Black Bean and Corn Salad

2 cans of black beans, rinsed and drained

1 can of corn, drained

1 red pepper, chopped small

1/2 cup cilantro, chopped

Juice and zest of two limes

1/4 cup olive oil

2 TBSP. cumin

1 tsp. chili powder

Salt and pepper to taste

Combine the black beans, corn, red pepper, and cilantro in a large bowl or container. Combine the remaining ingredients in a separate bowl, and then pour over the black bean mixture. Toss well. Taste and add more salt or pepper if needed. This salad tastes great right away, but has even better flavor if you give it a couple of hours to mingle in the fridge.

An Easy Side | Orzo with Parmesan and Basil

I’m dreaming of summer. Cool refreshing mornings, warm breezy nights, deliciously hot days. Amazing garden vegetables, fresh herbs, fruit that is actually in season! *sigh* Sadly, I will have to keep dreaming for another few months or so. Although, apparently the groundhog didn’t see his shadow, which means spring is on its way…right? I get confused by the groundhog theory. Anyway…

The first time I had orzo was a few years ago, when my mom made this recipe. Orzo is such a fun pasta – about the size of rice, but with the bite of pasta. It makes a great pasta salad (which I have another great recipe for), a fantastic side dish, and also goes well in soups. Now, this orzo with parmesan and basil tastes best with fresh basil, but sadly, the “fresh” basil currently available at my local grocery store tends to be half brown and less than delightful. Not to fret if you have the same problem – dried basil does the trick when necessary. Whether you use fresh or dried, give this recipe a try. It really is a fantastic example of the amazing orzo! Happy eating!

Orzo with Parmesan and Basil (a la my mama)

3 TBSP. butter

1 1/2 cups orzo pasta

3 cups broth (chicken or vegetable)

6 TBSP. fresh basil (or 2 tsp. dried)

1/2 cup fresh parmesan

Salt and pepper to taste

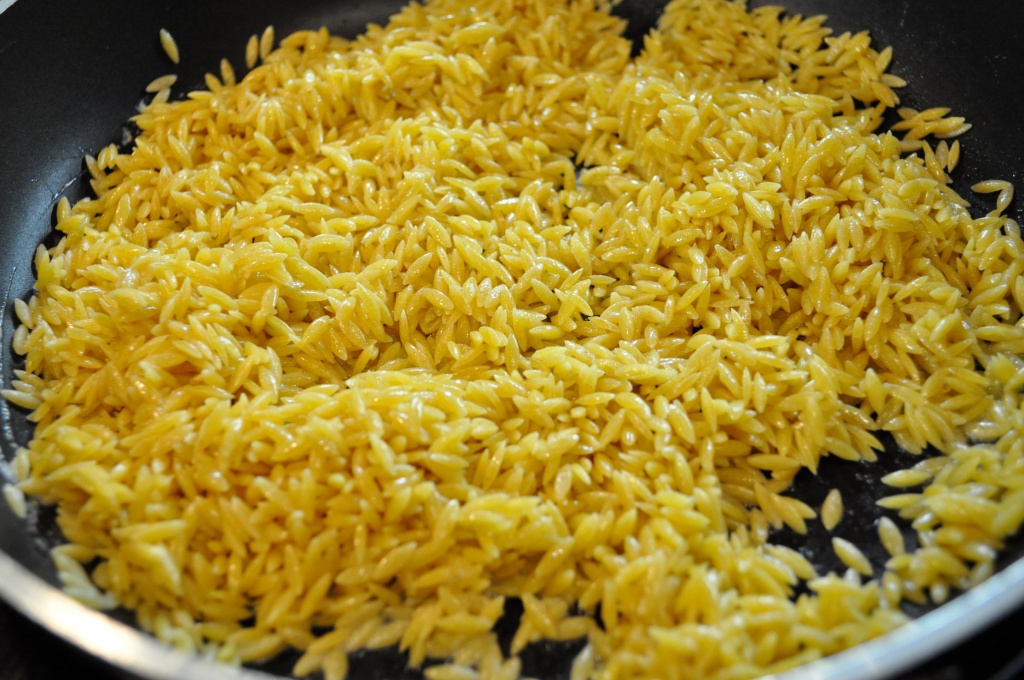
Melt the butter over medium high heat. Add the orzo and saute for several minutes, until the orzo starts to become golden brown. Add the broth, cover and simmer for about 20 minutes, or until the orzo has absorbed the broth. Remove from heat, add the basil and parmesan, and season with salt and pepper to your liking. Add more parmesan if you want it to be really gooey and cheesy.

This orzo is SO good. It will serve 4 very healthy portions (although honey and I can eat one batch to ourselves – piggish, right?), but if you’re having company, make sure you double the recipe. Enjoy!