Things I’ve Learned Vol. 1 | Christmas Crack (aka. Clodhoppers)

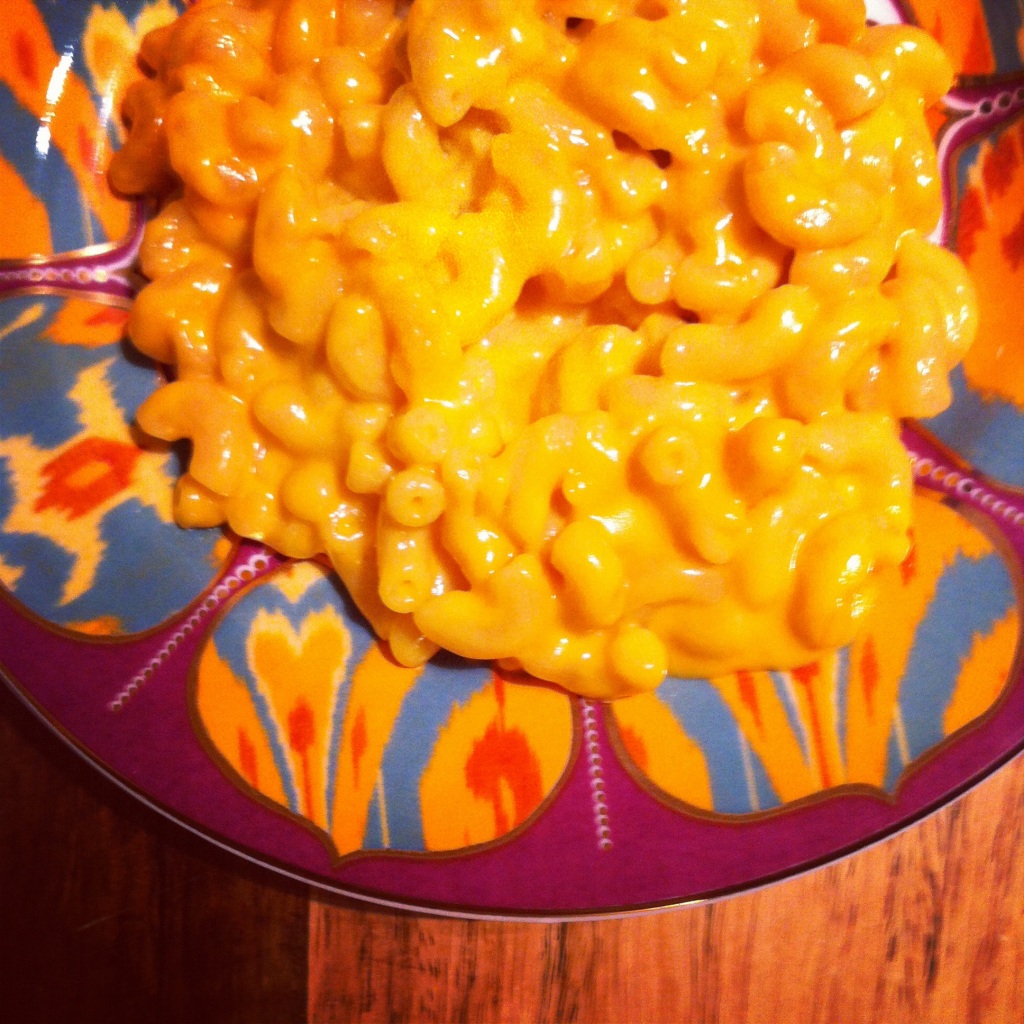
1.When you’re eating a single lady dinner (read: frozen dinner), always enjoy your dinner on a fancy plate. This will help you to feel less bad about yourself/pathetic for a) eating by yourself, and b) eating microwaved crap when you should have been less lazy and made yourself something respectable to eat. Your fridge is full of groceries, after all.

2. When you decide that it’s a good idea to wait until the week before Christmas to start your Christmas shopping, be prepared to get feisty. People get crazy. I went to Costco recently and people were taking the line-ups for the samples a wee bit too seriously. I actually witnessed two people almost get into a fight about who got there first. Dudes, if you’re going to get that worked up about a sample of cheese, then you’ve got bigger problems on your hands. Seek help. Immediately.

3. It’s not a very smart idea to wait until the week before the big day to start your Christmas shopping.

4.Christmas baking is a lot of fun. Delicious fun at that. And you can dance around to annoying Christmas songs spilling flour and sugar and sprinkles everywhere while you do it. Unfortunately the fun suddenly comes to a halt when you have 14 dozen cookies in your freezer, beckoning you to eat them at all hours of the day and night. Thankfully, most people enjoy Christmas cookies and will gladly take a couple dozen off of your hands. Baking also makes a great gift. Right?

5. We should all poach chickens more often. Whole chickens. As in, stick ’em in a pot, cover ’em with water, add veggies and herbs and simmer away until you’ve got the most tender chicken that’s ever passed your lips. You’ll be left with a whack of chicken (for use in soups, salads, pasta, whatevs) and a serious helping of homemade chicken broth. Win! Seriously. Do it. I followed these guidelines.


Single Lady Dinner/Poached Chicken

6. Nearly every Christmas song recorded after 1995 is terribly annoying. Have you noticed that every song is about love, or asking Santa to shoot you with Cupid’s arrow, bring your love back to you, or some variation of the two? Newsflash peeps! There is no Santa Claus. And if there actually was a jolly old fat guy who could fly around the entire world on a sleigh pulled by magical reindeer in one night, eat billions of cookies, and slide down chimneys and leave us all everything we wished for, I’m pretty sure there wouldn’t be so many weird single people in this world. Me included.

7. Is anyone looking for a weird girlfriend? I’ll bring cookies.

8. If you make the following recipe, you won’t regret it.

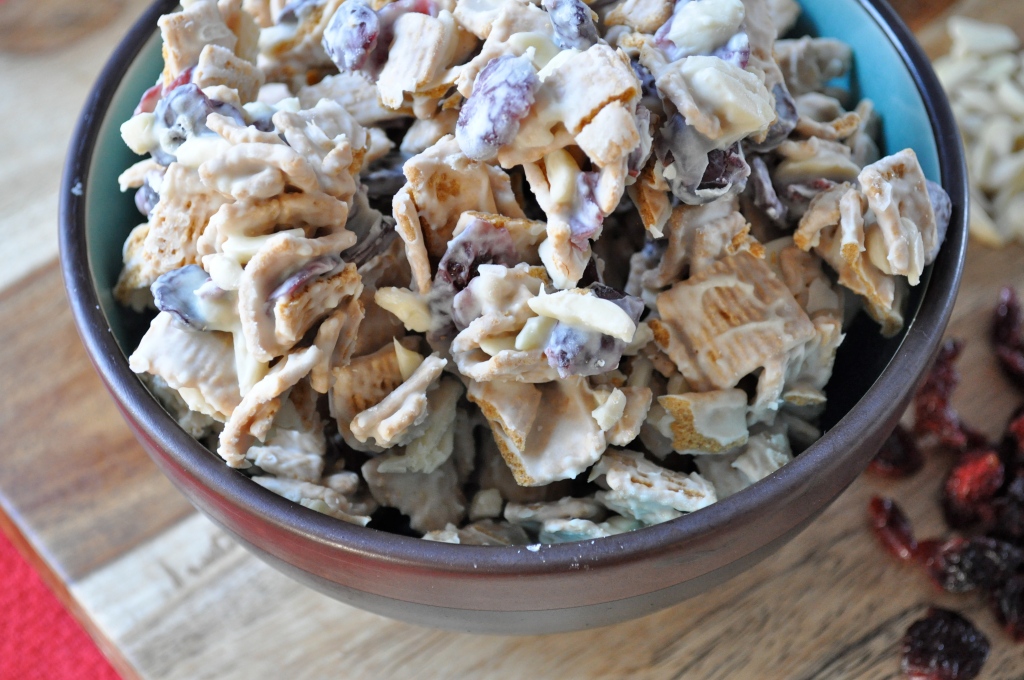
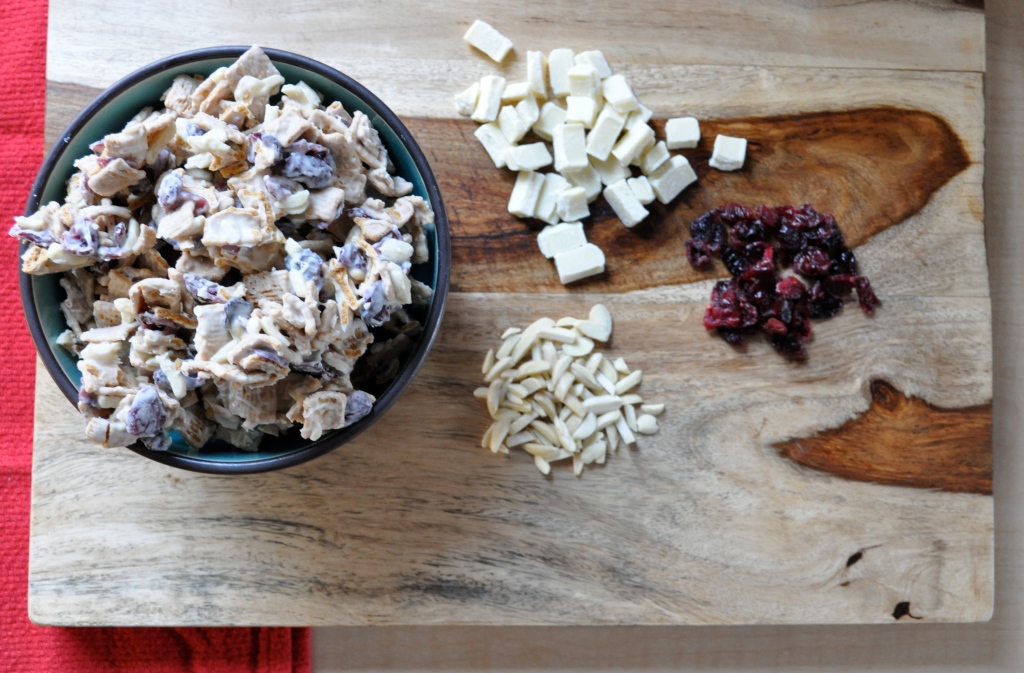
Warning: I have discovered edible crack. Just 4 ingredients come together to create a highly addictive sweet snack. This recipe was shared by a lovely coworker of mine (hi E!) who brought said edible crack to a cookie exchange I attended last weekend. Clodhoppers is the real name, but after one taste of this stuff, you’ll agree that it’s as addictive as crack. Not that I have any personal experience with the stuff (seriously). Make it. Eat it. Enjoy it.

Christmas Crack (aka. Clodhoppers)

1 cup white chocolate pieces

1/2 cup dried cranberries

1/4 cup slivered almonds

2 heaping cups of Graham Crackers cereal

In a medium bowl, combine the cereal, cranberries, and almonds. In a double boiler over medium heat, melt the chocolate. Pour the melted chocolate over the cereal mixture, and toss until evenly coated. Roughly spread the mixture (but leave lots of clumps!) on a baking sheet lined with wax paper and throw the whole shebang into the freezer for about 10-15 minutes (to set). Remove from the freezer and break into chunks. Package in festive Christmas bags to give away, or toss into a bowl to enjoy yourself. Start researching rehab programs near you. 😉
Counting Down | Peanut Butter Marshmallow Squares


Hello lovelies,

Oh, how I miss you so. I have been knee-deep in boxes and packing tape and dust bunnies. My move is only four days away! I have been without Internet access for the past week or so, hence my prolonged absence. But I’ve snuck away for a brief moment to share a quick little sweet treat with you.


The best thing about these Peanut Butter Marshmallow Squares, aside from the way that they melt in your mouth and leave you wanting more (more, more!), is how quick and easy they are to prepare. I’ve been doing little cooking and baking lately, so to avoid buying ingredients that will eventually take up precious space in Tupperware containers full of my pantry items. However, these squares require just four ingredients, and leave very little leftovers. There are many other versions of these squares – some call for coconut or nuts – but I love the simplicity of this recipe. Plus, I have yet to meet someone who doesn’t love ‘em!

Make yourself a batch of these…they make the perfect snack, especially if you’re moving. See you next week from my new kitchen!

PS. Only four days left to enter the giveaway!


Peanut Butter Marshmallow Squares

½ cup butter

1 cup peanut butter

1 bag (300g) of butterscotch chips

1 bag (200g) of mini rainbow marshmallows

In a saucepan over low heat, melt your butter, peanut butter, and butterscotch chips. Stir constantly until the mixture is smooth. Allow the mixture to cool for 10-15 minutes (we don’t want to melt the beautiful marshmallows!). Once the mixture has cooled, add in the bag of marshmallows and stir to evenly coat. Spread the mixture into a greased 9×13” baking dish. Refrigerate to set. Or, if you’re impatient like me, shove the pan into the freezer for an hour. Allow the pan to thaw for about 5 minutes before cutting into squares. Keep uneaten squares in the fridge to ensure that they stay firm (they get a little soft if left out on the counter).

Enjoying | Bourbon Pecan Pie Brownies

Well, hello there. How you doin’?

What’s that?

You skipped your pilates class for the third week in a row the other night because something more important came up? You went to a hockey game and sat in the front row and drank overpriced beer and ate salty popcorn and hot dogs and cheered your little heart out instead? Me too!

You haven’t gone for a run in over a week, cause you’re too lazy to get off your butt, strap on your sneaks, and hit the pavement? Oh my goodness, I know that feeling!

You have a to-do list a mile long, but you continue to ignore it, and it continues to grow and grow and grow, and you have no idea how you’ll ever possibly accomplish everything? Ditto!

And you also made these decadent brownies and proceeded to eat almost an entire row of the pan while taking photographs of them? No way! But please tell me that you had the decency to go to a hot yoga class last night, to rid your body of all of those toxins, like I did?

Ok, phew. We’re on the same page then.

Do you ever have one of those weeks? Where your best intentions are set aside when fun opportunities come up, and you grab hold of them and take a leap and just enjoy? It’s been one of those weeks for me. But instead of beating myself up for not exercising enough, or not getting enough sleep, or not doing all of the things on my to-do list, I’m just enjoying. You only have one life peeps, enjoy it. Live in the moment when possible. It’s kinda liberating.

Friends, I wish you all had one of these brownies in front of you at this very moment. I really do. Cause if we lived in a world where illness, poverty, war, unhappiness, or even a crap-town day could be cured by brownies…we’d have it made in the shade. These brownies have a fudgy, rich base, and a sweet, gooey, crunchy top. Oh, and don’t forget about the bourbon. I’m rather certain that the bourbon gives these brownies special powers. And if you’re like me, and don’t have a bottle of bourbon lying around, go out and buy one. Yes, you only need two tablespoons for this recipe, but hey, then you have a bottle of bourbon to drink! Heck yes. Stick with me and that bottle of bourbon will come in handy. I promise you. Deal?

Bourbon Pecan Pie Brownies (from the Edmonton Journal, Oct. 12,2011)

For the brownie layer:

2 eggs

1 tsp. vanilla

1/2 cup butter

3/4 cup cocoa

1 1/4 cup sugar

A pinch of salt

1/2 cup flour

Preheat your oven to 325°F. Whisk the eggs and vanilla together in a small bowl and set aside. In a double boiler set over boiling water, combine the butter, cocoa, sugar, and salt. Allow the butter to melt and mix everything together until smooth. Remove from the heat and whisk in the egg/vanilla mixture. Add the flour and stir until well blended. Pour into a greased 8 x 8 inch baking pan. Bake for about 25 minutes (until a toothpick inserted into the centre comes out clean). Allow to cool.

For the pecan pie layer:

1/2 cup corn syrup

1/2 cup brown sugar, packed

2 eggs

1 TBSP. vanilla

1/4 tsp. cinnamon

1/4 cup butter, melted

2 TBSP. bourbon

2 cups chopped pecans

Using an electric mixer, beat together the corn syrup and sugar until smooth. Add the eggs, vanilla, and cinnamon, and beat well. Add the butter and bourbon and beat again until well-mixed. Stir in the pecans and pour the mixture over top of the brownie layer. Bake for 30-35 minutes, or until the centre of the pecan pie layer has set (mine took about 45 minutes). Allow to cool completely, then refrigerate for at least a couple of hours before serving. Chow. down. Preferably in the company of others. I cannot be held responsible for what might happen if you are left alone with this entire pan of brownies. Consider yourself warned.

Giving Thanks | Pumpkin Breakfast Cake


OK, I know what you’re thinking…

Not another pumpkin recipe.

But wait! Don’t run away! Allow me to plead my case.


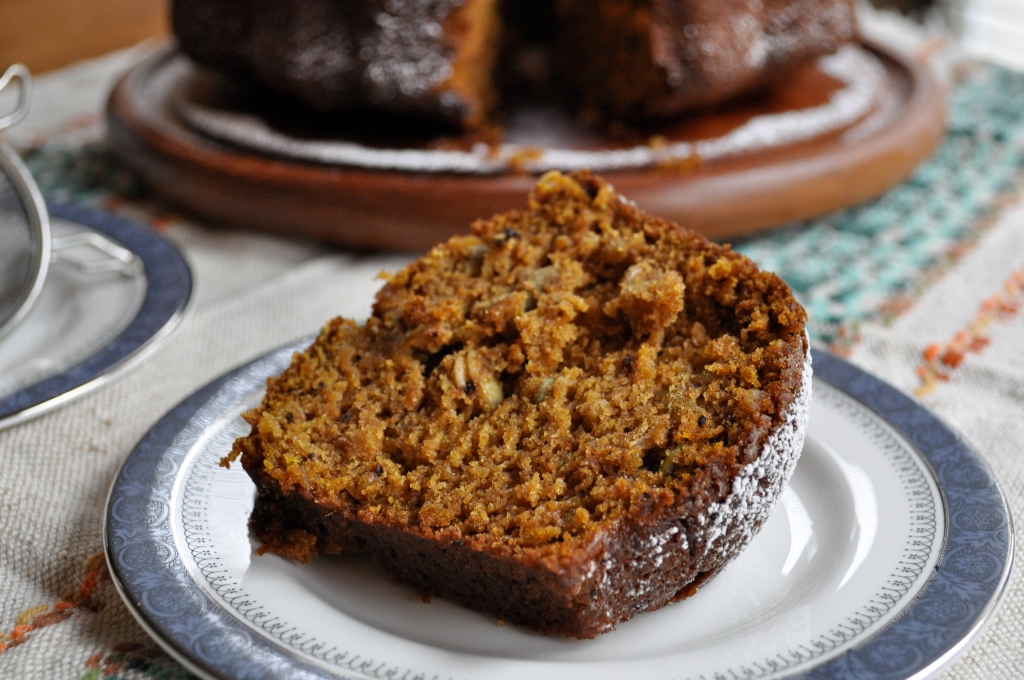
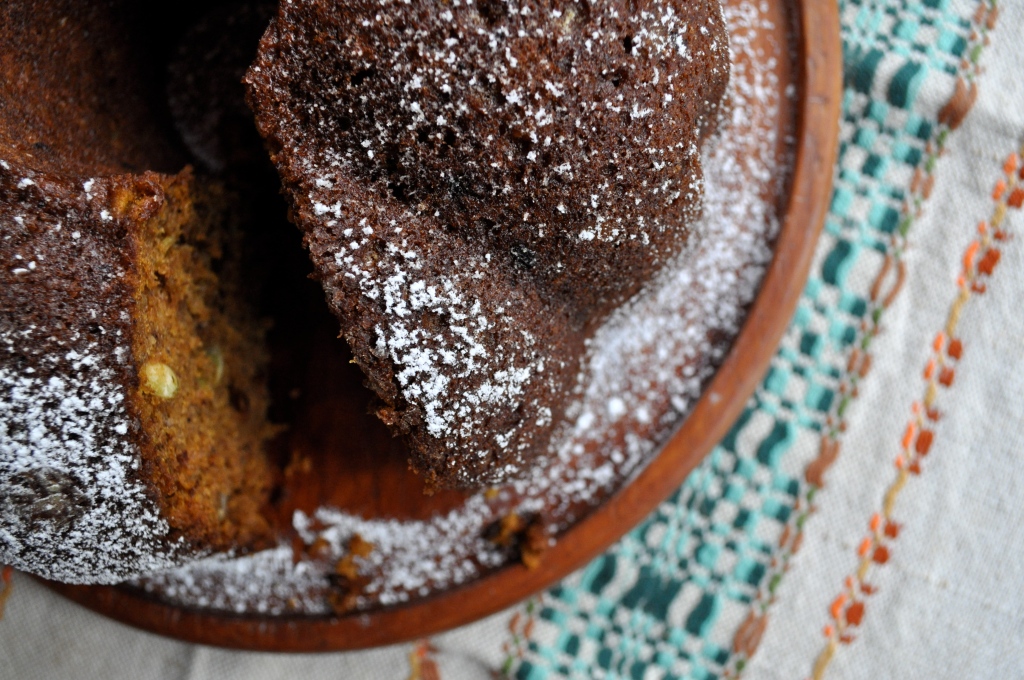
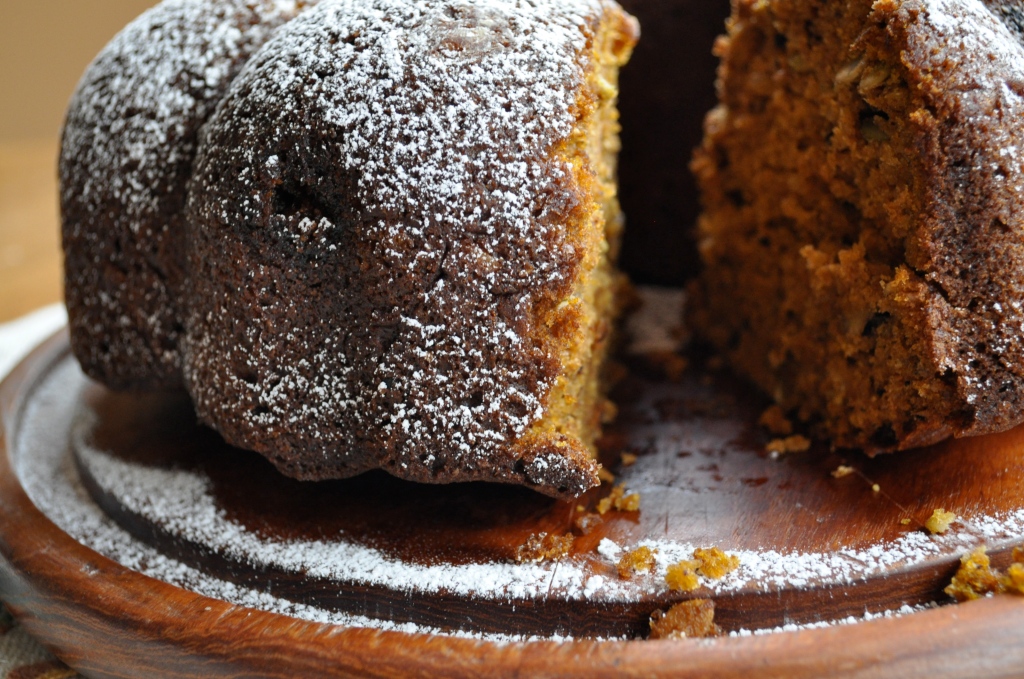
This isn’t just any cake. First of all, and probably most importantly, it’s a cake you can eat for breakfast. Yep, it’s breakfast approved. You know why? Cause it’s full of hearty good-for-you ingredients like whole wheat flour, oats, nuts, and pumpkin! A nice big hunk of this cake with a steaming mug of coffee or tea will start your morning off right.

Secondly, this cake is super adaptable! If the thought of eating another pumpkin anything makes you want to vomit (although really, that would be a bit dramatic of you), then you can change it up! You can use applesauce or banana instead of pumpkin. You can sub in almonds, raisins, coconut, or any other nuts or dried fruit for the pumpkin seeds and walnuts. Or change up the spices! In fact, one of my favorite versions of this cake uses applesauce, cinnamon, almonds and coconut. Delish!


But back to this particular version of the cake, with pumpkin! It’s moist, nutritious, delicious, and seasonal. Just in case you need an excuse to eat cake for breakfast. Personally, I don’t need an excuse. (Don’t you know me by now?!) 🙂 This recipe was shared with me several years ago by a very special lady. I remember awakening to the wonderful aroma of one of these breakfast cakes baking away in the oven on several occasions. And while we probably won’t have another opportunity to share a piece of breakfast cake and tea on a lazy weekend morning, I hope she knows that she will remain in my heart always.

Happy Thanksgiving weekend to you and yours! May we all remember to be thankful for what we have.


Pumpkin Breakfast Cake

1 cup white flour

1 cup whole wheat flour

1 cup oats

2 tsp. baking powder

2 tsp. baking soda

1 tsp. ground cinnamon

1/2 tsp. ground nutmeg (optional)

1/2 tsp. ground allspice (optional)

1/2 tsp. ground cloves (optional)

Pinch of salt

1 cup olive oil

1 cup white sugar

1 cup brown sugar

4 eggs

2 tsp. vanilla

2 cups pumpkin puree (or other fruit)

1/2 cup raw pumpkin seeds (or other nuts/dried fruit)

1/2 cup chopped walnuts (or other nuts/dried fruit)

Preheat the oven to 350°F. Whisk together the flours, oats, baking powder, baking soda, spices, and salt in a large bowl. In a separate bowl, combine the olive oil, sugars, eggs, and vanilla. Add to the dry ingredients and mix well. Add in the pumpkin puree and the pumpkin seeds and walnuts. Stir well. Pour/spread into a large greased bundt pan (or two loaf pans). Bake for about 1 hour, or until a toothpick inserted into the cake comes out clean. Allow the cake to cool thoroughly before turning out of the pan(s).

*Please note that you may also halve the recipe and bake the cake in a loaf pan. Or keep the recipe as is and bake two loaves, freezing one for later.

PS. I can’t make any promises that I’m done with the pumpkin recipes…

Falling | Pumpkin Cookies with Cinnamon Frosting


I’m going to cut right to the chase.

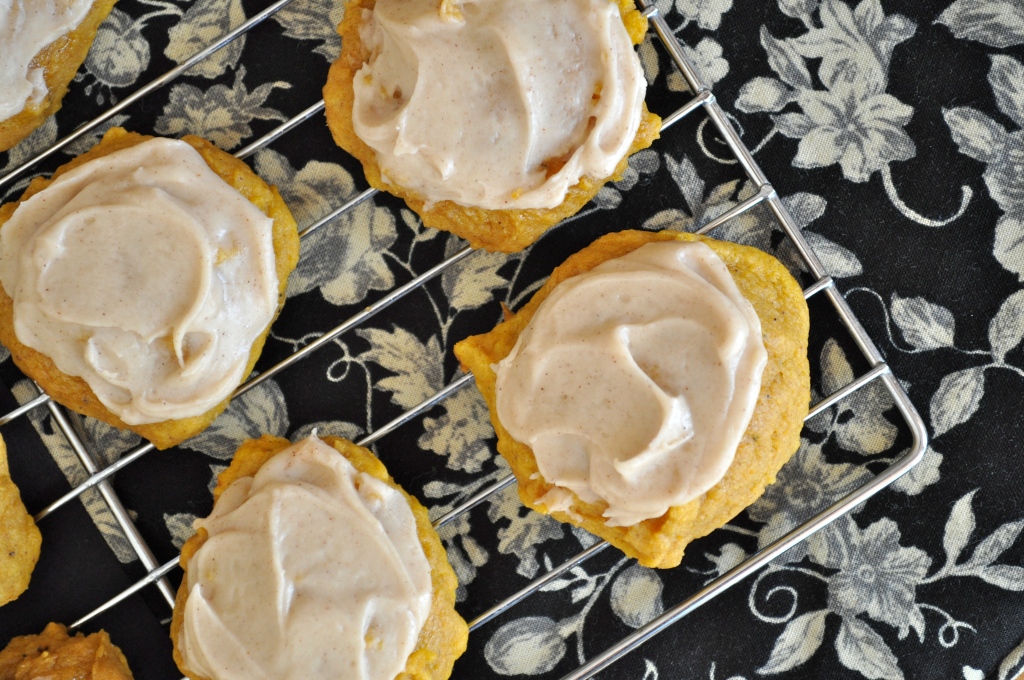
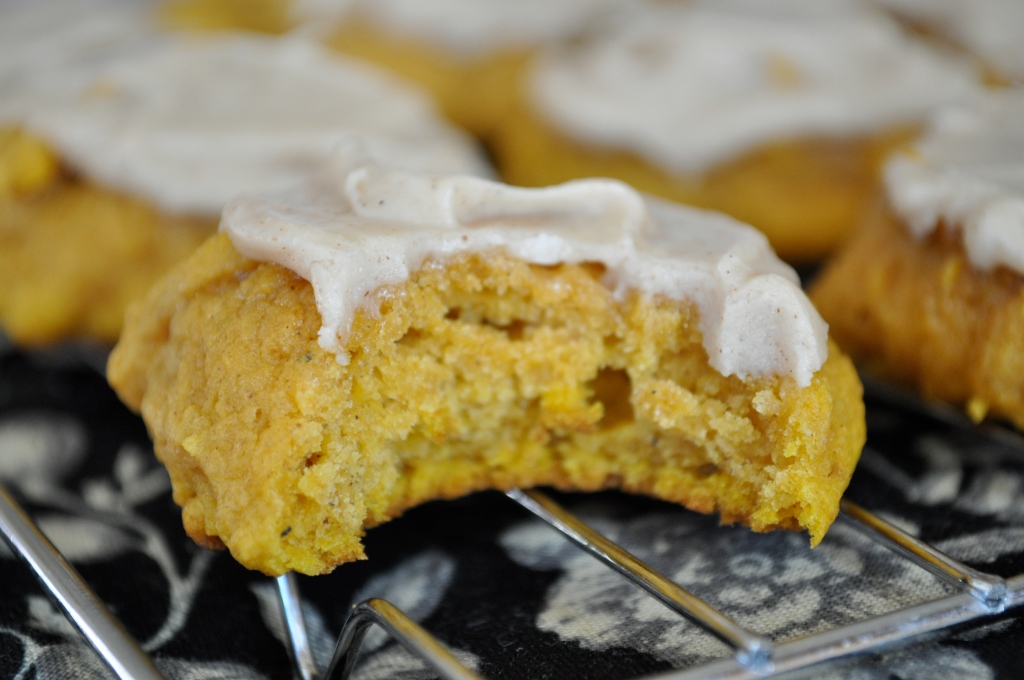
I made you some cookies. They’re soft and cakey. Spicy and pumpkiny. Yep, pumpkiny is a word. You heard it here first.

But back to those cookies…


Posting two cookie recipes back to back was not the plan. I had another recipe to share with you. However, these little melt-in-your-mouth pillows of pumpkiny goodness came into my life unexpectedly this week and I just had to share them immediately. Words really don’t do these cookies justice. They taste like pumpkin pie, but way better ’cause I don’t really even like pumpkin pie. I mean, I eat a token slice of it every Thanksgiving, but only because Thanksgiving wouldn’t feel the same if I didn’t. But these cookies, they deliver.


So how about you run off to the grocery store and pick yourself up some pumpkin, and then get your tush into the kitchen to make these? And then you can proceed to eat a dozen cookies over the course of the day. But they’re tiny, and they have pumpkin in them. So you’re practically eating a serving of vegetables…

Go make these cookies!


Pumpkin Cookies with Cinnamon Frosting (adapted from Better Homes and Gardens)

1 cup of butter, softened

1 cup of granulated sugar

1 tsp. baking powder

1 tsp. baking soda

1/2 tsp. salt

1 tsp. cinnamon

1/2 tsp. ground nutmeg

1 egg

1 tsp. vanilla

1 1/2 cups of pumpkin puree

2 cups of all-purpose flour

For the frosting:

1/4 cup butter

1/4 cup brown sugar

1/8 cup milk

1/2 tsp. vanilla

1 tsp. cinnamon

2 to 2 1/2 cups icing sugar

Preheat your oven to 350°F. In a mixing bowl, beat the butter with an electric mixer on medium speed for about 30 seconds. Add the sugar, baking powder, baking soda, salt, cinnamon, and nutmeg. Beat until thoroughly combined, taking care to scrape the bowl down at least once. Add the egg and vanilla, and beat until combined. Beat in the pumpkin. Add in the flour and mix together well. Drop the dough by heaping teaspoons onto a cookie sheet lined with parchment paper or a Silpat (or one sprayed with cooking spray). Bake for 10 to 12 minutes or until tops are just set. Transfer the cookies to a wire rack and allow to cool.

For the frosting: In a small saucepan, heat the butter and brown sugar together over low heat until melted and smooth. Transfer to a bowl. Stir in the milk, vanilla, and cinnamon. Add in 2 cups of icing sugar and beat until smooth. Add more icing sugar if necessary to create a spreadable frosting.

Frost the cookies when cool and enjoy! Store in an airtight container, placing waxed paper between layers to avoid them sticking together.

Intention | Kindness Cookies

What is your intention today?

That is the question that my yoga instructor asks of her students at the beginning of every class. In other words, what is your aim or objective for the next 75 minutes? A little self-love? Compassion? Forgiveness?

My intention in my very first warm Hatha class was to make it through the class without passing out. Me + intense heat + exercise does not typically yield the best results. But after a few classes, my body adjusted to the temperature and I learned when to push a little harder and when to hold back. My energy has shifted to other intentions, such as focusing on my breath and deepening each pose. Definite self-love. I cannot begin to describe the powerful flow of positive energy that runs through me during a yoga class. I rock warrior pose. I balance through tree pose. I relish relaxation in savasana pose.

Have you ever tried setting an intention for your day? Do you make a conscious plan about how and where you will direct your energy in a given moment? It’s more challenging than it seems. Certainly harder in real life than in yoga class.

Not long ago, I read The Alchemist by Paulo Coelho. The main character, a shepherd boy named Santiago has a recurring dream about a treasure and travels to the pyramids of Egypt to find it. Along his journey, Santiago meets an old king who teaches him about discovering his personal legend – what he desires to accomplish in his life. The most important piece of wisdom that the king bestows upon Santiago is that “when you want something, all the universe conspires in helping you to achieve it.” If you’ve never read The Alchemist, you should. I found it to be totally inspiring. Do I believe in the aforementioned “motto” of the book? No, not particularly. If it is true, then the universe has most certainly failed me on several occasions. However, I do believe that setting an intention is the first step to realizing your dreams and goals.

So…what is my intention today? At this point, I’m keeping it simple. My intention, each day, is to be happy. Don’t get me wrong, I have plenty of reasons to be happy. I have a wonderful family, amazing friends, an education, and a great job. And I do fun things. Often. But this is a crazy world that we live in. Have you noticed? War, famine, murder, natural disasters, untimely deaths. And fortunately for me, I live in one of the safest countries in the world. Much less crazytown than others.

But my point is, on some days, it’s not as easy to just feel happy. Despite this, my intention is to focus on the positive aspects of my life, rather than focus on the negative. I am going to be good to myself and to others. I am going to laugh more. Put positive energy out into the universe and it will come back to you…right? Someone get me a copy of The Secret.

My intention for these cookies was even simpler: stuffing them in my face. And sharing them of course. Because nothing makes me the same kind of happy as the smiling faces of people as they eat something delicious. And these are kind cookies. Kind to animals. Kind to the Earth. And kind to your body. Just ask Alicia Silverstone. Her book, The Kind Diet, is spectacular. Check it out if you have the chance.

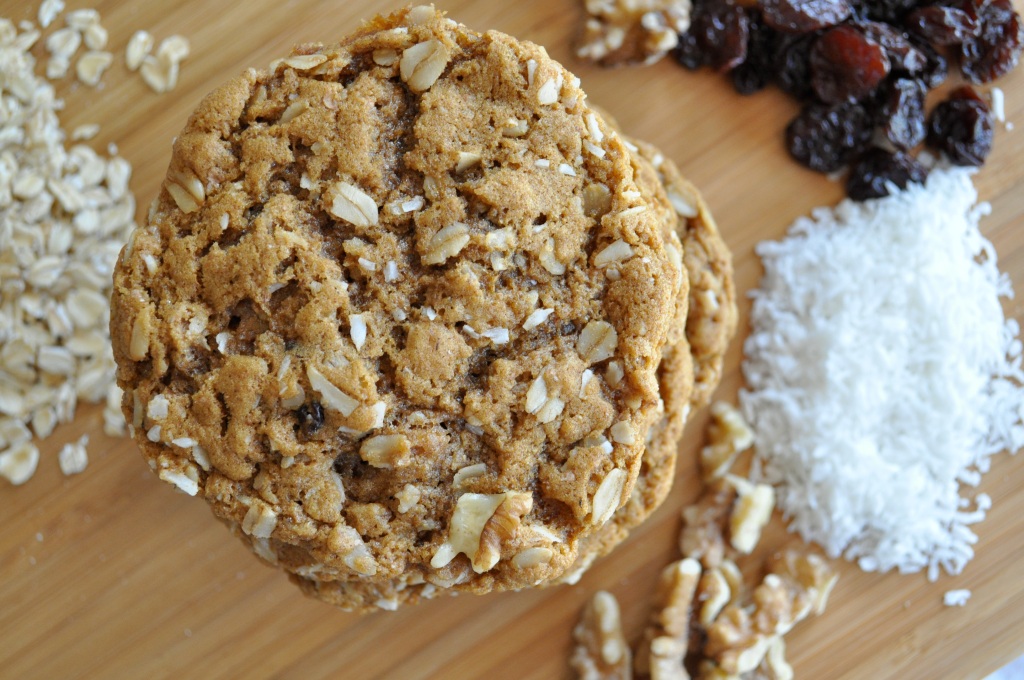
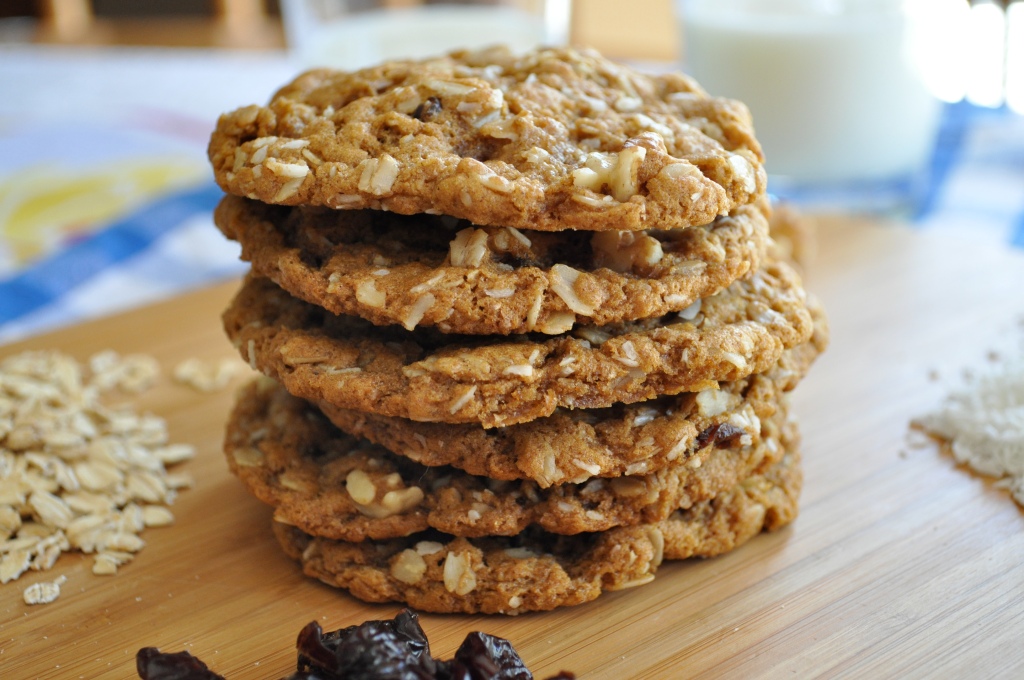
*I made two variations of this cookie. In my first batch, I used whole wheat flour and molasses. The molasses are part of the original recipe. In the second batch, I used all-purpose flour, left out the molasses, and added in a pinch of nutmeg instead. Each batch had a very distinct but delicious flavor. The molasses batch had a bit more chew to them, but even a tablespoon of the stuff makes the flavor quite pronounced. The non-molasses batch really showcased the flavor of the dried cherries and walnuts, which I loved. However, I adored both cookies and will be making both variations again and again.

Kindness Cookies, aka. Vegan Oatmeal, Cherry, and Walnut Cookies (adapted from The Kind Diet by Alicia Silverstone)

1 cup large flake oats

3/4 cup whole wheat (or all-purpose) flour

1/3 cup brown sugar

2 tsp. baking powder

1 tsp. baking soda

1/4 tsp. salt

1/3 cup maple syrup

1/2 cup vegetable oil

1 tsp. vanilla

1 tsp. cinnamon

1 TBSP. molasses (or a pinch of nutmeg)

1/4 cup dried cherries (cut in half)

1/4 cup chopped walnuts

1/4 cup dried coconut

Preheat the oven to 350°F. Mix together the oats, flour, brown sugar, baking powder, baking soda, and salt. Add in the maple syrup, oil, vanilla, molasses (if using) and spices. Finally, add in the cherries, walnuts, and coconut. Use your hands to shape the dough into balls (golf ball size) and then slightly flatten with your fingertips. Bake for about 10 minutes, until just golden brown. Allow the cookies to cool for a few minutes before transferring to a wire rack. Each batch made 14 cookies for me. Don’t forget to stuff them in your face.

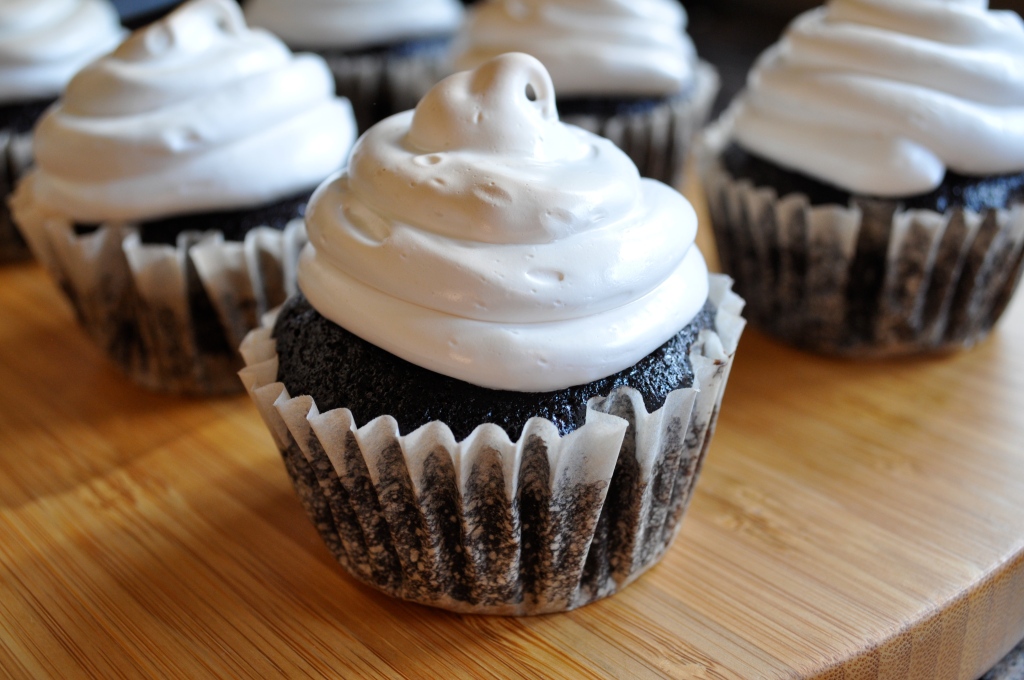
When You Love Someone | Chocolate Skor Cookie Dough Toasted Marshmallow Cupcakes


When you love someone…

You do nice things for them. Things that will make them happy. Because seeing them happy makes you happy too.

Like…making them a CD of their favorite music. (That is, if they still own a CD player. In this day and age, maybe you make them a playlist and put it on their iPod. I still like CDs. Call me old-fashioned).


Like…writing a special note or card to them, and mailing it to them, or leaving it in their mailbox.

Like…surprising them with tickets to a concert with their favorite band.

Like…leaving a package of their favorite candy in their coat pocket when they’re not looking, so that when they reach into their coat pocket later that day, they will find a sweet little surprise.


Like…making the most ridiculously and absurdly delicious cupcakes for them, and delivering them to that special person’s door on their birthday.

These are the kind of cupcakes you make for someone that you care about very much. They take some time to make. They’re a labor of love. But they are totally worth it.

I know because I did it. I made them, and I delivered them, and I helped eat them, and I put a smile on a very special somebody’s face. Family, friends, significant others…make these for someone special in your life.


This recipe was adapted ever-so-slightly from Joy’s version. Joy is the creator of always-fabulous recipes. But I did my own thing with the cookie dough, since I was making these for a Skor chocolate bar lover. The cookie dough options are endless! The end result was a rich, decadent, and over-the-top cupcake. They tasted extra wonderful straight out of the fridge, cold and moist, ridiculously good.


Chocolate Skor Cookie Dough Toasted Marshmallow Cupcakes (slightly adapted from Joy the Baker)

For the cupcakes:

2 1/4 cups all-purpose flour

2 cups cane sugar

1 cup cocoa powder

2 tsp. baking soda

1/2 tsp. salt

1 TBSP. vanilla

2/3 cup canola oil

2 tsp. white vinegar

2 cups cold water

Preheat your oven to 350°F.  Prepare two cupcake pans with cupcake liners. In a large bowl, sift the dry ingredients together and set aside. In a medium bowl, whisk together the oil, water, vanilla and vinegar. Slowly combine the wet ingredients with the dry ingredients. Do not overmix.  The mixture will be quite runny, but it’s all good! Fill each cup two-thirds full and place in the oven for 22-24 minutes or until a toothpick inserted into the center comes out clean. Cool in the pan for 10 minutes then place on a wire rack until completely cool.

For the cookie dough (I got some help here):

2 cups all-purpose flour

1/2 tsp. salt

3/4 cup butter, melted

1 cup brown sugar

1/2 cup white sugar

1 TBSP. vanilla

4 TBSP. milk

1 cup chopped Skor chocolate bar (about 2-3 bars)

Mix everything together and refrigerate until you’re ready to use. This cookie dough is safe to eat without cooking because there are no eggs in it. Delightful!

And finally, for the meringue:

4 large egg whites

1 1/2 cups white sugar

1/2 cup light corn syrup

A large pinch of salt

2 tsp. vanilla

In a large pot, bring a couple inches of water to a simmer. Place a large, heat-proof bowl over top (to create a double-boiler). In the bowl, whisk together the egg whites, sugar, corn syrup and salt.  Keep whisking as the mixture heats. The sugar will dissolve after about 5 minutes. Be careful, we don’t want to cook the eggs. Transfer the  mixture to the bowl of an electric mixer. With a whisk attachment, beat the mixture on high until stiff peaks form (about 5 minutes). The mixture will be sticky and glossy and look like melted marshmallows. Finally, beat in the vanilla. Set aside.


Putting it all together:

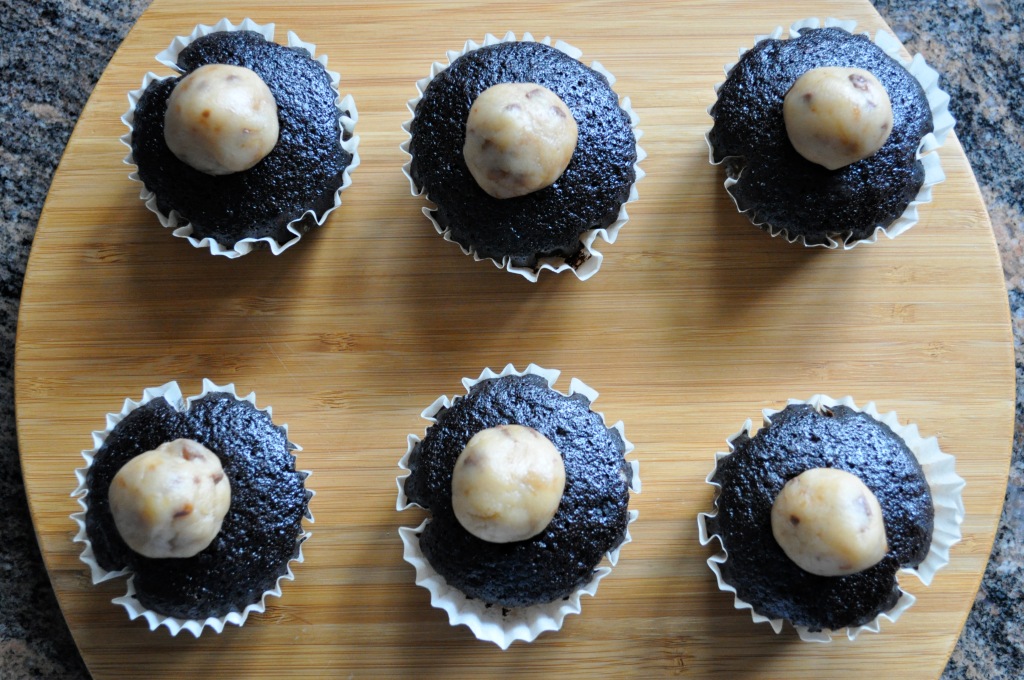
Use a small spoon to scoop a small indent out of the top/center of the cupcakes (see above). The indent will help the cookie dough balls rest on the cupcake without falling off. Now, it is absolutely imperative that you eat each spoonful of cupcake. You need to keep up your strength on this long journey. Do it.

Roll your cookie dough into walnut size balls, and place one ball in the centre of each cupcake. Are you still with me?

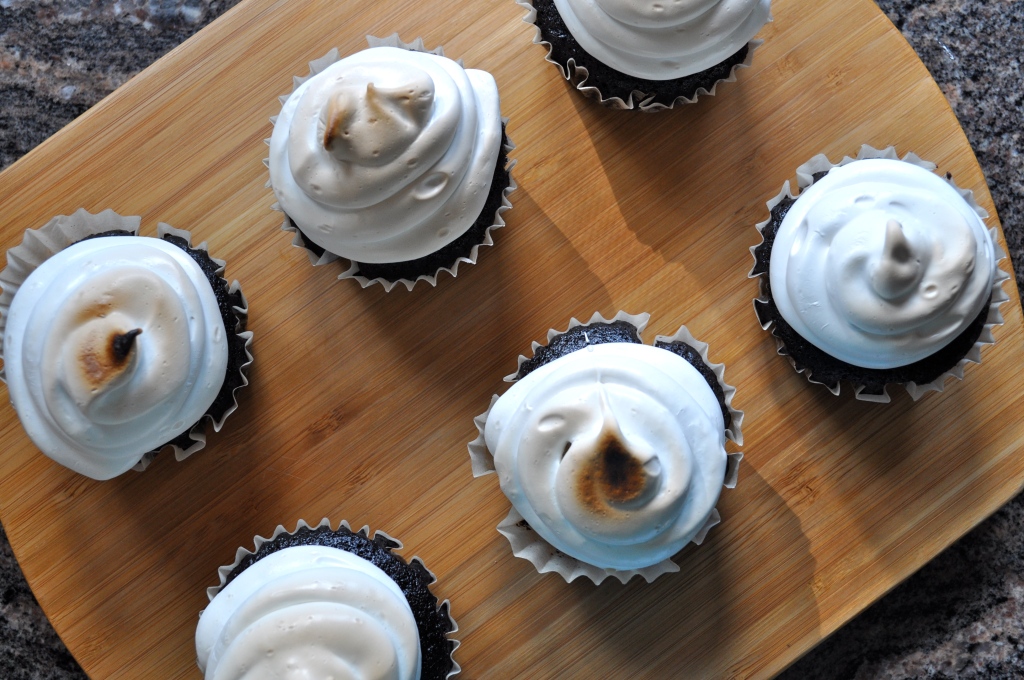
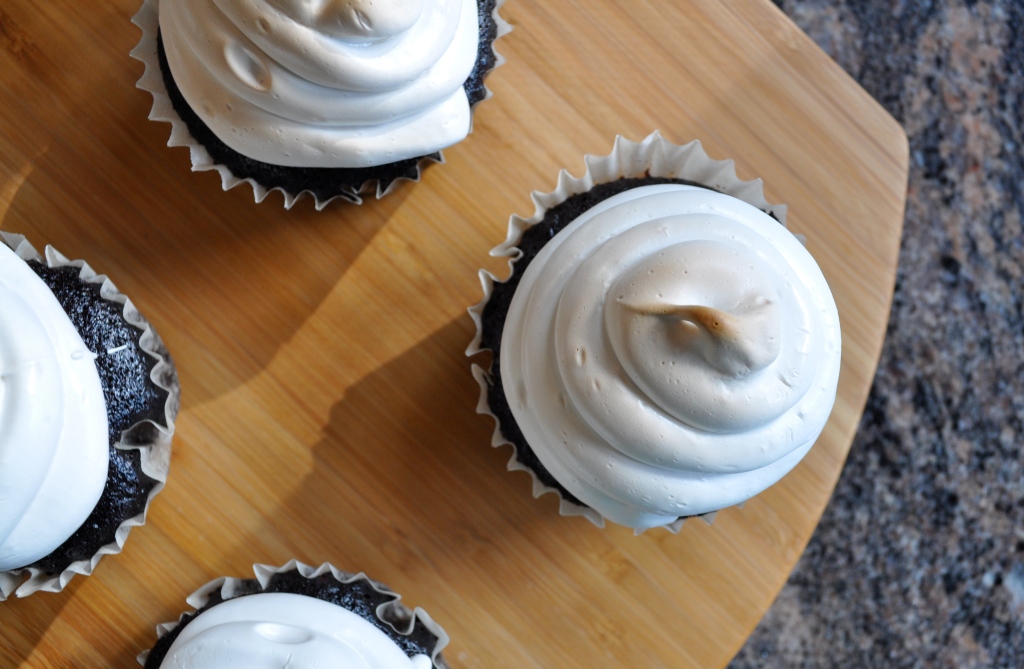
Place the meringue frosting in a large ziplock bag (or in a pastry bag, if you’re fancy). Cut a small hole out of one of the bottom corners of the bag. Pipe frosting around the edges of the cupcake and over the dough ball in a circular motion like you’re topping a cone with soft serve ice cream.

And finally, turn your oven on to broil. Place 12 cupcakes on a baking sheet. Place cupcakes under the broiler for about 1 minute. Keep a very close eye on them, they can burn in an instant. As Joy suggests, you may need to remove the cupcakes and rotate the pan to ensure that they cook evenly.  Once toasted, remove the cupcakes from the oven, and toast the other batch. These can be served right away, or cold from the fridge, whatever tickles your fancy. Amazing.


Get baking friends.

And share the love.

An Anytime Treat | Best Ever Rice Pudding

I never really liked rice pudding as a child. Something about the texture turned me off. And hello, rice was a side dish. To be eaten only with soy sauce. Not touching anything else on the plate.

I look back at my food tastes as a child and almost laugh. Children are such particular beings – little food critics that require imaginative reasons for eating certain things. I remember when my brother was little, we had to call broccoli “tree stars,” because the dinosaurs in The Land Before Time movie ate tree stars and enjoyed them to boot. As a result, my brother could not get enough broccoli. Mission accomplished, I suppose.

Many of the foods that I hated as a child have become some of my favorites as an adult. There is not a single vegetable I don’t enjoy nowadays, and salmon is no longer a stinky, disgusting main dish (but rather one of my very favorite things). And I hated rice pudding, or so I thought, until a couple of years ago when one of my coworkers started chowing down on rice pudding from the hospital cafeteria as a post-lunch dessert. Yes, I just said hospital cafeteria.

Fear not, it was a prepackaged rice pudding, not something made on site. She raved about it and ate it so often that my curiosity got the best of me, and I grabbed one for myself one day. Now, the rice pudding was certainly not rave-worthy, but it was enough to shift my feelings about rice pudding from grotesque to tolerable. It also gave me some encouragement to try making it myself. If a packaged rice pudding could taste good, the chance of homemade rice pudding knocking my socks off became a bit more likely.

Eventually, I gave a few recipes a try, but nothing really blew my taste buds away. I tried baked rice pudding, but became a little skeeved out by the eggs that seemed to do their own thing and create a scrambled egg-like custard alongside the rice. I tried a couple of stovetop recipes, but they always glommed together like play-doh once the pudding had cooled. Rice pudding failure.

And then one day, I was feeling sorry for myself and decided to treat myself to a cooking magazine while at the grocery store. Even pity parties require refreshments. I grabbed a copy of Fine Cooking, leafed through it quickly, saw a few interesting recipes, and threw it into my basket. It wasn’t until a day later when I was flipping through the magazine with a little more care that I came upon this recipe. “Best-Ever Rice Pudding” it said. Now, if you’re going to call something “best-ever,” you had better be able to deliver. And this creamy, sweet, rich pudding certainly does that.

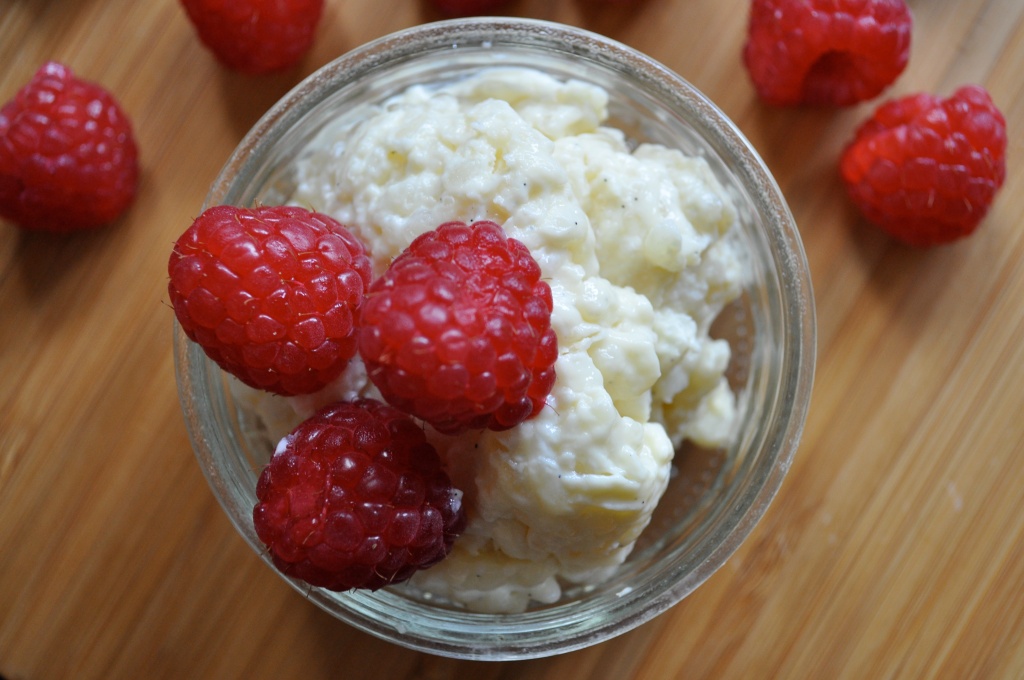
Make this rice pudding. Whether you love rice pudding already, or are a skeptic like I was. It’s so worth it. The blue photos were taken right after the pudding came off the stove, and it was incredible when still warm, all on its own. The red photos were taken the next day, when the pudding was cold out of the fridge. It was amazing with fresh raspberries, and I imagine that any fresh fruit would be delicious company for this creamy treat. Or throw in some raisins if you want to be more traditional. I found myself going back to the fridge over and over, standing in the open door, eating it spoonful by spoonful. Best. Ever. Indeed.

Best-Ever Rice Pudding (slightly adapted from Fine Cooking magazine, June/July 2011)

4 cups whole milk

1/2 cup arborio rice*

5 TBSP. granulated sugar (add another TBSP. or two if you want it to be sweeter)

1 vanilla bean

2 cinnamon sticks

2 large egg yolks

In a medium saucepan, combine the milk with the rice and sugar. Split the vanilla bean lengthwise and scrape out the seeds. Add them to the saucepan, along with the scraped vanilla bean and the cinnamon sticks. Bring the mixture to a boil over medium heat. Reduce the heat to the point where the mixture can continue to simmer, and cook until the rice is tender, about 25 minutes. Stir frequently during this time. Remove the pan from the heat.

In a small bowl, whisk the egg yolks until smooth and pale yellow. Whisk about 1 cup of the hot rice mixture into the yolks, then put the egg mixture back into the pan. The eggs need to be tempered, to avoid that scrambled egg effect. Scrambled eggs for breakfast = super-duper. Scrambled eggs in rice pudding = blech. Stir until well blended, and put the mixture back over medium heat. Cook, stirring constantly, until the mixture just starts to boil, about 2 minutes. Take the pan off the heat and allow to cool for 5-10 minutes. Remove the vanilla bean and cinnamon sticks.

If you’re going to enjoy the pudding right away, spoon into bowls or ramekins and get eating. If you’d prefer to eat the pudding cold, transfer the pudding into a bowl or container and refrigerate for a couple of hours. Try to stay away from the fridge.

*You can use other varieties of rice (ie. long grain, basmati, jasmine), but arborio rice really helps to create a creamy and sticky texture.

This One’s For Nana | Cinnamon Buns

I made you a promise yesterday. I like to keep my promises.

Raise your hand if you like cinnamon buns.

I don’t know about you, but my hand is in the air.

One of my fondest memories is making cinnamon buns with my Nana when I was a little girl. While it was a long process, especially for a child, I loved the fact that at the end of it all, we had such a special treat waiting for us to eat. We cheated a little and used a breadmaker to make the dough, but Nana taught me the care and patience required to roll the dough out into a perfect rectangle, spread it generously with butter, sprinkle it with brown sugar and cinnamon, and then wait until the little rolls had blossomed into pillowy buns waiting to be baked. The sweet aroma would fill the kitchen, and I would anticipate that first delicious bite of a freshly baked, warm cinnamon bun.

Shortly after Nana passed away, just over 4 years ago, I tried to make our cinnamon buns again. I followed the same recipe, even used the same breadmaker, and the buns were a total flop…twice. The first batch never rose, and the second batch just didn’t taste anything like I remembered. Clearly I was missing Nana’s special touch. I decided that cinnamon rolls were better left as a wonderful memory of Nana, and that I would stop trying to replicate those special treats that Nana and I created together.

And then, a few days before this past Mother’s Day, I asked my mama what she wanted for the Mother’s Day brunch I wanted to make her. “Cinnamon buns,” she replied. And I knew that store-bought cinnamon buns would not cut it. I started my search for an amazing cinnamon bun recipe, one that would live up to my Nana memories. I remembered how Pioneer Woman’s recipe for Cinnamon Rolls had called out to me the first time I saw it. And I decided that there was no time like the present to give it a try, adding my own little twist, one that Nana taught me.

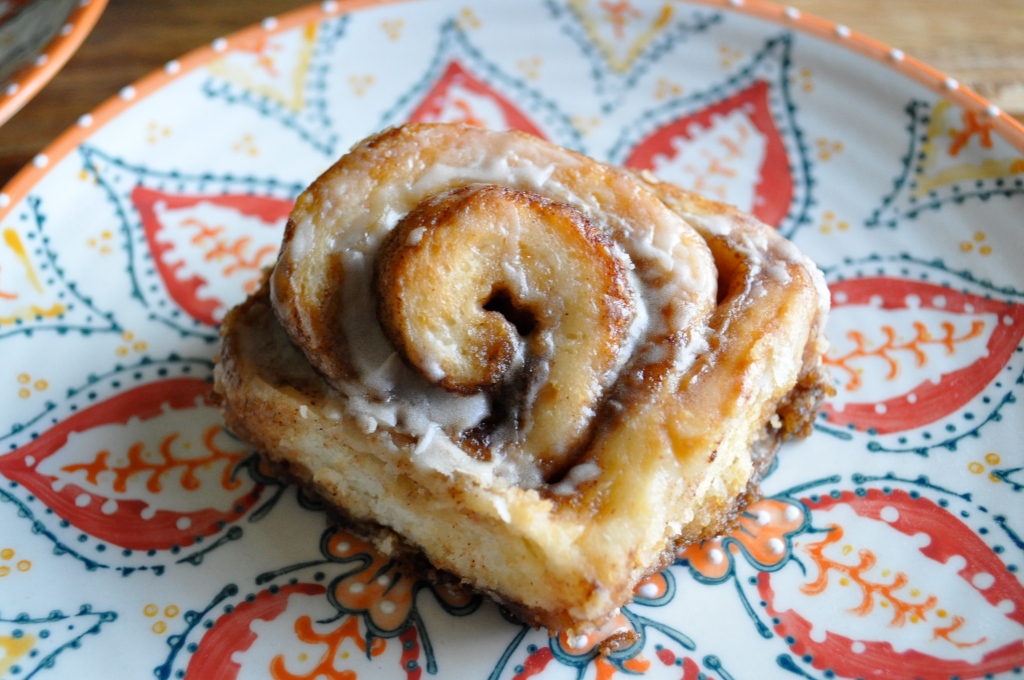
The cinnamon rolls exceeded my expectations, and were declared by my mom as the best cinnamon buns she ever had. Nana would be proud.

Cinnamon Buns (adapted from Pioneer Woman)

2 cups whole milk

1/2 cup canola oil

1/2 cup white sugar

1 package  active dry yeast (2 1/4 tsp.)

4 1/2 cups all-purpose flour, divided

1/2 tsp. baking powder (heaping)

1/2 tsp. baking soda (scant)

1/2 TBSP. salt

3/4 cup melted butter

1 1/2 cups brown sugar

Lots of cinnamon

For the glaze:

1 1/2 cups icing sugar

1 tsp. vanilla

1 TBSP. (plus extra if needed) milk

To start, I follow Pioneer Woman’s recipe for the dough to a tee, except that I cut it in half. In a saucepan over medium heat, mix together the milk, canola oil, and white sugar. Scald the mixture (take it off the heat just before boiling), remove from heat, and allow to cool for about half an hour. When I can stick my pinky finger into the mixture without burning it, I know it’s ready! Sprinkle the package of yeast over top, and let it mingle with the milk mixture for a couple of minutes. Add 4 cups of all-purpose flour, and mix together with a wooden spoon. Cover with a towel and allow it to rise for at least an hour.

Then add the remaining 1/2 cup of flour, the baking power, baking soda, and salt. Stir the mixture together, or do as I did and mix it together with your hands. Once everything is blended together, you’re ready to make some cinnamon buns!

Sprinkle your work surface with flour to prevent the dough from sticking. Using a rolling pin, roll the dough out into a large rectangle. I roll my dough out quite thin (about 1/8″ thick). Drizzle it with about 1/2 cup of melted butter. You’re not allowed to think about how many calories these cinnamon buns have while you do this. Deal?

This is where I started to add my own spin. First, I used brown sugar instead of white sugar for the filling of the rolls. Sprinkle about 1 cup of the brown sugar over the butter, and top it with a very generous coating of cinnamon. You’ll also want to prepare your pans. I used one 9 x 13″ pan and one 9″ pan. I used the remaining 1/4 cup of butter to coat the bottom of the pans. Then I used the remaining 1/2 cup of brown sugar to sprinkle into the bottom of the pans, finishing with another healthy dose of cinnamon. My Nana taught me this trick of coating the bottom of the pans with the same mixture that fills the cinnamon buns. The end result is cinnamon buns with a lovely oooey-gooey bottom. Yum!

Begin rolling the dough up, trying to keep it tightly rolled. Once finished, pinch the end of the roll into itself, so that it doesn’t start to open up when you begin cutting. Using a sharp knife dipped in hot water (to make the job easier), slice the rolls about 1 inch thick and lay them flat into your pans. I fit 12 rolls in the larger pan, 9 rolls into the smaller pan. Cover the pans and let them rise again, for at least half an hour (or longer if you have time).

Preheat your oven to 350°F, and bake the rolls for about 15-20 minutes, or until lightly browned. Mix together the glaze ingredients. Add more milk if the mixture is too thick, or more icing sugar if too thin. Pour over warm cinnamon buns so that the glaze can seep into them. Enjoy while warm. You’ll find it hard to stop at one. Happy eating!

Some Things Just Go Together | Banana Peanut Butter Muffins

Hello long lost friends. It seems like ages since I have shared any deliciousness with you. It practically has been ages. It has been a stressful few weeks. The biggest stress of all has been preparing to list my condo for sale. Honey and I, and mostly our little (but rapidly growing) Bella have outgrown the condo, and are preparing to look for a cute little house. However, first things first, we must sell my condo. It was finally listed for sale this week, after many hours of cleaning, decluttering, and all-out stress. And unfortunately, the stress is only beginning, as we now have to be prepared to get out of dodge at a moment’s notice if someone wishes to view our condo. Which is not easy when we have a pup to worry about.

My body has done a fantastic job of protecting me from all of the sickness that everyone seems to be dealing with…until yesterday. I have succumbed. I now have one of those annoying cold/flus that don’t necessarily make you feel completely terrible, but just overall pooped and blah. With a very sore throat to boot. *sigh* Life may feel rough right now, but then I think about those people who have it far worse. The current crisis in Japan has definitely made me feel thankful for my life, despite some difficult days here and there. (Boogie over at The Boogie blog has some great suggestions for how to help).

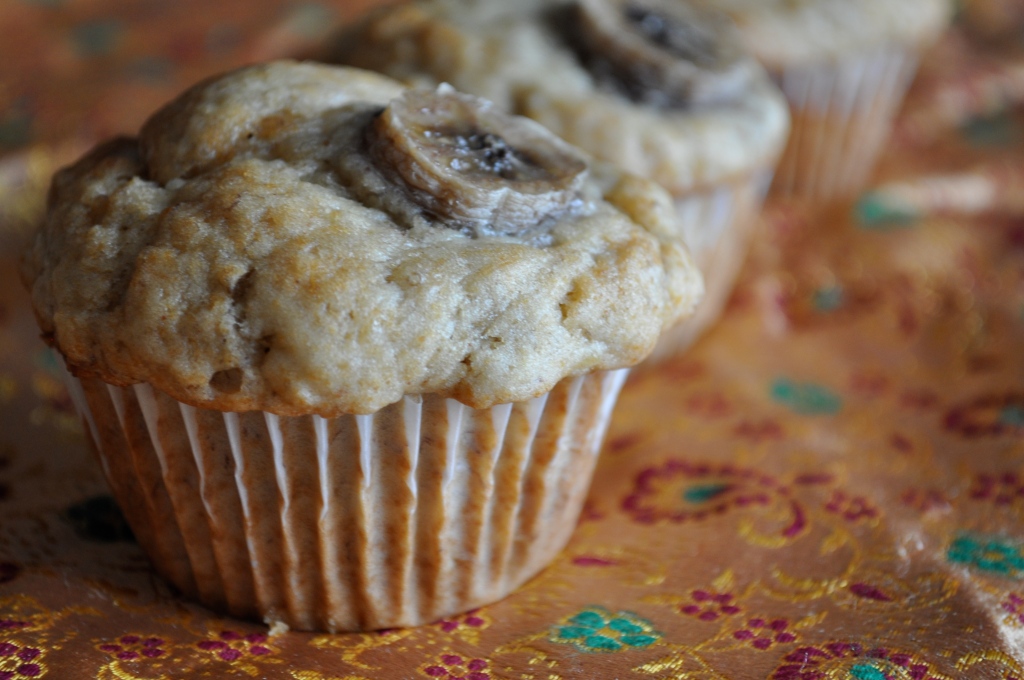
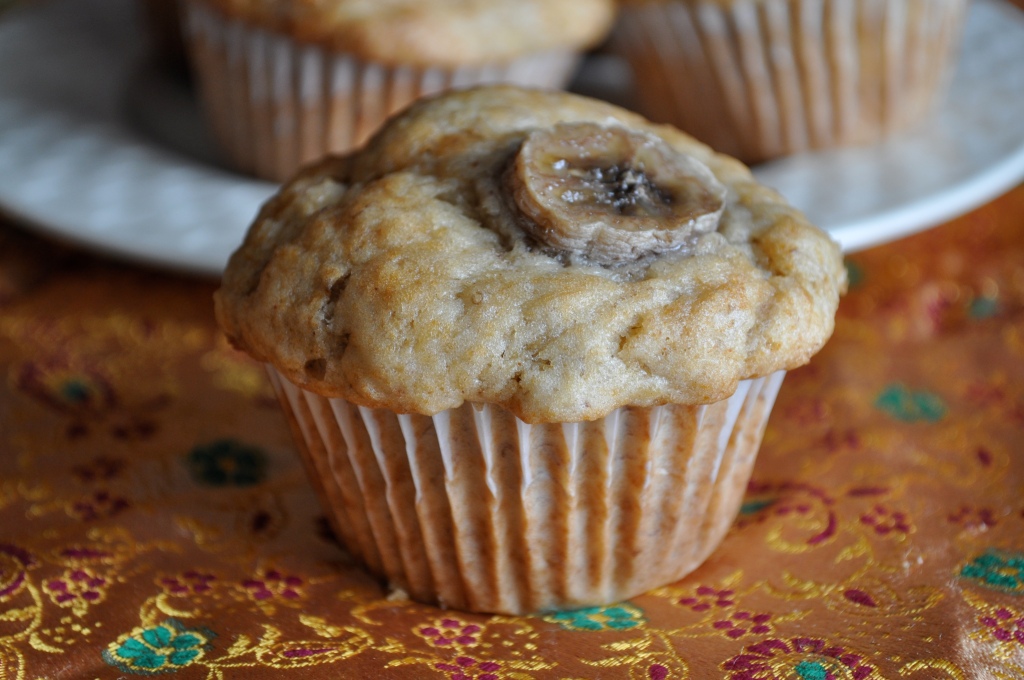
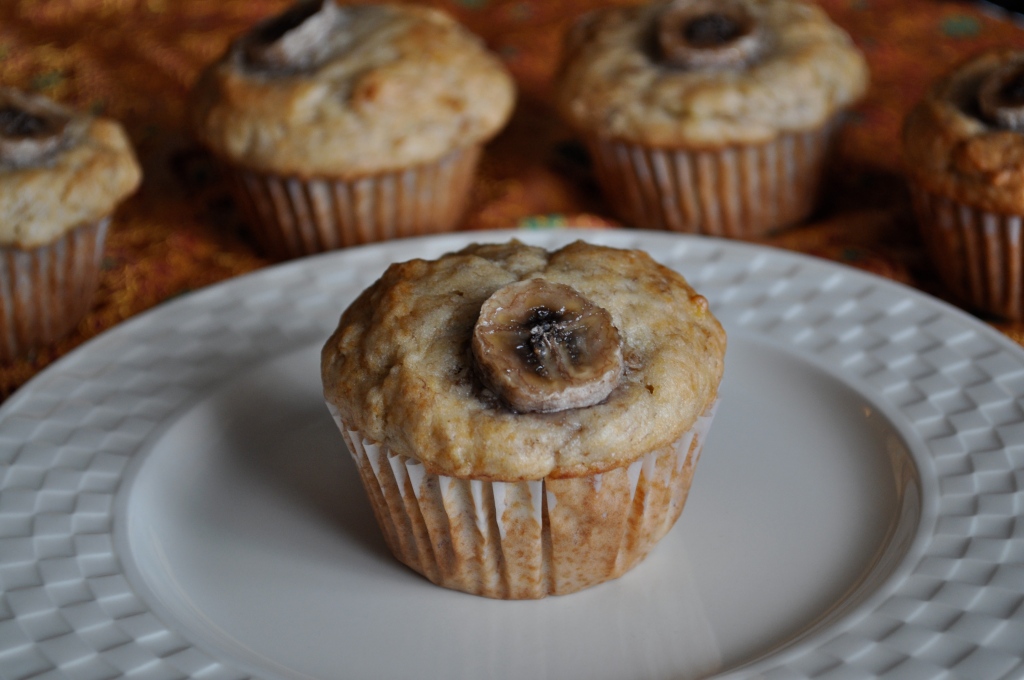
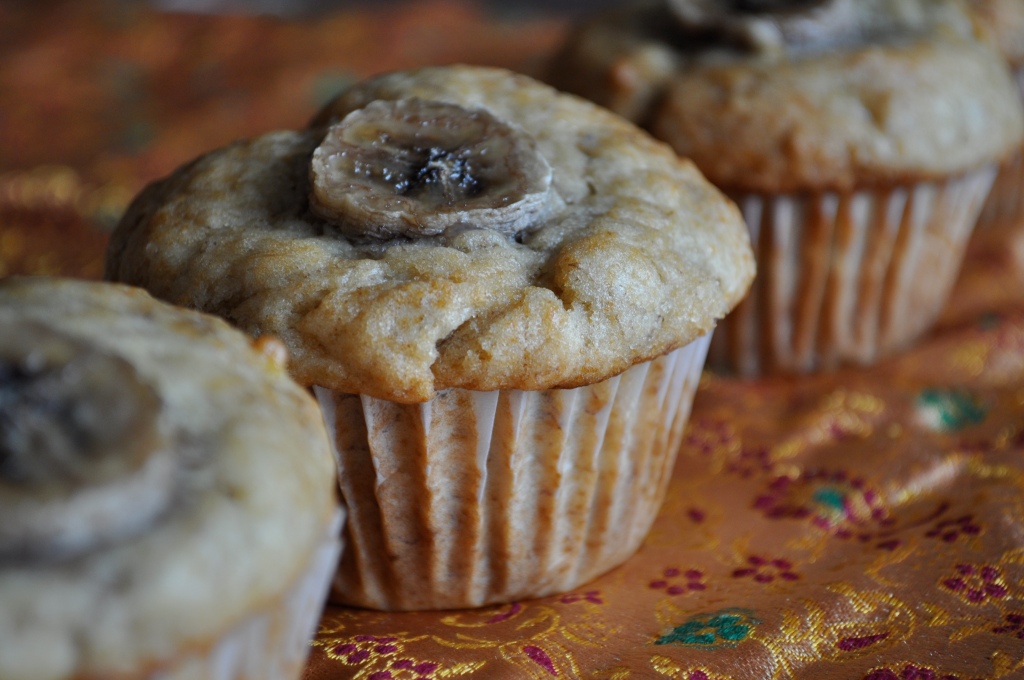
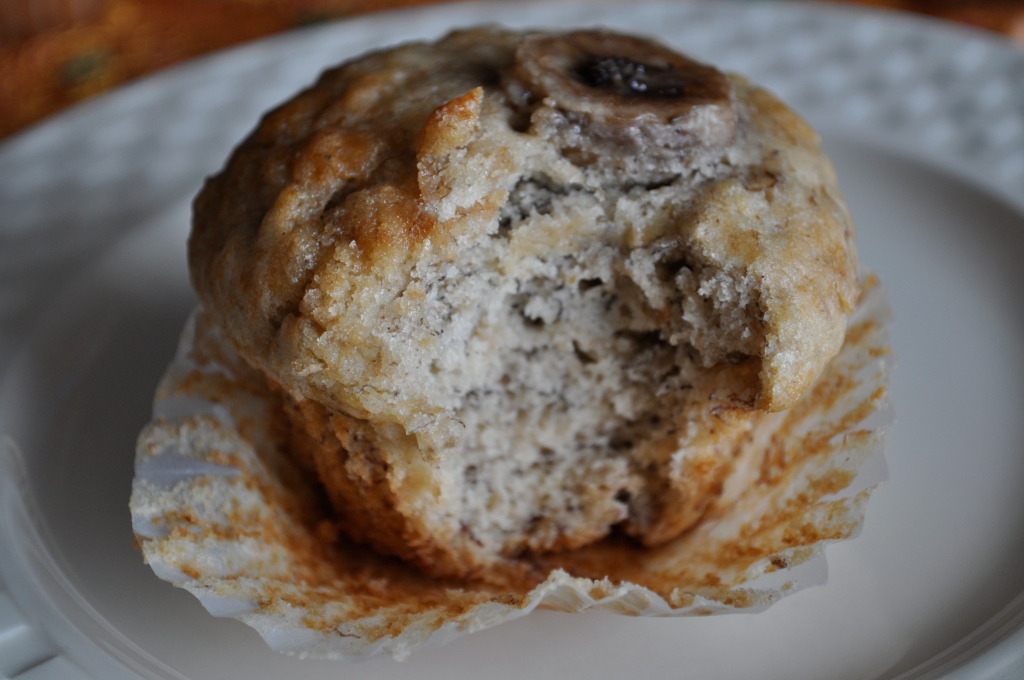
One of my favorite stress-relieving activities is baking. I find calm and serenity in measuring out ingredients and building something warm and comforting. Not to mention the bonus of eating said deliciousness when it’s all said and done. Last night, after lying on the couch watching bad TV for much of the evening, I threw these muffins together. Banana and peanut butter just go together. At first bite, these muffins took me back to my childhood of peanut butter and banana sandwiches. Lots of banana flavor with a hint of peanut butter. Yum. And comforting indeed.

Banana Peanut Butter Muffins (from Lululu at Home)

1 3/4 cups all-purpose flour (next time I will try whole wheat)

1 tsp. baking powder

1/2 tsp. baking soda

1/4 tsp. salt

3/4 cup sugar

1/4 cup butter, softened

1/4 cup peanut butter (I used natural smooth PB)

2 eggs

3 large bananas, mashed (I used 4)

1 sliced banana for garnish

Preheat oven to 350°F. Prepare your muffin tin with liners or grease.

Whisk together the flour, baking powder, baking soda, and salt in a small bowl. In a separate bowl, cream together the butter and sugar until light and fluffy. Beat in the peanut butter. Add in the eggs, one at a time, followed by the mashed bananas. With the mixer on low speed, slowly add in the flour mixture until just combined.

Fill the muffin cups with batter. Top with a slice of banana. Bake for about 25 minutes, or until a toothpick inserted into the center comes out clean. Cool on a wire rack. Enjoy!

PS. Chocolate chips would be a great addition to this recipe for some added richness, although they taste just fabulous the way they are. I bet peanut butter chips would be incredible as well. Oh the possibilities!