Savory Spinach & Cheese Waffles

Savory Spinach & Cheese Waffles | Once Upon a Recipe

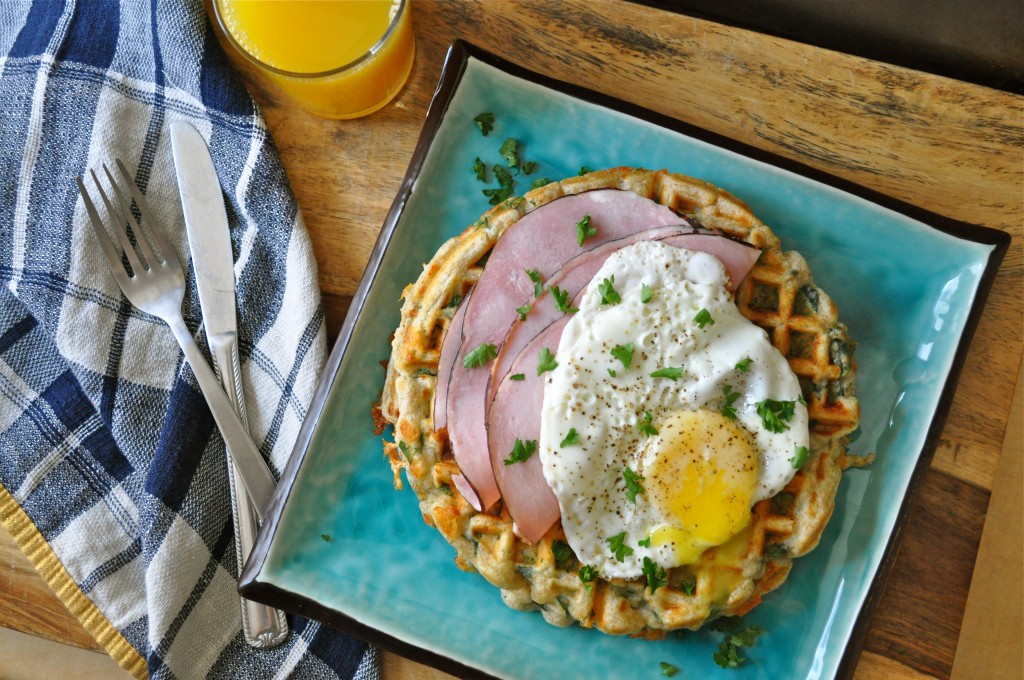
Friends, I am reeeeeeeally struggling to write this post. I mean, look at that pile of breakfast heaven right up there. It has everything. Carbs, cheese, meat, an egg. I am currently finishing up day 1 of a 3-day juice cleanse. The almond milk beverage that is my last “meal” of the day tastes much less like a milkshake than I’d worked it up to be in my mind. Yes, that’s right, give me a day of drinking vegetables and fruit and to my ears almond milk sounds like a straight-up milkshake. (Sadly, it doesn’t taste like one, not even after a day of juice).

And thus, editing these photos was a test in restraint and willpower.

Savory Spinach & Cheese Waffles | Once Upon a Recipe

These waffles are of the savory variety. And they are freaking delicious. Don’t run away, allow me to explain!

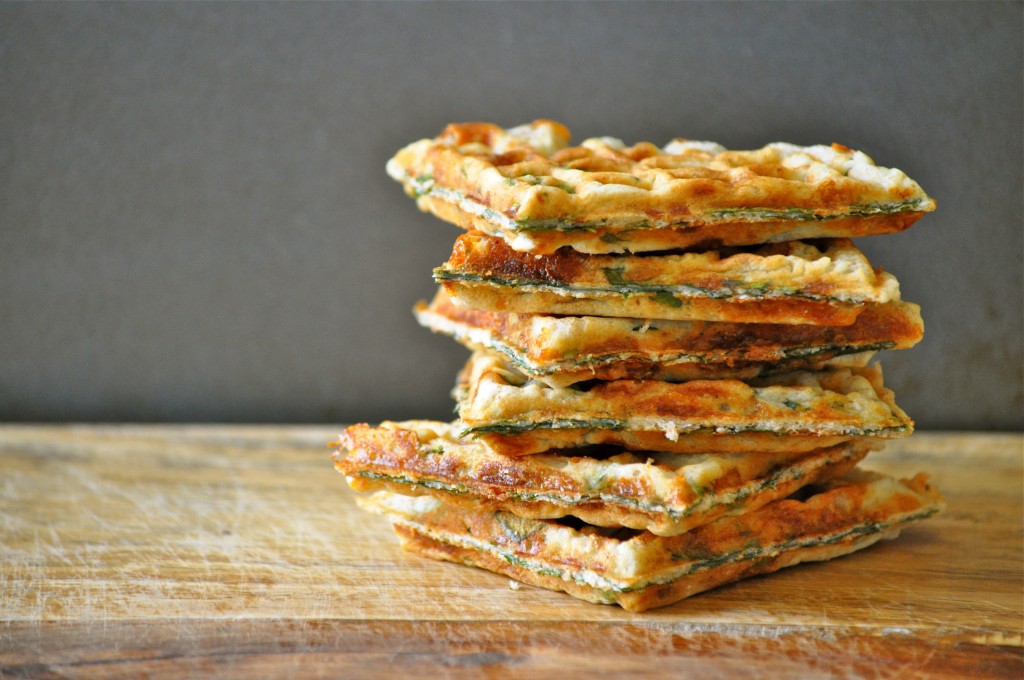
These waffles are packed with whole wheat flour and spinach. But I promise they don’t taste healthy! They crisp up all nice on the outside, but have such a tender interior. And that tender interior is made even more delicious by little pockets of cheese, some of which hit the waffle iron directly and get all crispy too. The first time I made these waffles, I enjoyed them straight off the iron, while still hot and crisp. I burnt my fingers and my mouth, and the pain was completely worth it.

Savory Spinach & Cheese Waffles | Once Upon a Recipe

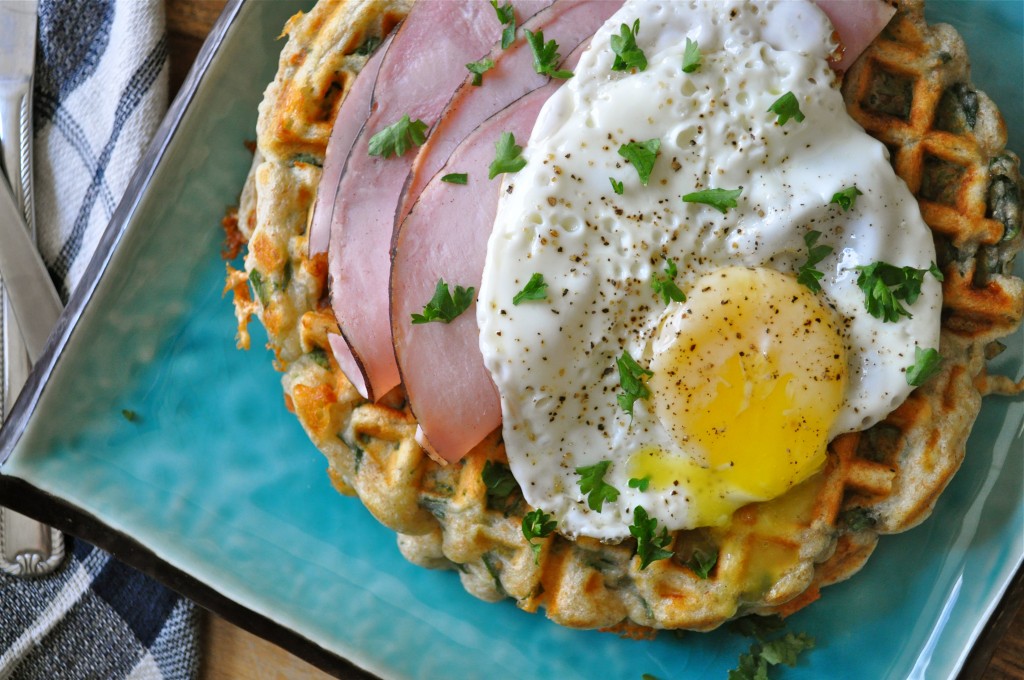
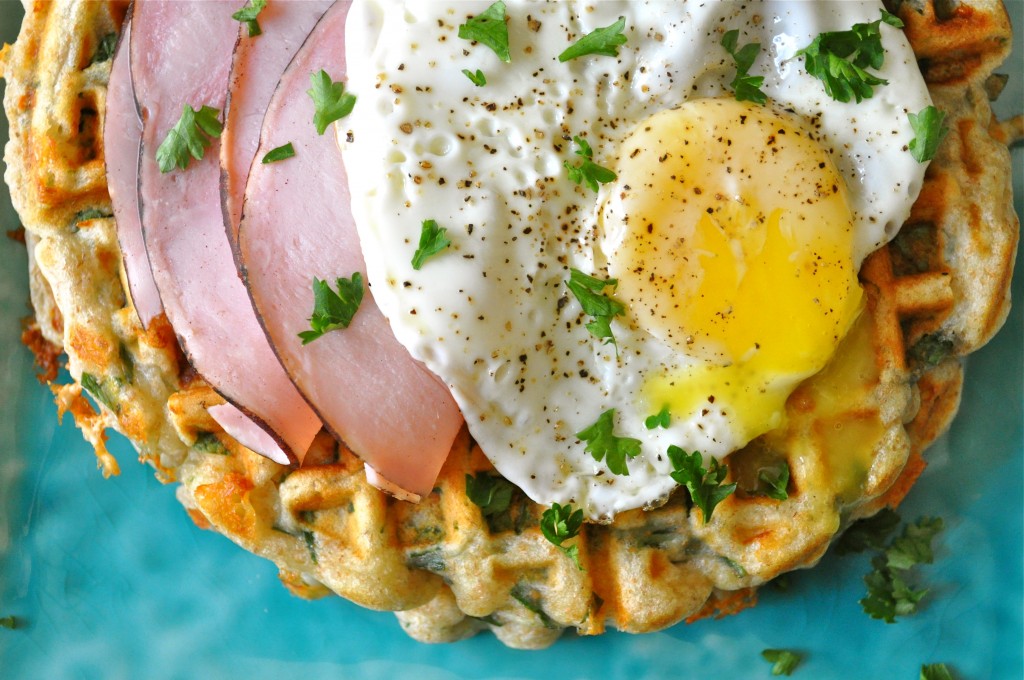
But the second time around, I topped the waffles with a couple slices of black forest ham and a fried egg. Now we’re talking! Eating the waffles this way also forced me to use cutlery, which was perhaps a blessing in itself. I’m a lady, I swear.

Do not fear this savory waffle concept! Breakfast, brunch, brinner, a snack – whatever tickles your fancy. Get into it!

Savory Spinach & Cheese Waffles | Once Upon a Recipe

Savory Spinach & Cheese Waffles (slightly adapted from The Mrs. Writes)

This recipe will yield about 6 large waffles, depending on the size of your waffle iron. If you’re serving the waffles with toppings, one waffle is probably an adequate serving for the average person. However, if you’re serving them on their own, plan for two waffles per person (for hungry eaters). The recipe can easily be doubled, if needed. Feel free to experiment with different cheeses too, depending on what you have on hand. 

1 1/2 cups whole wheat flour
2 tsp. baking powder
1/2 tsp. sea salt
1 TBSP. sugar
1 egg, beaten
1 1/2 cups milk
1/3 cup vegetable oil
4 oz. Monterey Jack cheese, freshly grated
4 cups fresh spinach, chopped

Toppings (optional): black forest ham, a fried egg, avocado, salsa, hot sauce

Preheat your waffle iron. Again, the appropriate heat setting will vary for each different waffle iron (I used heat setting 4 out of 6).

Combine the flour, baking powder, salt, and sugar in a bowl and whisk to combine. In a separate bowl, combine the egg, milk, and oil. Add to the flour mixture and stir gently until the mixture comes together. Fold in the cheese and the spinach. Spray the hot waffle iron with non-stick cooking spray (between each waffle) and cook waffles according to your waffle iron’s directions. Serve with your choice of toppings or straight off the iron. If you’re cooking for a larger group, keep waffles warm in the oven as you go. But they do taste best hot and fresh! Leftovers also reheat very well in the toaster or in the oven.
Savory Spinach & Cheese Waffles | Once Upon a Recipe

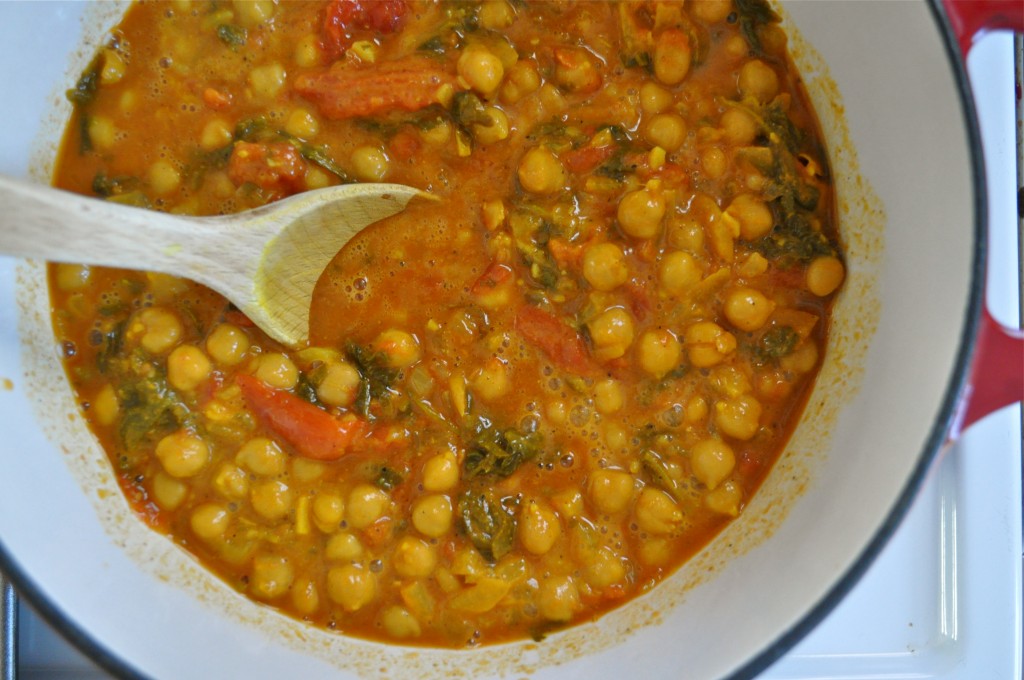
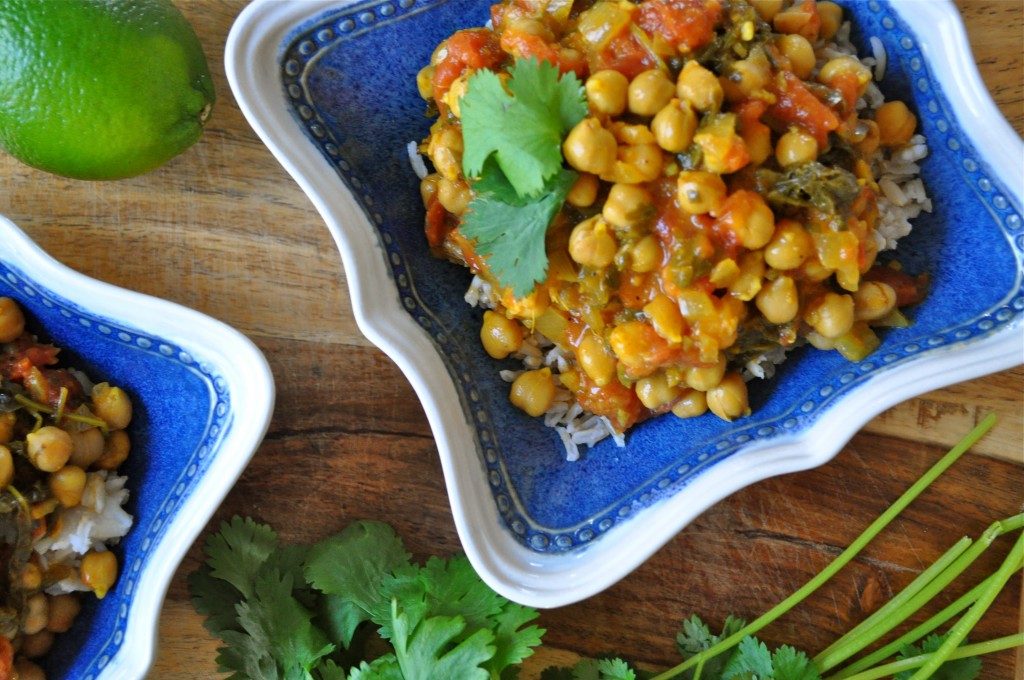
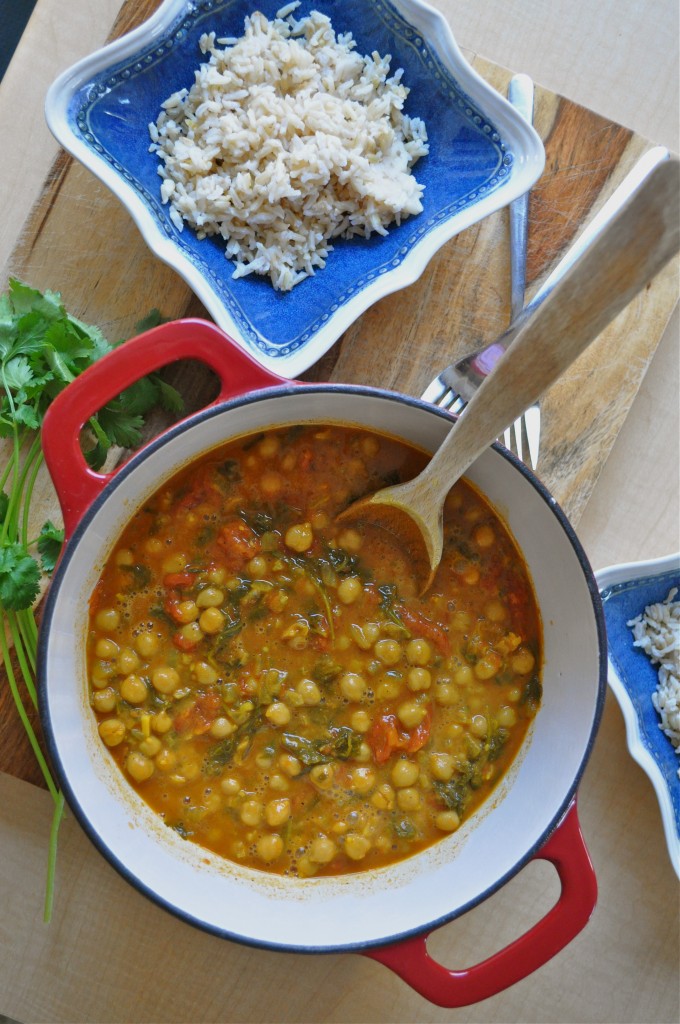
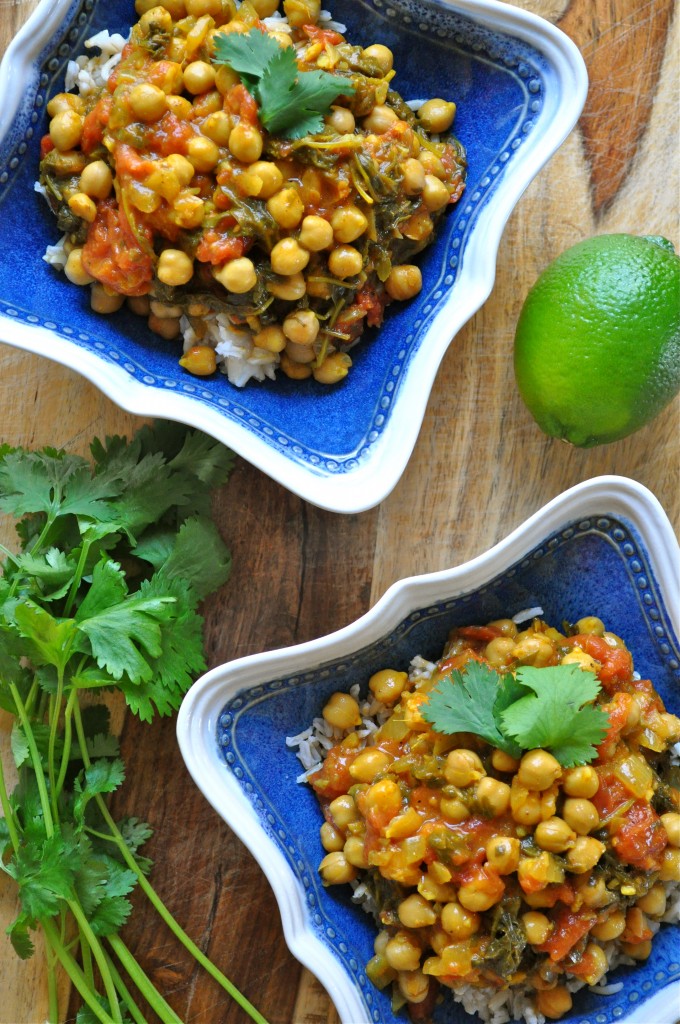
Coconut Chana Saag (Vegan, GF)

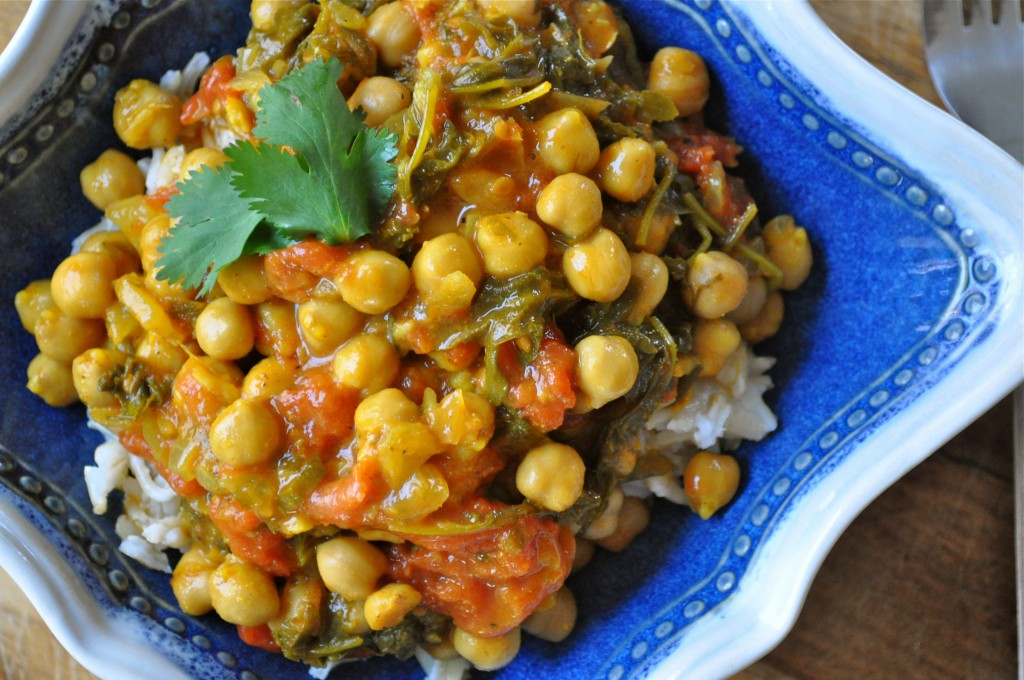
Coconut Chana Saag | Once Upon a Recipe

Hello friends!

How is 2014 treating you so far? Made any resolutions yet? Come up with any goals for the new year? Or maybe you’re easing into January by slowly decreasing your chocolate/cookie/wine intake in preparation for new healthy habits.

Coconut Chana Saag | Once Upon a Recipe

Personally, I’m easing into 2014 gently. There are still cookies and salted caramel bark in my freezer that need to be eaten, yo! And champagne in my fridge that needs drankin’. However, despite the way I present myself and my eating habits on this blog (cookies and cakes and sweet things galore), I actually eat fairly healthy on the regular.

One of my goals for 2014 is to give you, my dear readers, a more accurate representation of the way I typically eat. Generally speaking, I try to focus on the 80/20 rule – 80 percent of the time I try to eat healthy and wholesome – veggies, fruits, lean proteins, and whole grains, and 20 percent of the time I allow myself to indulge. Some days, the scale tips more in favor of indulging, and other days, it tips more in favor of eating healthy. It’s all about balance, friends.

Coconut Chana Saag | Once Upon a Recipe

Coconut Chana Saag | Once Upon a Recipe    Coconut Chana Saag | Once Upon a Recipe

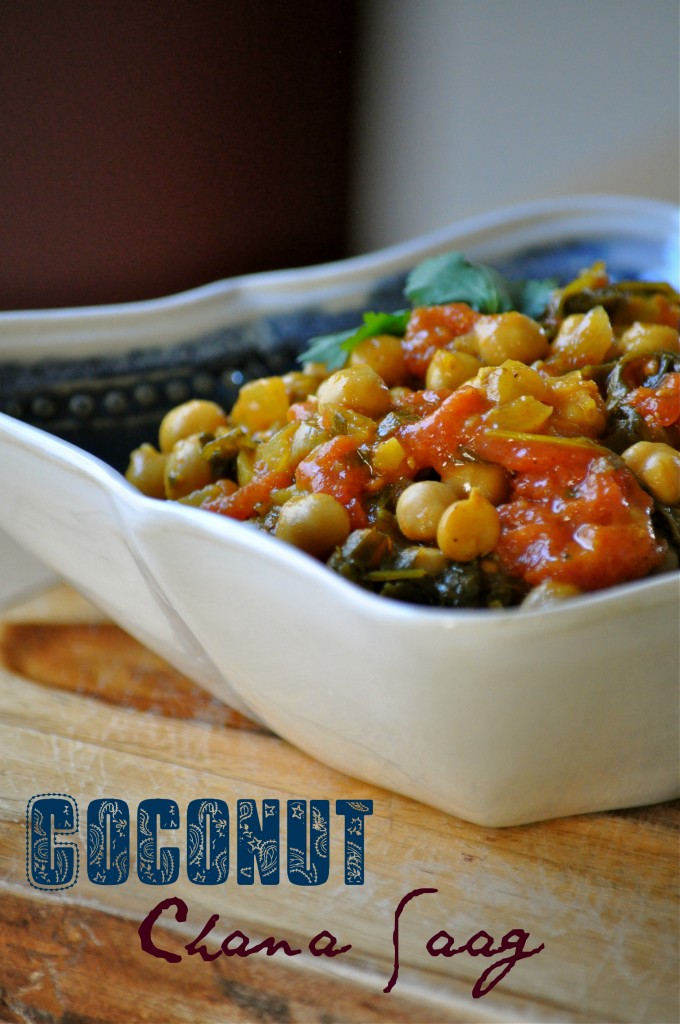
This recipe for Coconut Chana Saag is wonderfully reflective of the way I tent to eat. Simple ingredients, easy preparation, and lots of flavor. I was gifted a new cookbook for Christmas – Isa Does it by Isa Chandra Moskowitz. Isa Does It is full of easy and delicious vegan recipes, and I have already bookmarked about 20 recipes to try. If any of them are half as delicious as this Coconut Chana Saag, I have a very tasty 2014 ahead. And so do you!

Coconut Chana Saag | Once Upon a Recipe

Coconut Chana Saag (slightly adapted from Isa Does It by Isa Chandra Moskowitz)

This Coconut Chana Saag comes together quickly and easily. I served it over brown basmati rice, but you could also use quinoa, jasmine rice, or your favorite grain. Store leftovers in a sealed container and refrigerate, then enjoy throughout the week! Serves 6.

2 TBSP. coconut oil

1 medium onion, diced

4 cloves garlic, minced

A knob of fresh ginger, minced (about 2 TBSP.)

2 TBSP. curry powder (I used Moghul curry powder)

1 tsp. salt

Freshly ground pepper, to taste

1/2 tsp. crushed fennel seeds

1/4 tsp. garam masala

1/2 tsp. ground cumin

A pinch of cayenne pepper

1 24-ounce can whole tomatoes

2 15-ounce cans of chickpeas, drained and rinsed

8 ounces of baby kale

1 14-ounce can of lite coconut milk

1/4 cup fresh cilantro, chopped (plus more for serving)

Juice of 1 lime

Cooked brown basmati rice (for serving)

Heat the coconut oil in a large pot over medium-high heat. Add the onion and saute for about 7 minutes, until lightly browned. Add the garlic and ginger, and saute until fragrant (about 30 seconds). Add the curry powder, salt, pepper, fennel seeds, garam masala, cumin, and cayenne and mix well. Allow the spices to roast for about a minute.

Add the tomato juice from the can, and scrape the bottom of the pan to deglaze. Add the tomatoes from the can, squishing them with your fingers or mashing with a wooden spoon. Add the chickpeas and mix well. Cover the pot and increase the heat to medium-high. Let simmer for about 10 minutes, stirring occasionally. Add the kale and stir until wilted, and then simmer for about 5 minutes more.

Add the coconut milk, cilantro, and lime juice and heat through. Taste for seasoning. Allow to sit for 10-20 minutes (if possible), so that the flavors can mingle. It tastes even better the next day. Serve over brown basmati rice and add more fresh cilantro, if desired.

Have a great week! 🙂

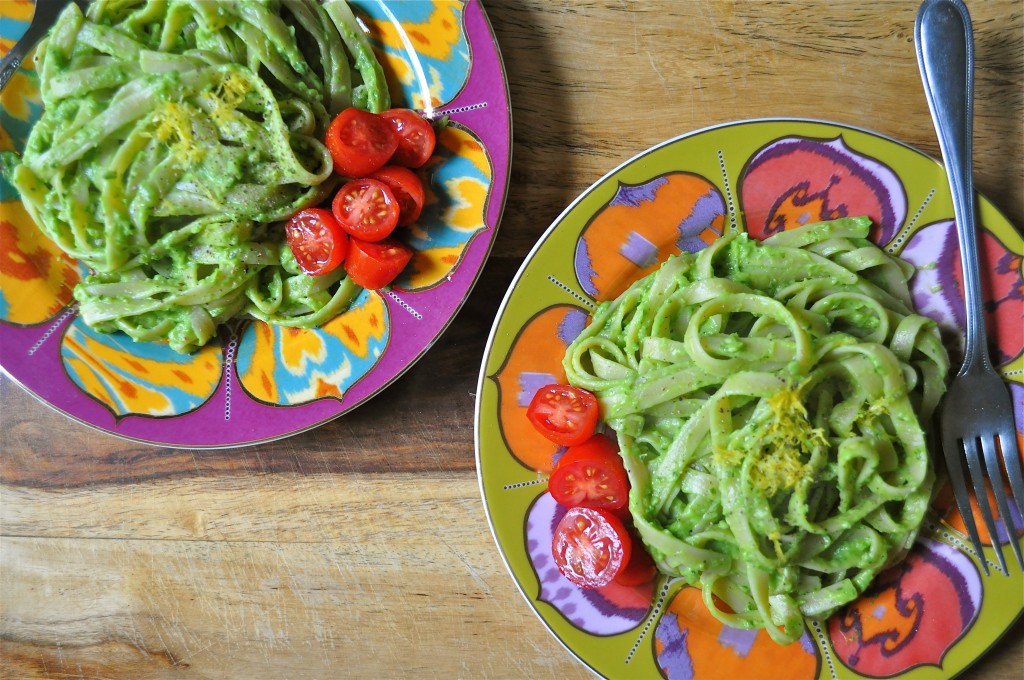
Light and Fresh | Fettuccine Al-Fake-O!

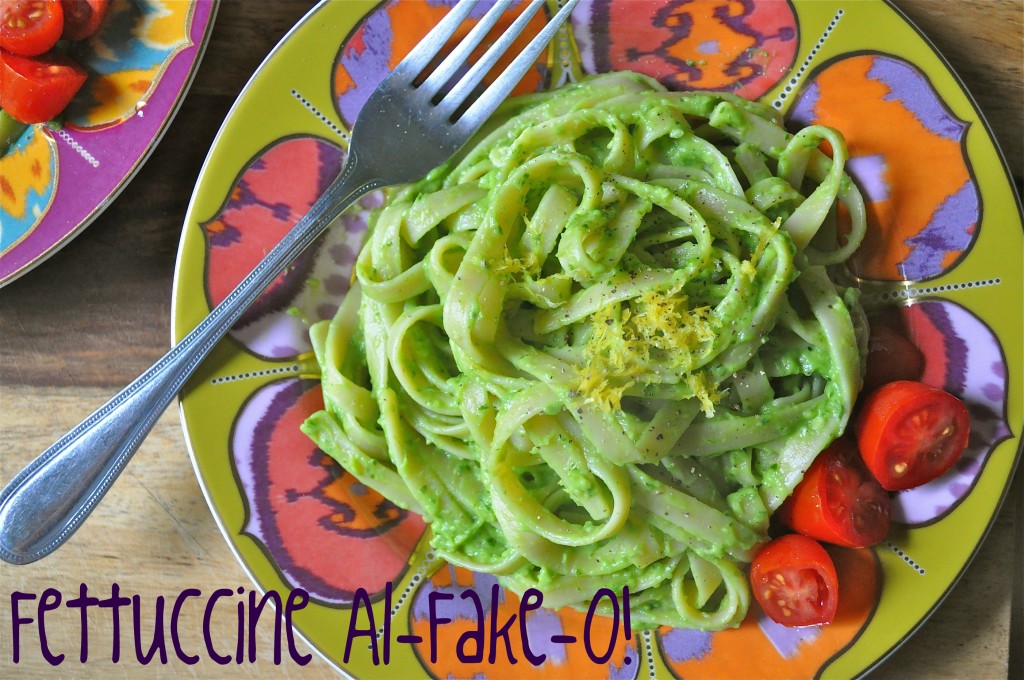
Fettuccine Al-Fake-O! | Once Upon a Recipe

Dear Universe,

I would like to make a proposition.

Fettuccine Al-Fake-O! | Once Upon a Recipe

Let’s add a few more hours to the day. Let’s make every day 36 hours long instead of 24. A deliciously long 12-hour night sleep will be mandatory and then we’ll still have 24 other hours during which we can make a living, love on all our family and friends, work out, catch up on all of our favorite TV shows, listen to all the best music, and cook/bake/eat/drink all the things. And do all of the other wonderful/demanding/amazing/worthy/necessary activities in our lives.

Fettuccine Al-Fake-O! | Once Upon a Recipe

And let’s make it happen immediately! Three day weekends are also on the wish list.

Most sincerely,

Amanda

Fettuccine Al-Fake-O! | Once Upon a Recipe

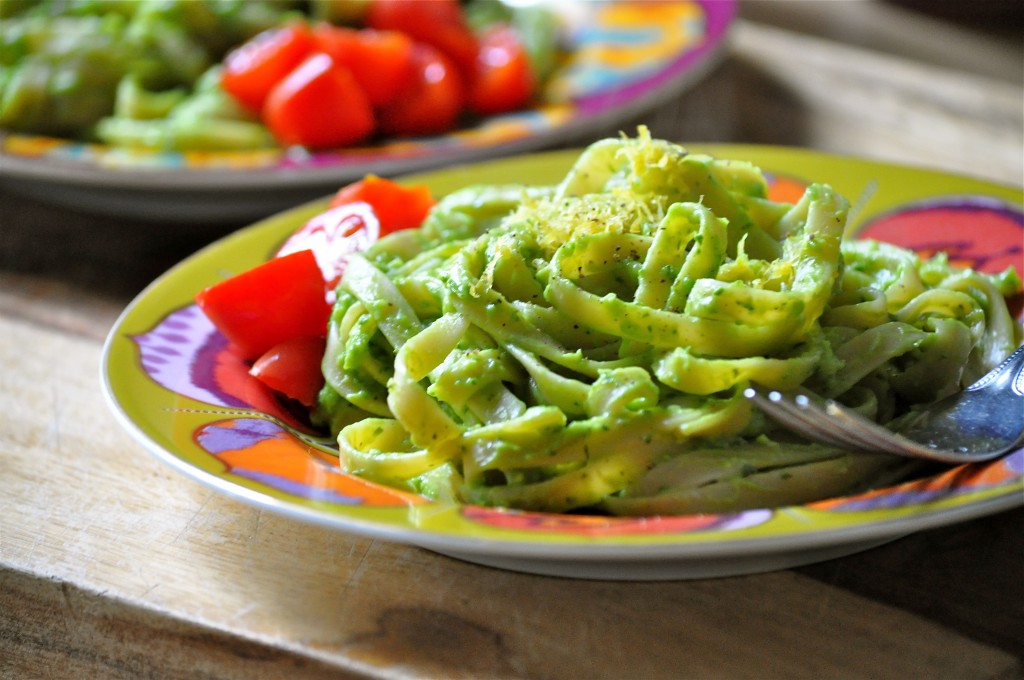
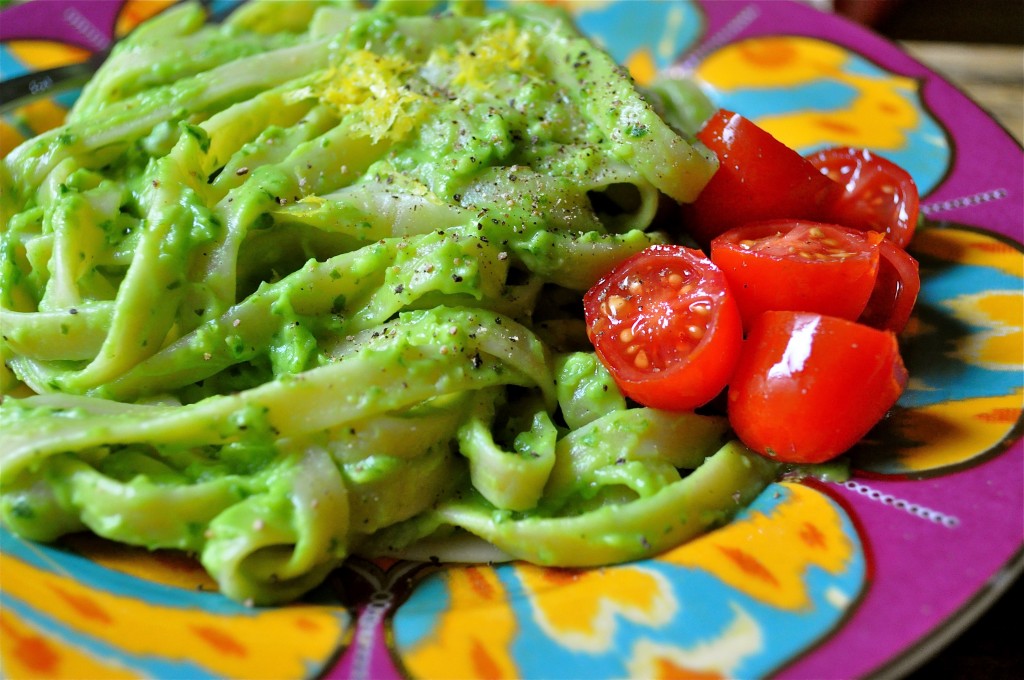
While it is unlikely for my wish for more hours in a day to come true, it might just be possible to squeeze more into the hours we already have. Quick and easy meals like this affectionately named Fettuccine Al-Fake-O will fill your belly with delicious and healthy things, without requiring tons of time in the kitchen. And guess what? It’s freaking vegan. Remember when I made you that vegan ice cream? Yeah, I hopped aboard the vegan train and you’re comin’ with me! (But don’t worry, I still really like butter and cheese and meat and stuff)

Disclaimer: Dudes, let’s be real. A sauce made without loads of butter, cream, and cheese is not going to taste like a sauce that is made with all of the above. I mean, I’m not freaking David Copperfield. However…this vegan avocado “alfredo” sauce is made with wholesome and delicious ingredients, and it tastes pretty amazing. It literally takes minutes to pull together, giving you more time for the important stuff. And if you enjoy lighter meals made with fresh ingredients during the hot summer months, this is the perfect dish for you. Live it up!

Fettuccine Al-Fake-O! | Once Upon a Recipe

Fettuccine Al-Fake-O! (barely adapted from The Kind Life)

If you are a garlic fiend like me, up the garlic to 3 cloves. If you don’t enjoy having garlic breath for days, or just aren’t a big garlic fan, reduce the garlic to 1 clove. The garlic packs a pretty big punch, so be warned. Also, this pasta tastes best when enjoyed immediately. I would be a bit leery of reheating it in the microwave, due to the avocado base. 

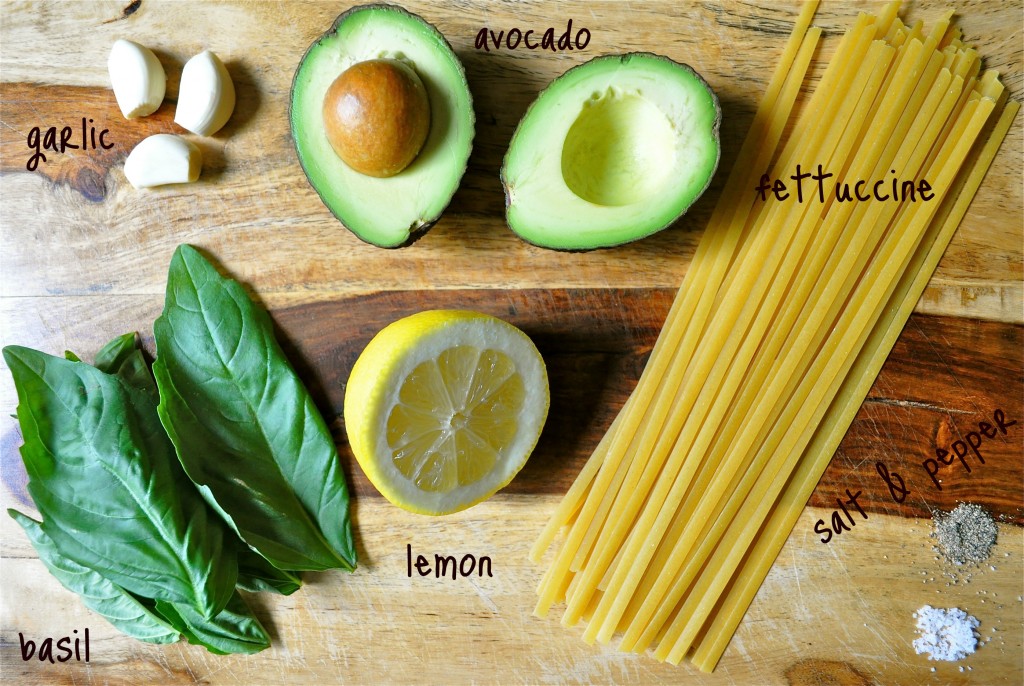
1 ripe avocado

1 large handful of fresh basil

1-3 cloves of garlic

Half a lemon

Salt and pepper to taste

2 servings of cooked fettuccine

In a food processor, blend the avocado, basil, garlic, the juice from the lemon together until smooth. Season with salt and pepper, to taste. Toss the sauce with the hot, cooked pasta until evenly coated. Serve immediately. Top with a pinch of lemon zest, if desired. And if you aren’t vegan, a little freshly grated parmesan cheese sprinkled on top tastes pretty darn good too.

Fettuccine Al-Fake-O! | Once Upon a Recipe

PS. If you are going to be kissing anyone in the hours after consuming this tasty dish, perhaps you should encourage your partner to enjoy the same meal. Just sayin’…

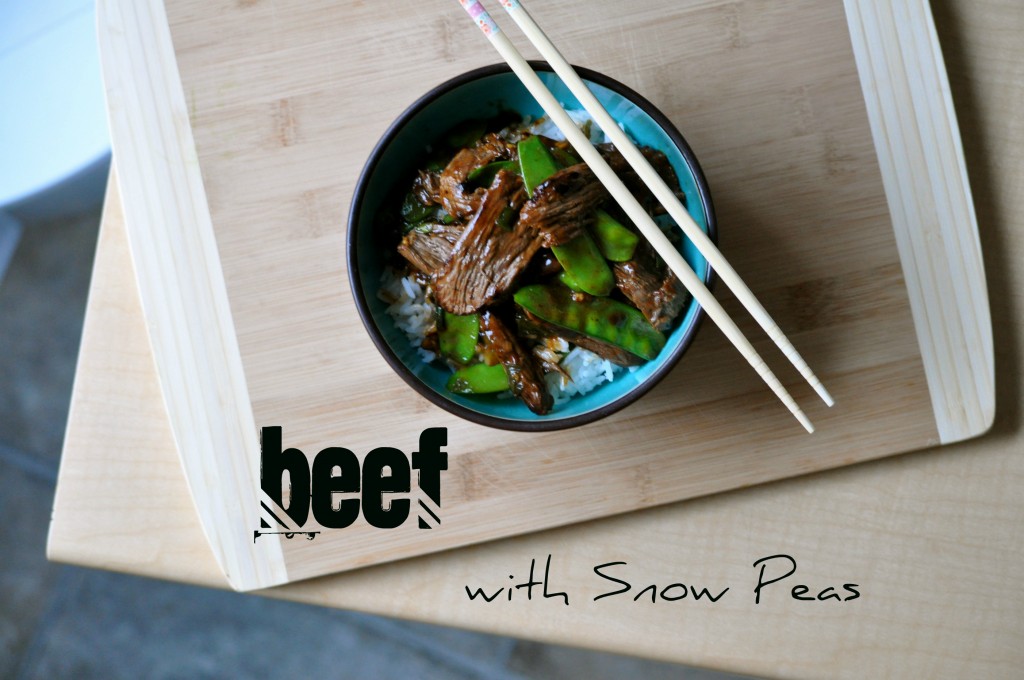
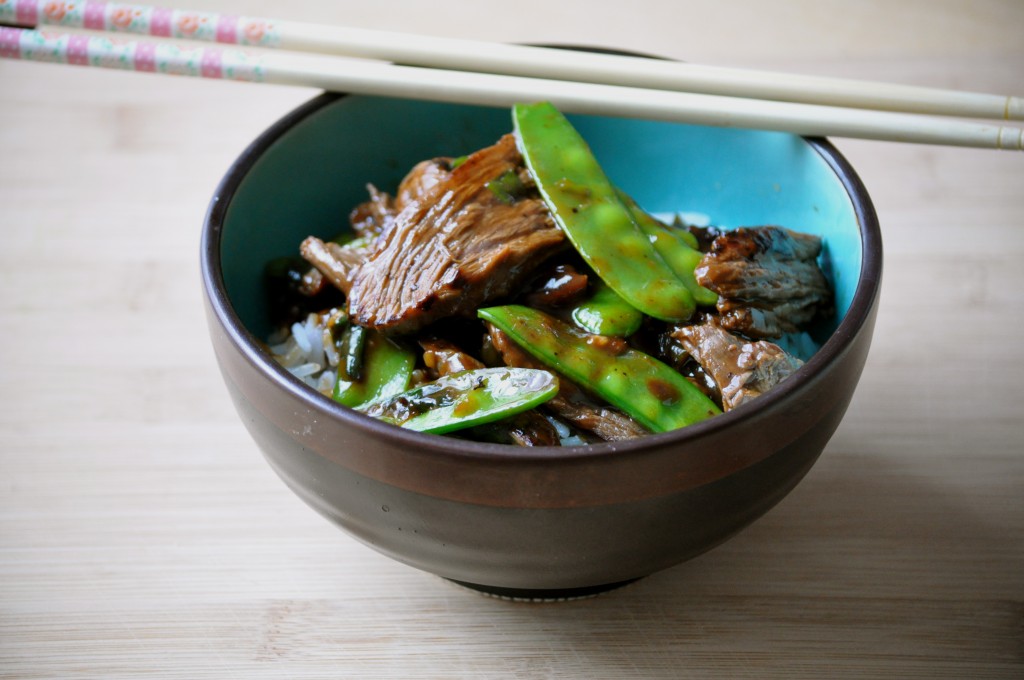
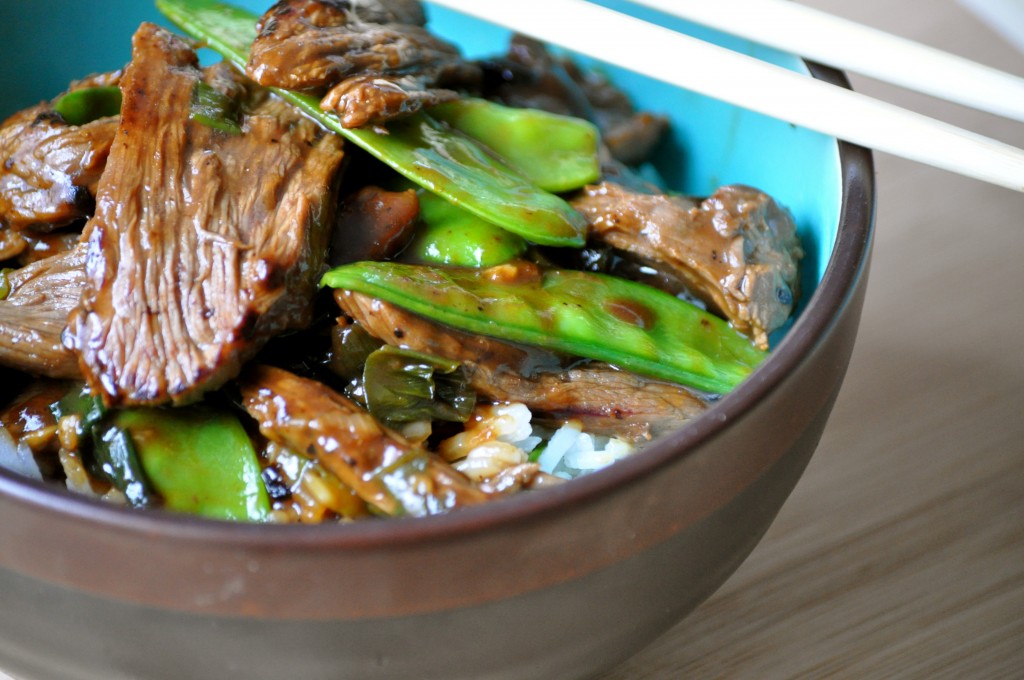
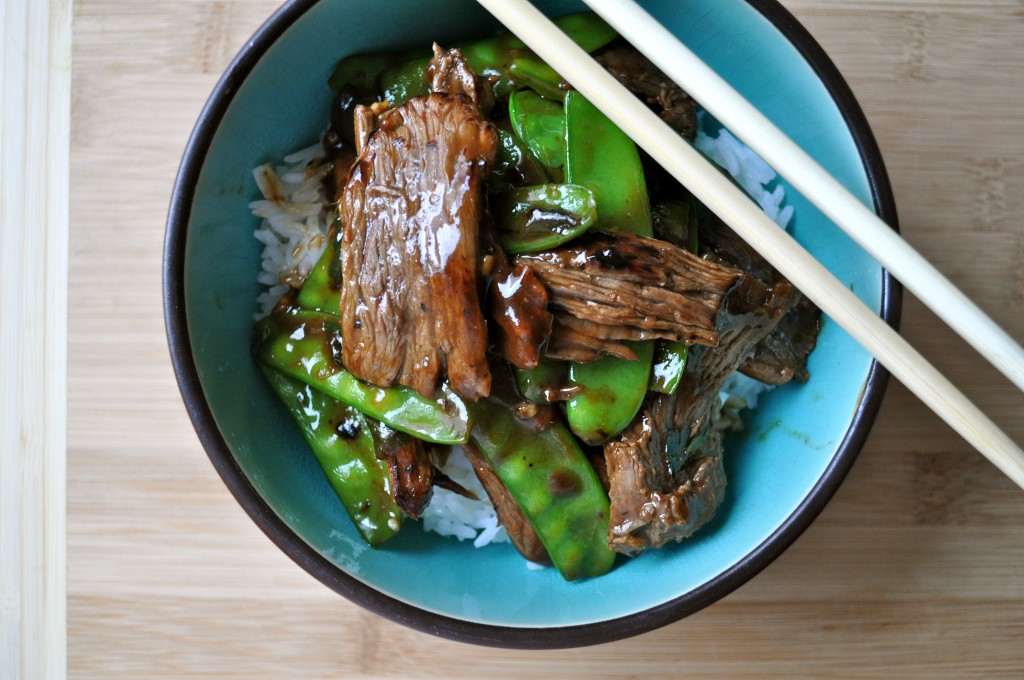
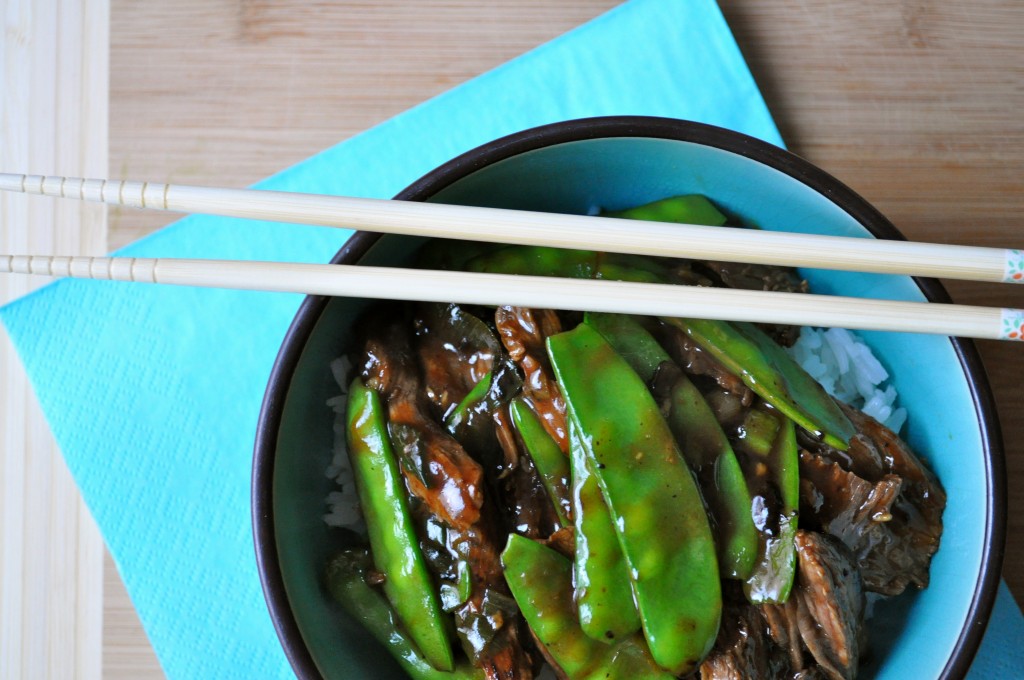
Take Out Fake Out | Beef with Snow Peas

Beef with Snow Peas | Once Upon a Recipe

Dudes, it’s Tuesday. And in case you didn’t know/needed a reminder, this week is a short one thanks to Good Friday. Which means, it’s basically hump day TODAY. Which means, we’re halfway to the weekend. I have big plans to pig out on ham (no pun intended) and chocolate this weekend. Easter Feaster!

Just call me the bearer of good news. I am here to make you smile.

Beef with Snow Peas | Once Upon a Recipe

And if a short work week + a long weekend isn’t enough to turn the corners of your mouth upwards into a $%@#-eating grin, then I’ve got a back-up plan.

Take out fake out!

Beef with Snow Peas | Once Upon a Recipe

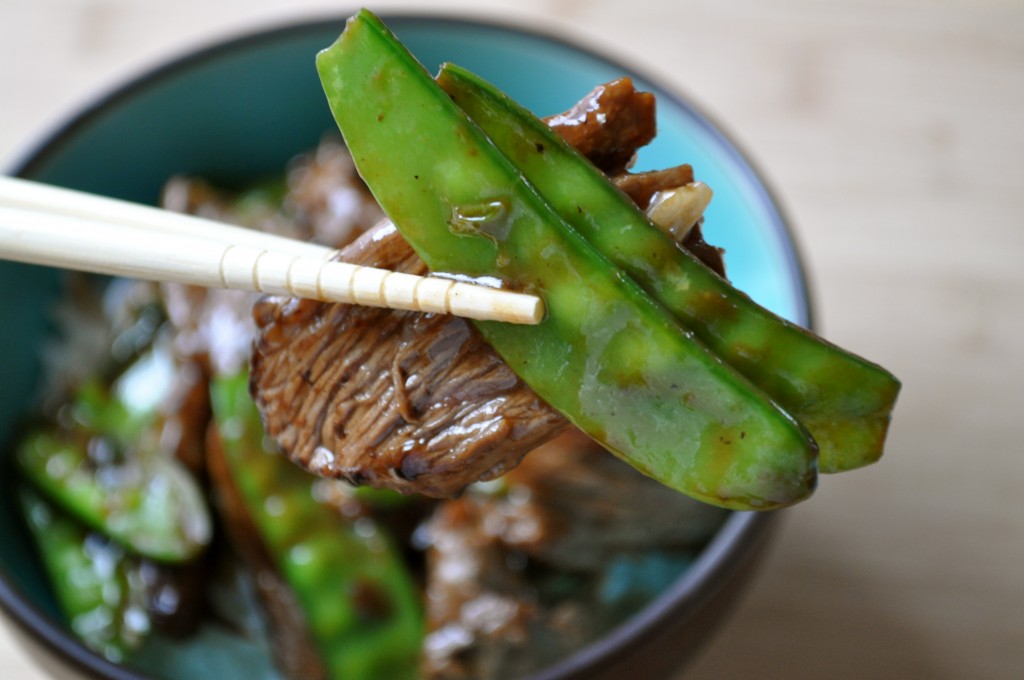
Indeed friends, you are mere minutes away from creating a delicious take-out-esque meal right in the comfort of your own kitchen. Put those Chinese food menus aside and your phones down. In all honesty, I’m not a big fan of Chinese take-out. I rarely crave it, and when I do eat it – as good as it may taste during it’s consumption – I always feel less than great about an hour afterwards. Thanks MSG…not.

Beef with Snow Peas | Once Upon a Recipe

This recipe comes from trusty Ree over at The Pioneer Woman. I first made this dish many months ago and was stunned by how easy and flavorful it is, despite its short ingredient list and quick prep and cook time. Yesterday, after a hectic day at work and a severe case of the Monday blues, I was ready to give in to a dinner of cereal/toast/cookies, or some combination of the three, when this dish came to mind. A quick stop at the grocery store + 20 minutes in my kitchen = saved. Before I knew it I was planted in front of my TV watching the Girls season finale (recorded from last weekend – umm, loved it!) with a tasty meal. This is good stuff people.

Life is short. Make yourself a delicious dinner.

Beef with Snow Peas | Once Upon a Recipe

Beef with Snow Peas (slightly adapted from The Pioneer Woman)

Serves 4-6.

1 pound flank steak, sliced very thin

1/2 cup soy sauce

3 TBSP. rice vinegar

2 TBSP. brown sugar

2 TBSP. cornstarch

1 TBSP. fresh ginger, minced

1 garlic clove, minced

2 cups fresh snow peas, ends trimmed

1/2 cup chopped scallions (about 4-5)

2 TBSP. olive oil

4 cups cooked jasmine rice

Combine the soy sauce, rice vinegar, brown sugar, cornstarch, ginger, and garlic in a small bowl. Place the sliced flank steak in a large bowl and pour half of the mixture over top, tossing to coat. Set the remainder of the marinade aside.

Heat the olive oil in a wok over hight heat. Add the snow peas and cook for about a minute, stirring constantly. Transfer the cooked snow peas to a plate and set aside. Allow the pan to heat up again to cook the steak. Add half of the steak to the pan in a single layer, along with half of the scallions. Allow the steak to cook for a minute and then turn over, cooking for an additional 30 seconds. Transfer to a clean plate. Repeat with the remaining steak and scallions.

Add the first batch of steak back to the wok, along with the snow peas and remaining marinade. Stir for another minute, then remove from heat. Serve immediately over rice.

Beef with Snow Peas | Once Upon a Recipe

PS. I am on dessert-making duty for two Easter dinners this weekend. Any suggestions?!

Stuffed to the Gills | Salmon Stuffed with Spinach, Sun-Dried Tomatoes, and Feta

Stuffed Salmon | Once Upon a Recipe

Da-dun-tss. I’m not sure what is more hilarious – my lame pun (stuffed to the gills) or the fact that da-dun-tss is actually defined by Urban Dictionary and my name is totally used in the example. Check it. Anyways…

Want to know how to really impress someone? Anyone…a family member? A friend? A member of the opposite sex (or same sex, if that’s your thing)? (whether or not you’re trying to woo said person is totally optional, but preferred)

…cook for them! And don’t just cook anything. Cook something that totally looks and tastes like you put way more effort into it than you actually did!

Stuffed Salmon | Once Upon a Recipe Stuffed Salmon | Once Upon a Recipe

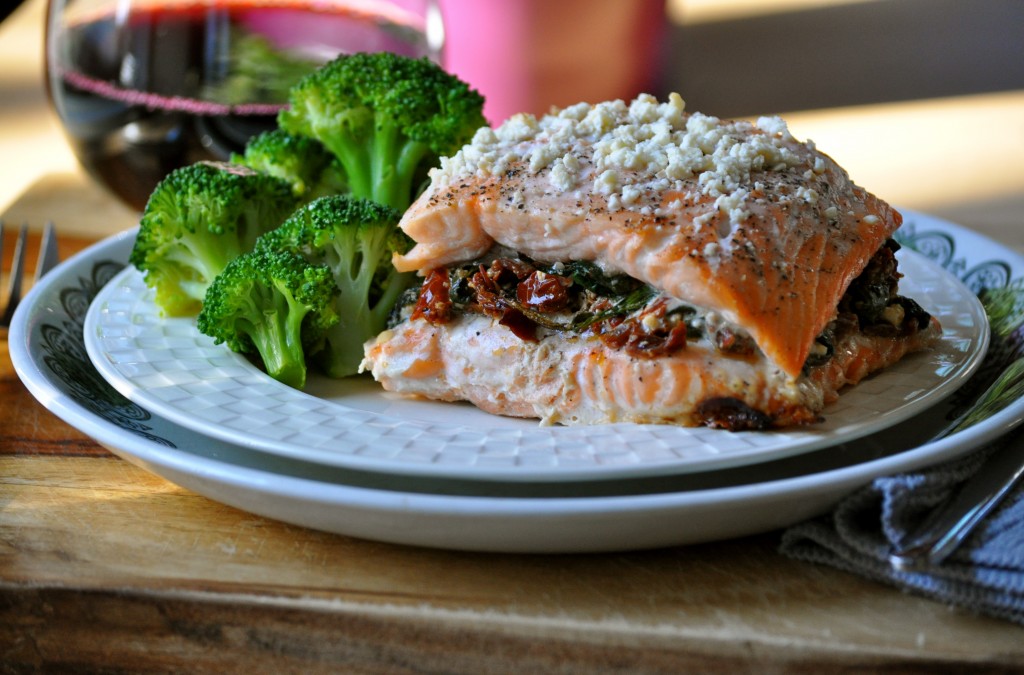
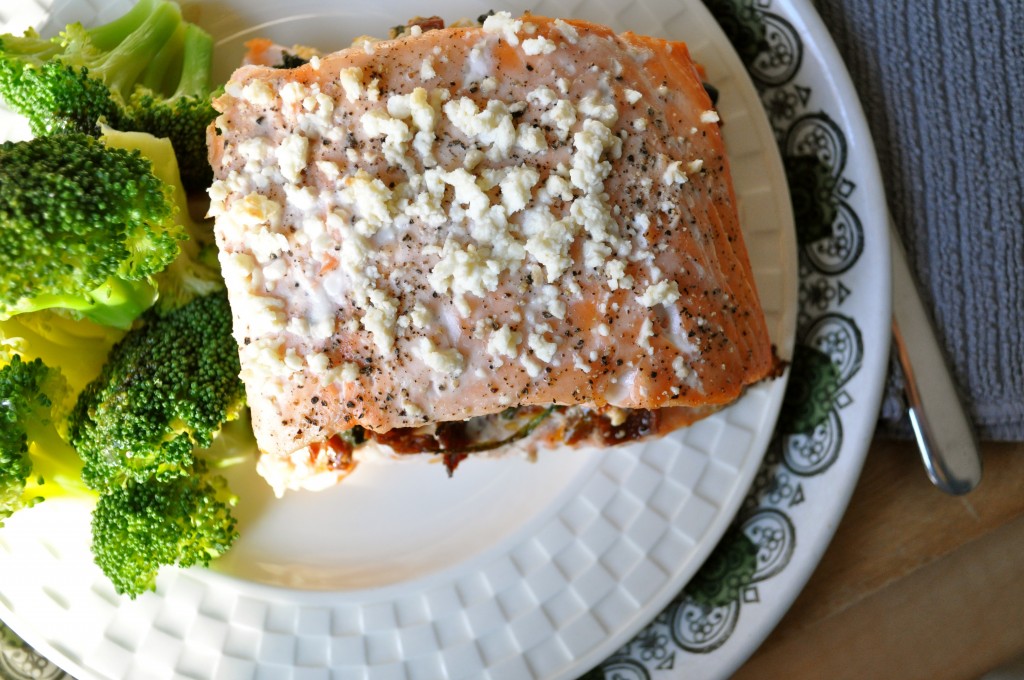
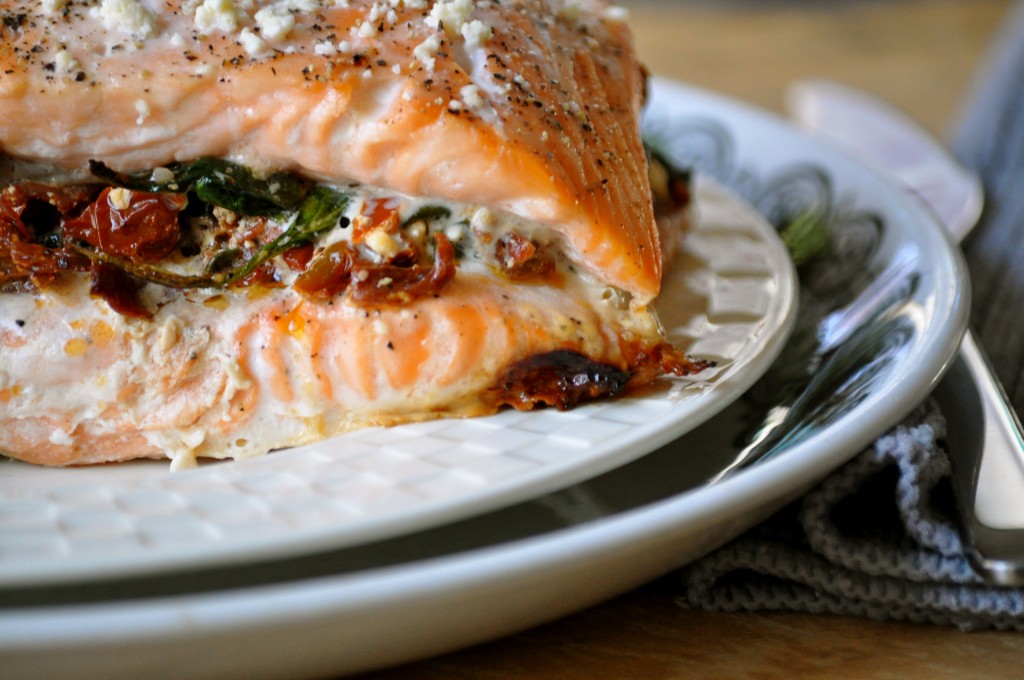
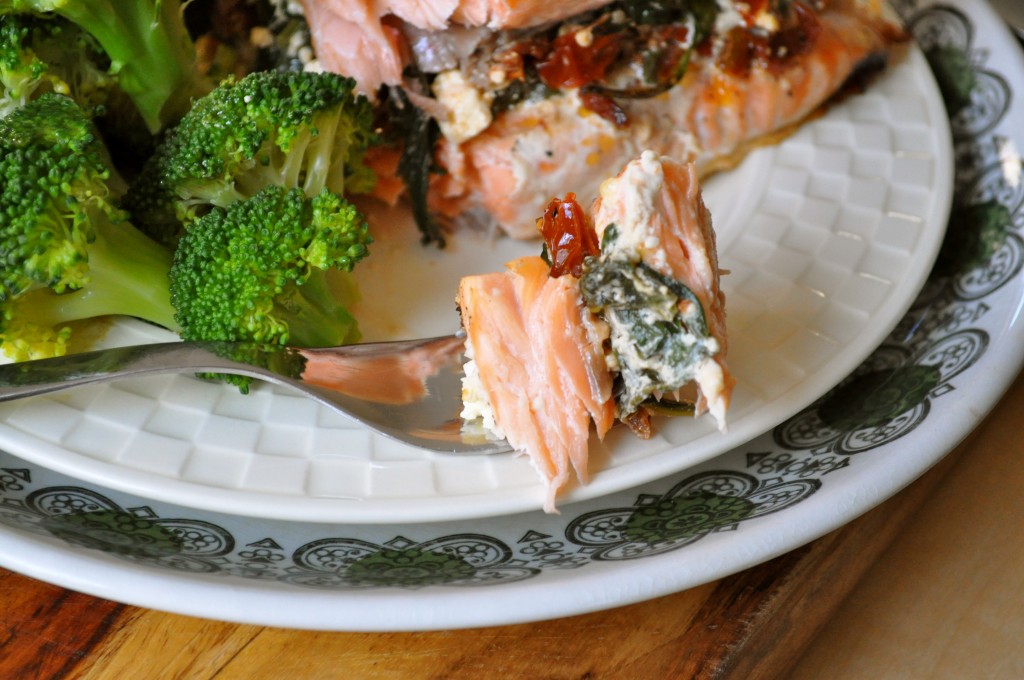
This salmon is a fine example. I mean, look at it. Two thick salmon fillets, perfectly cooked, and sandwiched around a ridiculously delicious filling of spinach, sun-dried tomatoes, and feta cheese. It’s beautiful! And totally looks and tastes gour-met. I’m confident enough in the wow-factor of this salmon that I’m prepared to give you a money-back guarantee. If you make this for someone and they don’t like love it, I will have a batch of freshly baked cookies couriered to your doorstep. Call it a cookie-back guarantee. (But play nice and refrain from testing my theory on someone who is opposed to fish, ’cause obviously that ain’t gonna work).

Stuffed Salmon | Once Upon a Recipe

Seriously. My Dad makes a mean grilled salmon, but this comes in at a very close second. And it’s as easy as can be! The inspiration came from a dinner I had at a friend’s place (hi Bev!), where she made a similar stuffed salmon, but with goat cheese. I never got her recipe but tried to recreate it at home and decided to use feta, since that’s what I had on hand. The feta is a little bit less overpowering than goat cheese, which worked really well here, since some of the other flavors (like the sweetness of the sun-dried tomatoes) were able to shine through. Serve the salmon with Orzo with Parmesan and Basil, and a steamed green like broccoli or asparagus, and you’ve got yourself an incredible, yet supremely easy meal. Sure to win over the hearts of many.

Please take me up on my offer. I like being right.

Stuffed Salmon | Once Upon a Recipe

Salmon Stuffed with Spinach, Sun-Dried Tomatoes, and Feta

Serves 2-3 generously. If feeding a larger group, increase the size of the salmon fillets and double or triple the filling ingredients. Also be prepared to adjust the baking time. Make sure that your fillets are very similar in size and have a relatively even thickness throughout. If the fillets are thick in the centre and thin at the ends, you will end up with cooked ends and an uncooked centre, or a cooked centre and overcooked ends, which would be a real shame. 

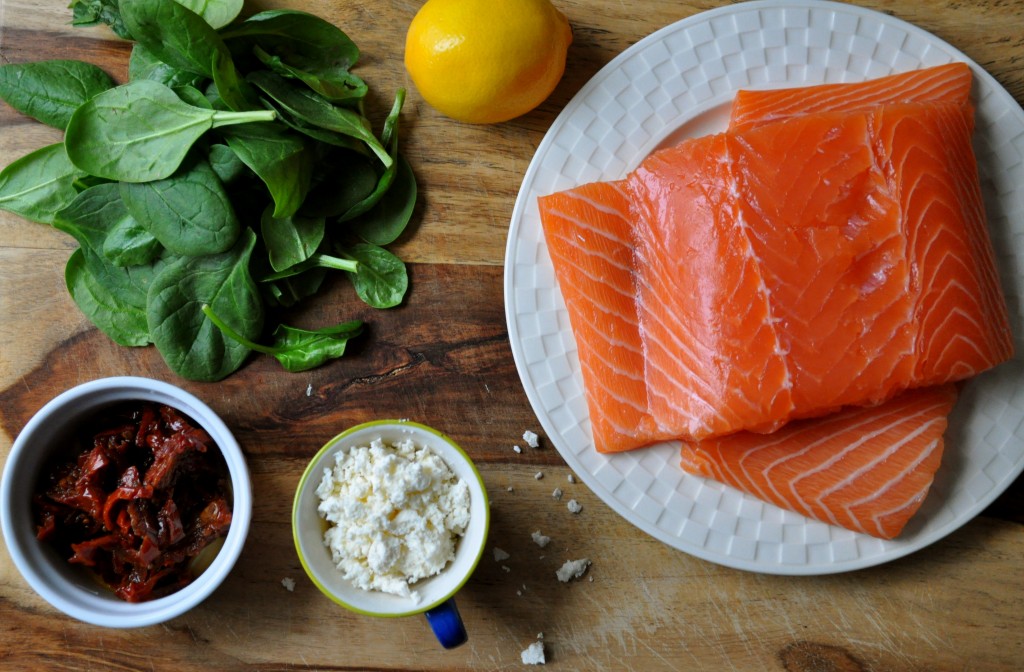
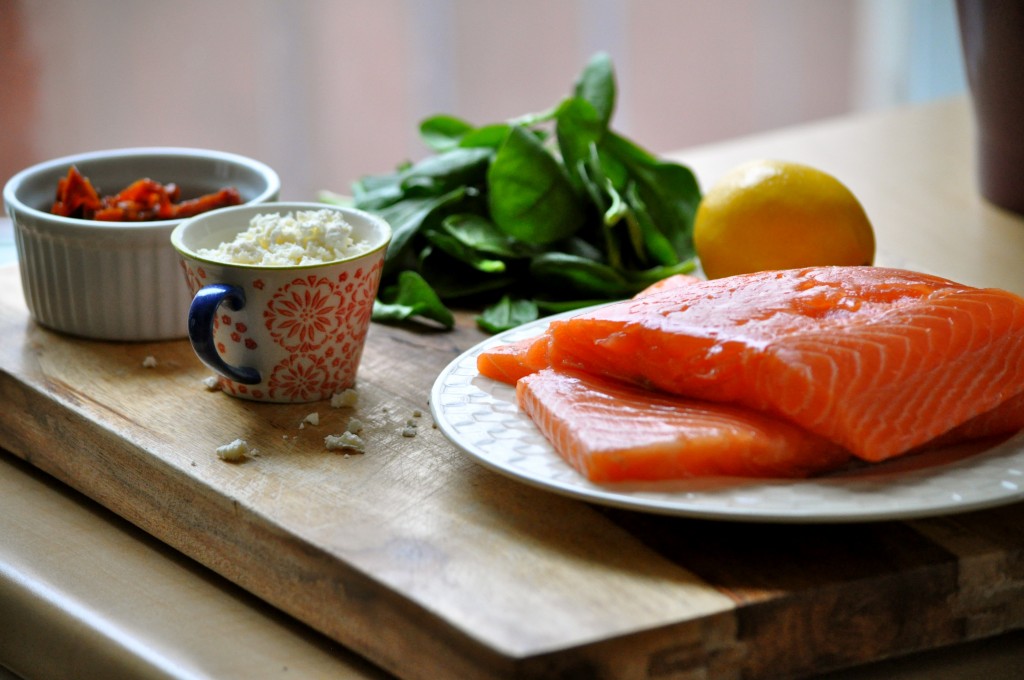
2 fresh salmon fillets (skinless), about 1/2 pound each and 1 inch thick

1 TBSP. olive oil

2 heaping cups of fresh baby spinach, roughly chopped

1/3 cup sun-dried tomatoes, packed in oil (drained and roughly chopped)

1/3 cup + 2 TBSP. crumbled feta cheese

2 cloves of garlic, minced

1 lemon, halved

Salt and pepper, to taste

Preheat the oven to 375°F. Spray a shallow casserole dish or baking sheet with non-stick spray. Lay one of the fillets down in the baking dish. Heat the olive oil in a skillet over medium-heat and saute the spinach until just wilted, about 1 minute. Add the sun-dried tomatoes and the garlic, and stir for another minute. Remove from heat and stir in 1/3 cup of feta cheese.

Spread the mixture evenly on top of the fillet. Squeeze half of the lemon over top of the filling. Lay the second fillet over top of the first, lining it up as evenly as possible. Squeeze the other half of the lemon over top, and then liberally sprinkle with salt, pepper, and the remaining feta cheese. Bake for 25-30 minutes, or until the salmon is just cooked through. Please note that the baking time will vary greatly depending on the size and thickness of your salmon fillets, so adjust accordingly. I suggest keeping a close eye on it after the first 20 minutes.

Stuffed Salmon | Once Upon a Recipe

Now get to that woo-ing.

Some Things and a Pizza (Zucchini, Tomato, Feta, and Balsamic)


Well hello there strangers. Long time no see. Don’t worry, I’m not blaming you. I take full responsibility for our lack of chatting lately, and the lack of sharing going on around here. You see, I’ve been on holidays for the last week and a half. I wish I could say that I’ve been on a beach or lounging lakeside somewhere far away from here, sipping on cocktails and exerting myself as little as possible. But no, this summer I’m having a little staycation right within my humble abode. As lovely as vacations are, staycations can be rather delightful as well. Staycations allow a person to forego the stress of packing, gratuitous spending, long days of traveling, and instead allow one to do things that need doing around the house (ie. tackling that dang room, which for the record, I still haven’t tackled), relax less than should be necessary while on holidays, and be productive with important projects, such as one’s food blog. While I am definitely succeeding with the first two things, clearly I have missed the mark on that last one. #epicfail


Trust me, I had the best of intentions going into this staycation of mine. I had envisioned baking or cooking up something fabulous on a daily basis, sharing a recipe with you every other day, and basically overstaying my welcome on the interwebs over these couple of weeks. But the thing about staycations is, they allow you to really live, and put responsibility aside when other things come up – things like invitations for patio drinks at 2pm/4pm/8pm on a beautiful summer day, a sporadic trip to the park to sit and read a good book, sleeping in way later than necessary, random backyard/living room yoga, or quick little road trips to visit friends that you just don’t see often enough. My mantra for my holidays? You only live once. YOLO! And sometimes, when you’re in the thick of YOLO’ing, blogging takes a back seat for a short while. PS. If you require further deets about YOLO’ing, Joy and Tracy got ya covered.


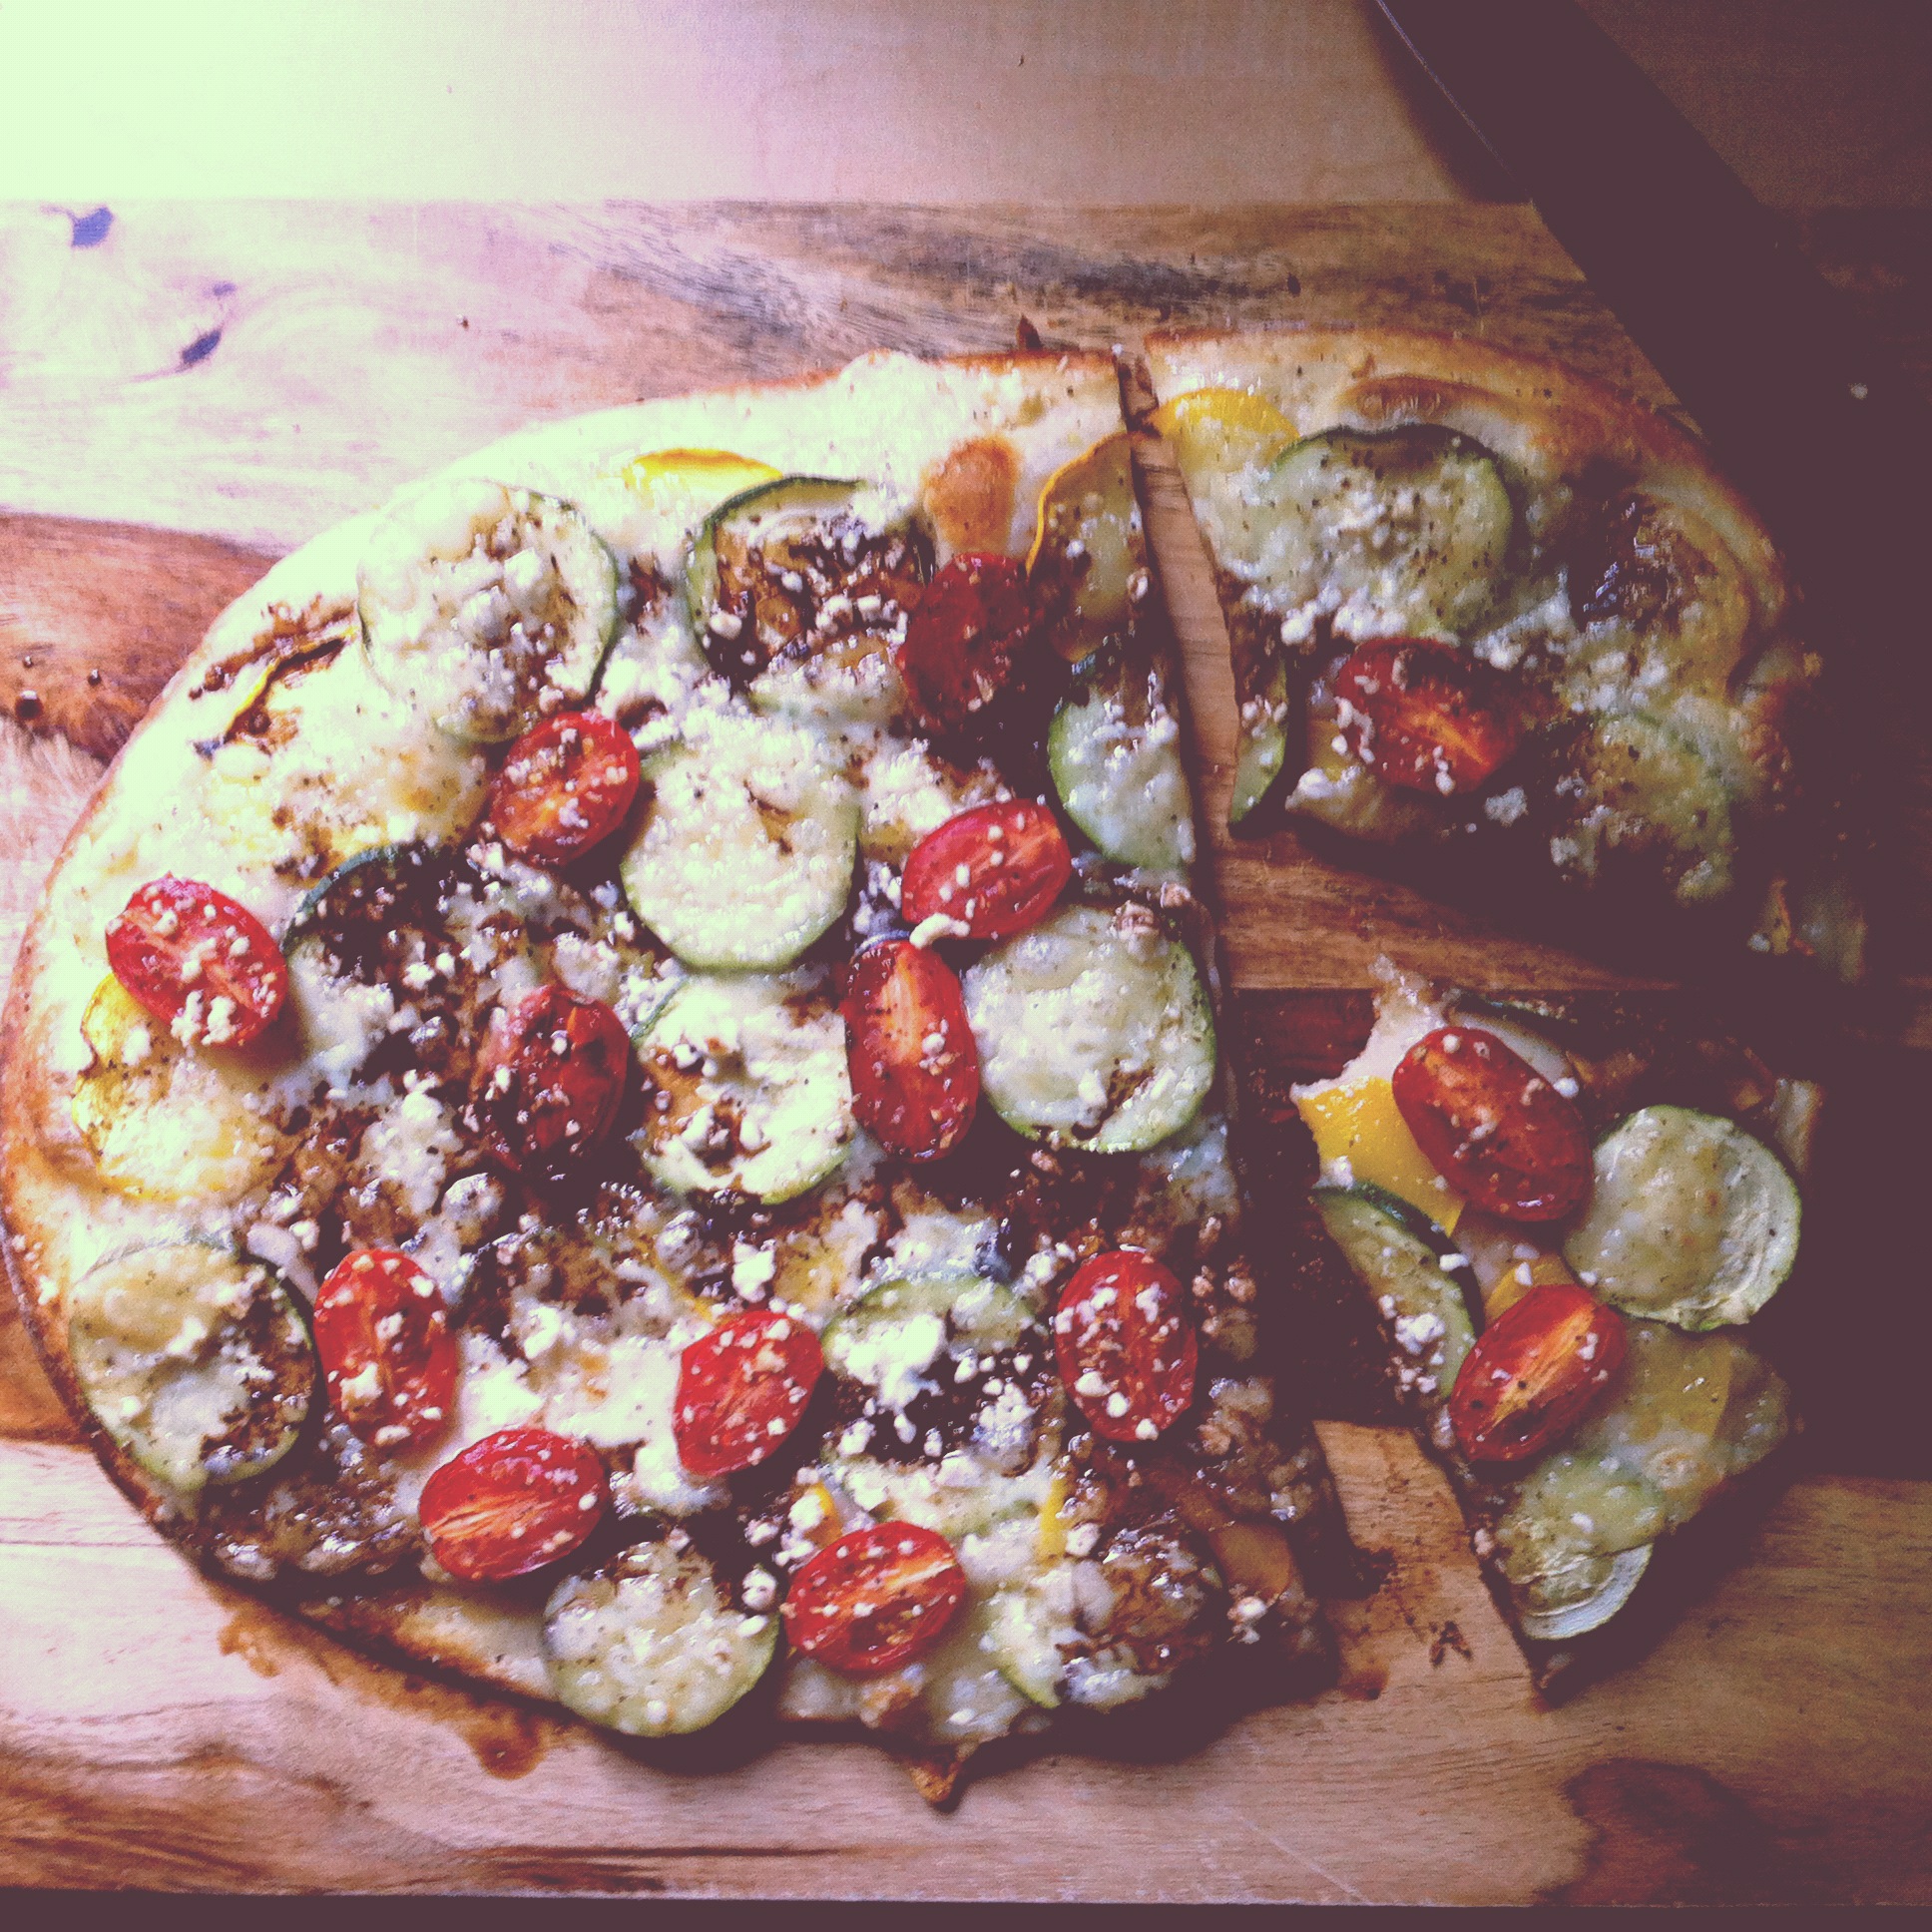
However, I did manage to whip up this simple and delicious summer pizza, and after taking the first bite, I snapped a couple of photos so that I could share it with you. But first, a couple of things…

First of all, I joined Pinterest. Finally! I realize I’m a bit behind the eight ball on this one, but better late than never. Too be honest, I was a little stumped by Pinterest when I first checked it out a few months ago (pins? boards? say what?), but a friend gave me a quick tutorial last week (thanks J!) and I am officially obsessed. OBSESSED. If you wish to follow me, you can search for me under onceuponarecipe.

Secondly, I caved on another social media front and now Once Upon a Recipe has a Facebook page! Check it out here.


And now, onto the good stuff, a fabulous pizza that I created last week. What started out as a venture to use up some of the market produce that was on its last legs in my fridge ended with one of the most delicious pizzas I’ve created in a long time. I don’t really want to call it a recipe, but here are some guidelines for you.

Zucchini, Tomato, and Feta Pizza with Balsamic Reduction

Start off with a pizza dough of your choice. I used some fresh dough from my local Italian market, but if you want to make your own, go for it! I have a great recipe for whole wheat pizza dough that you can find here.

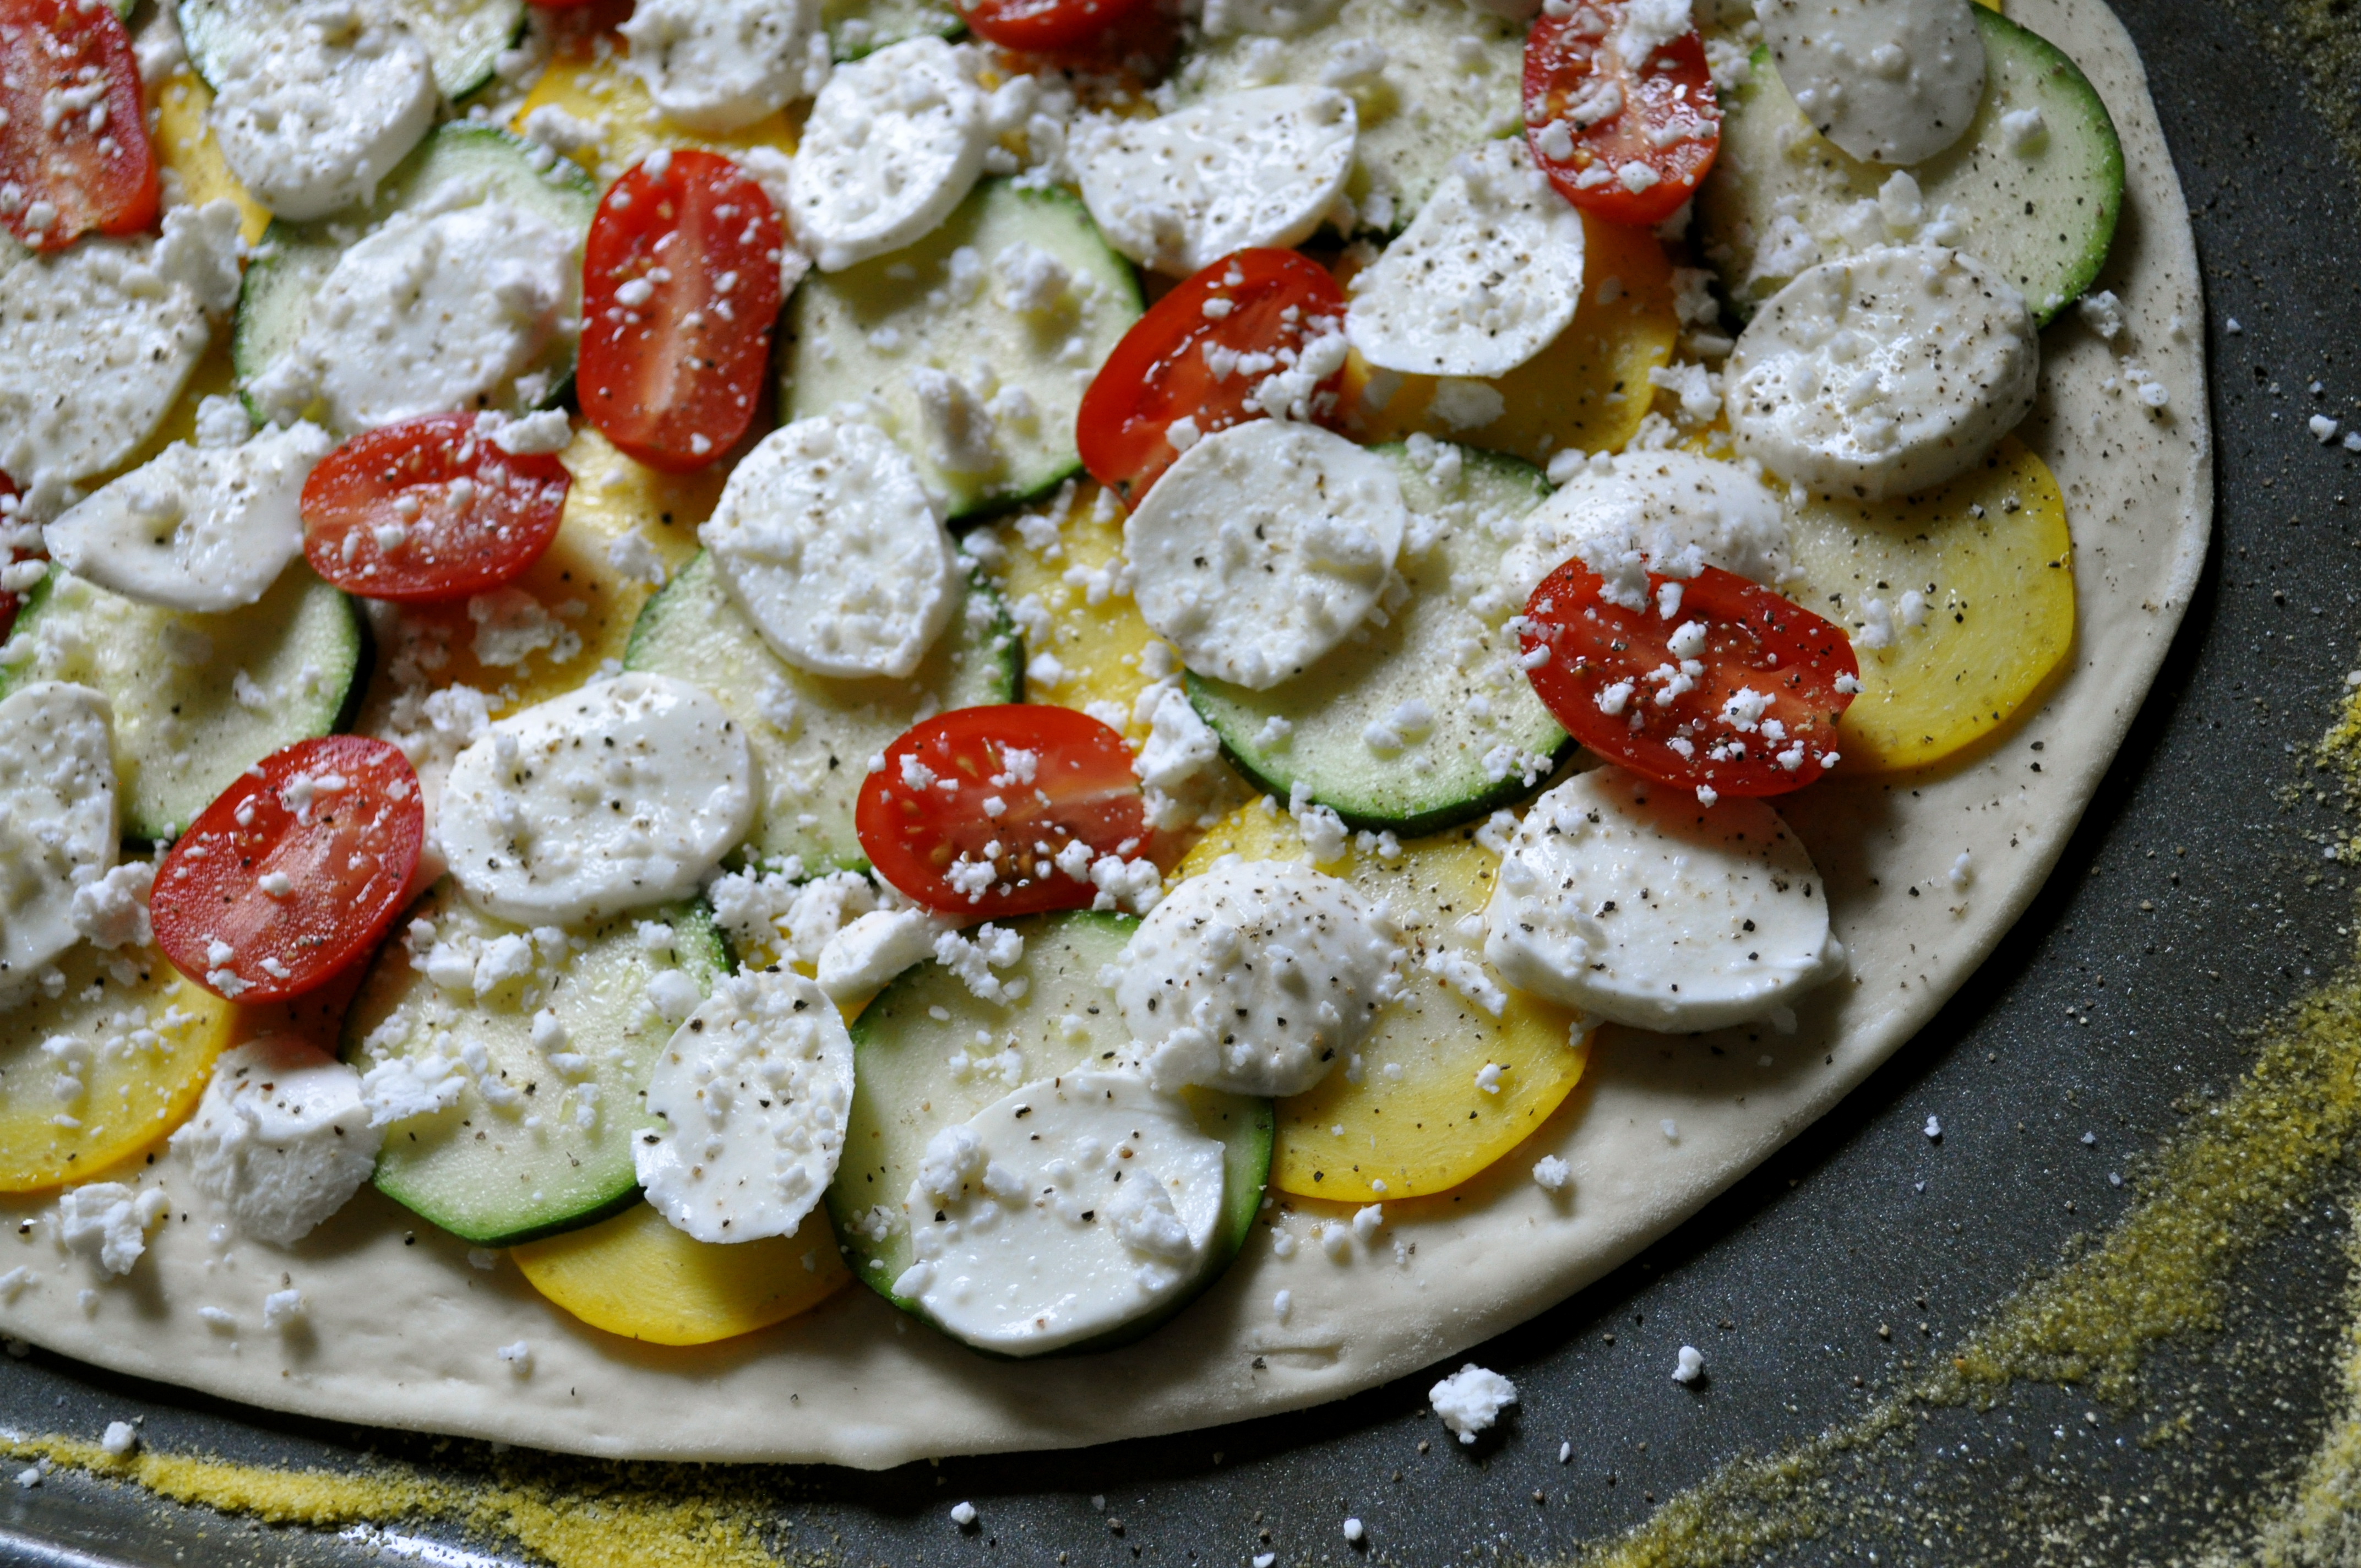
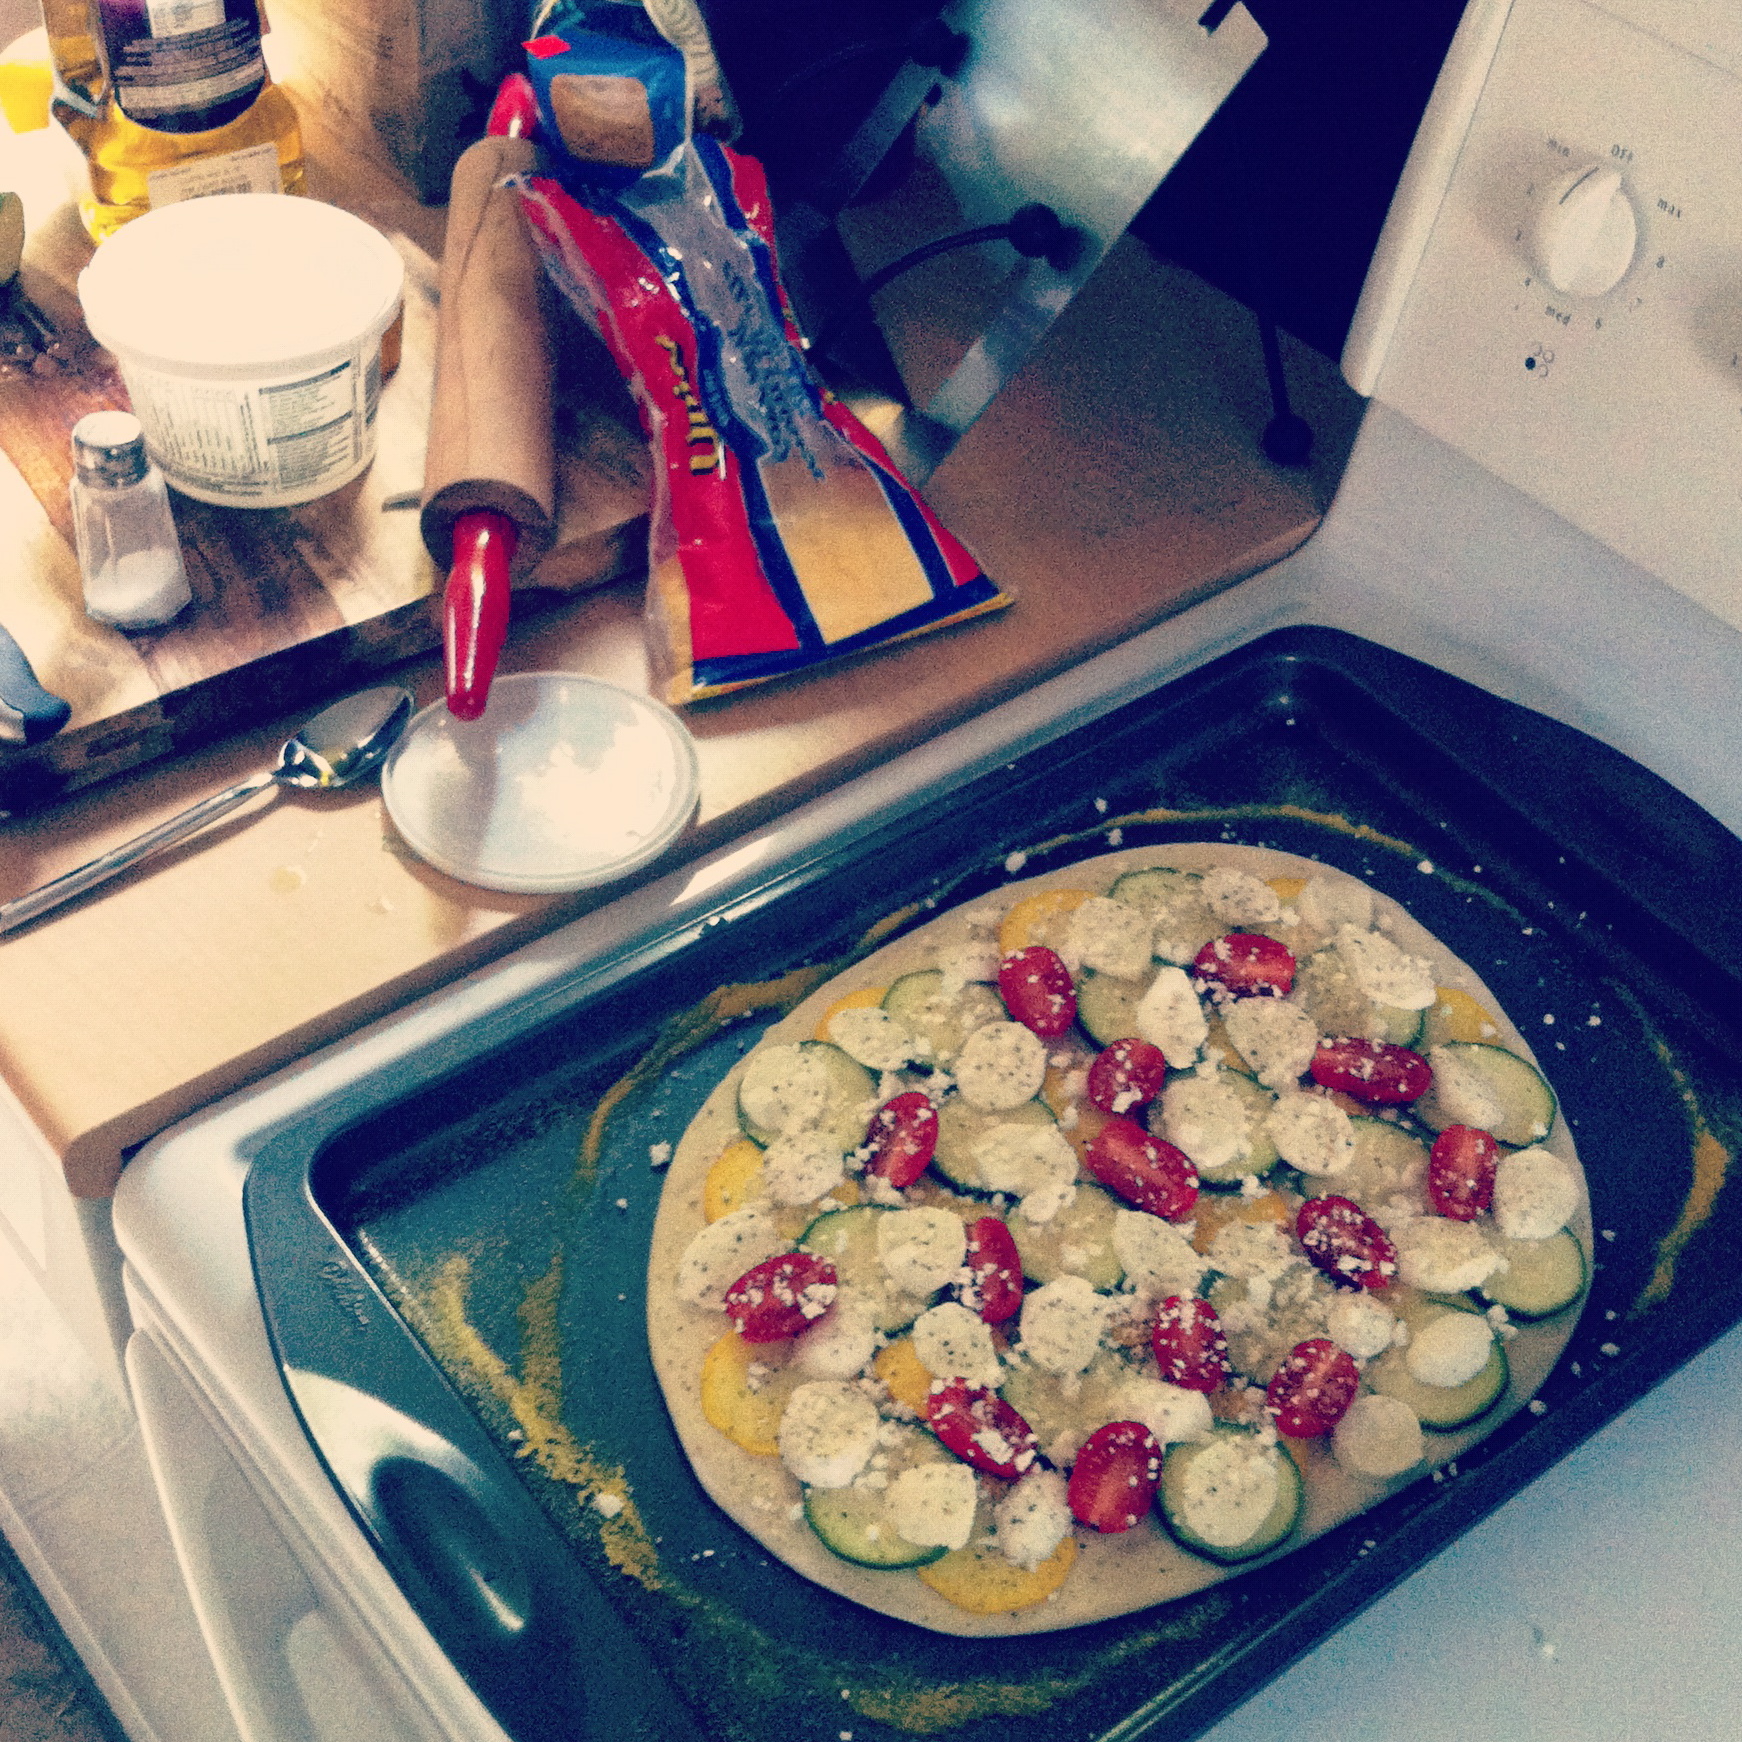
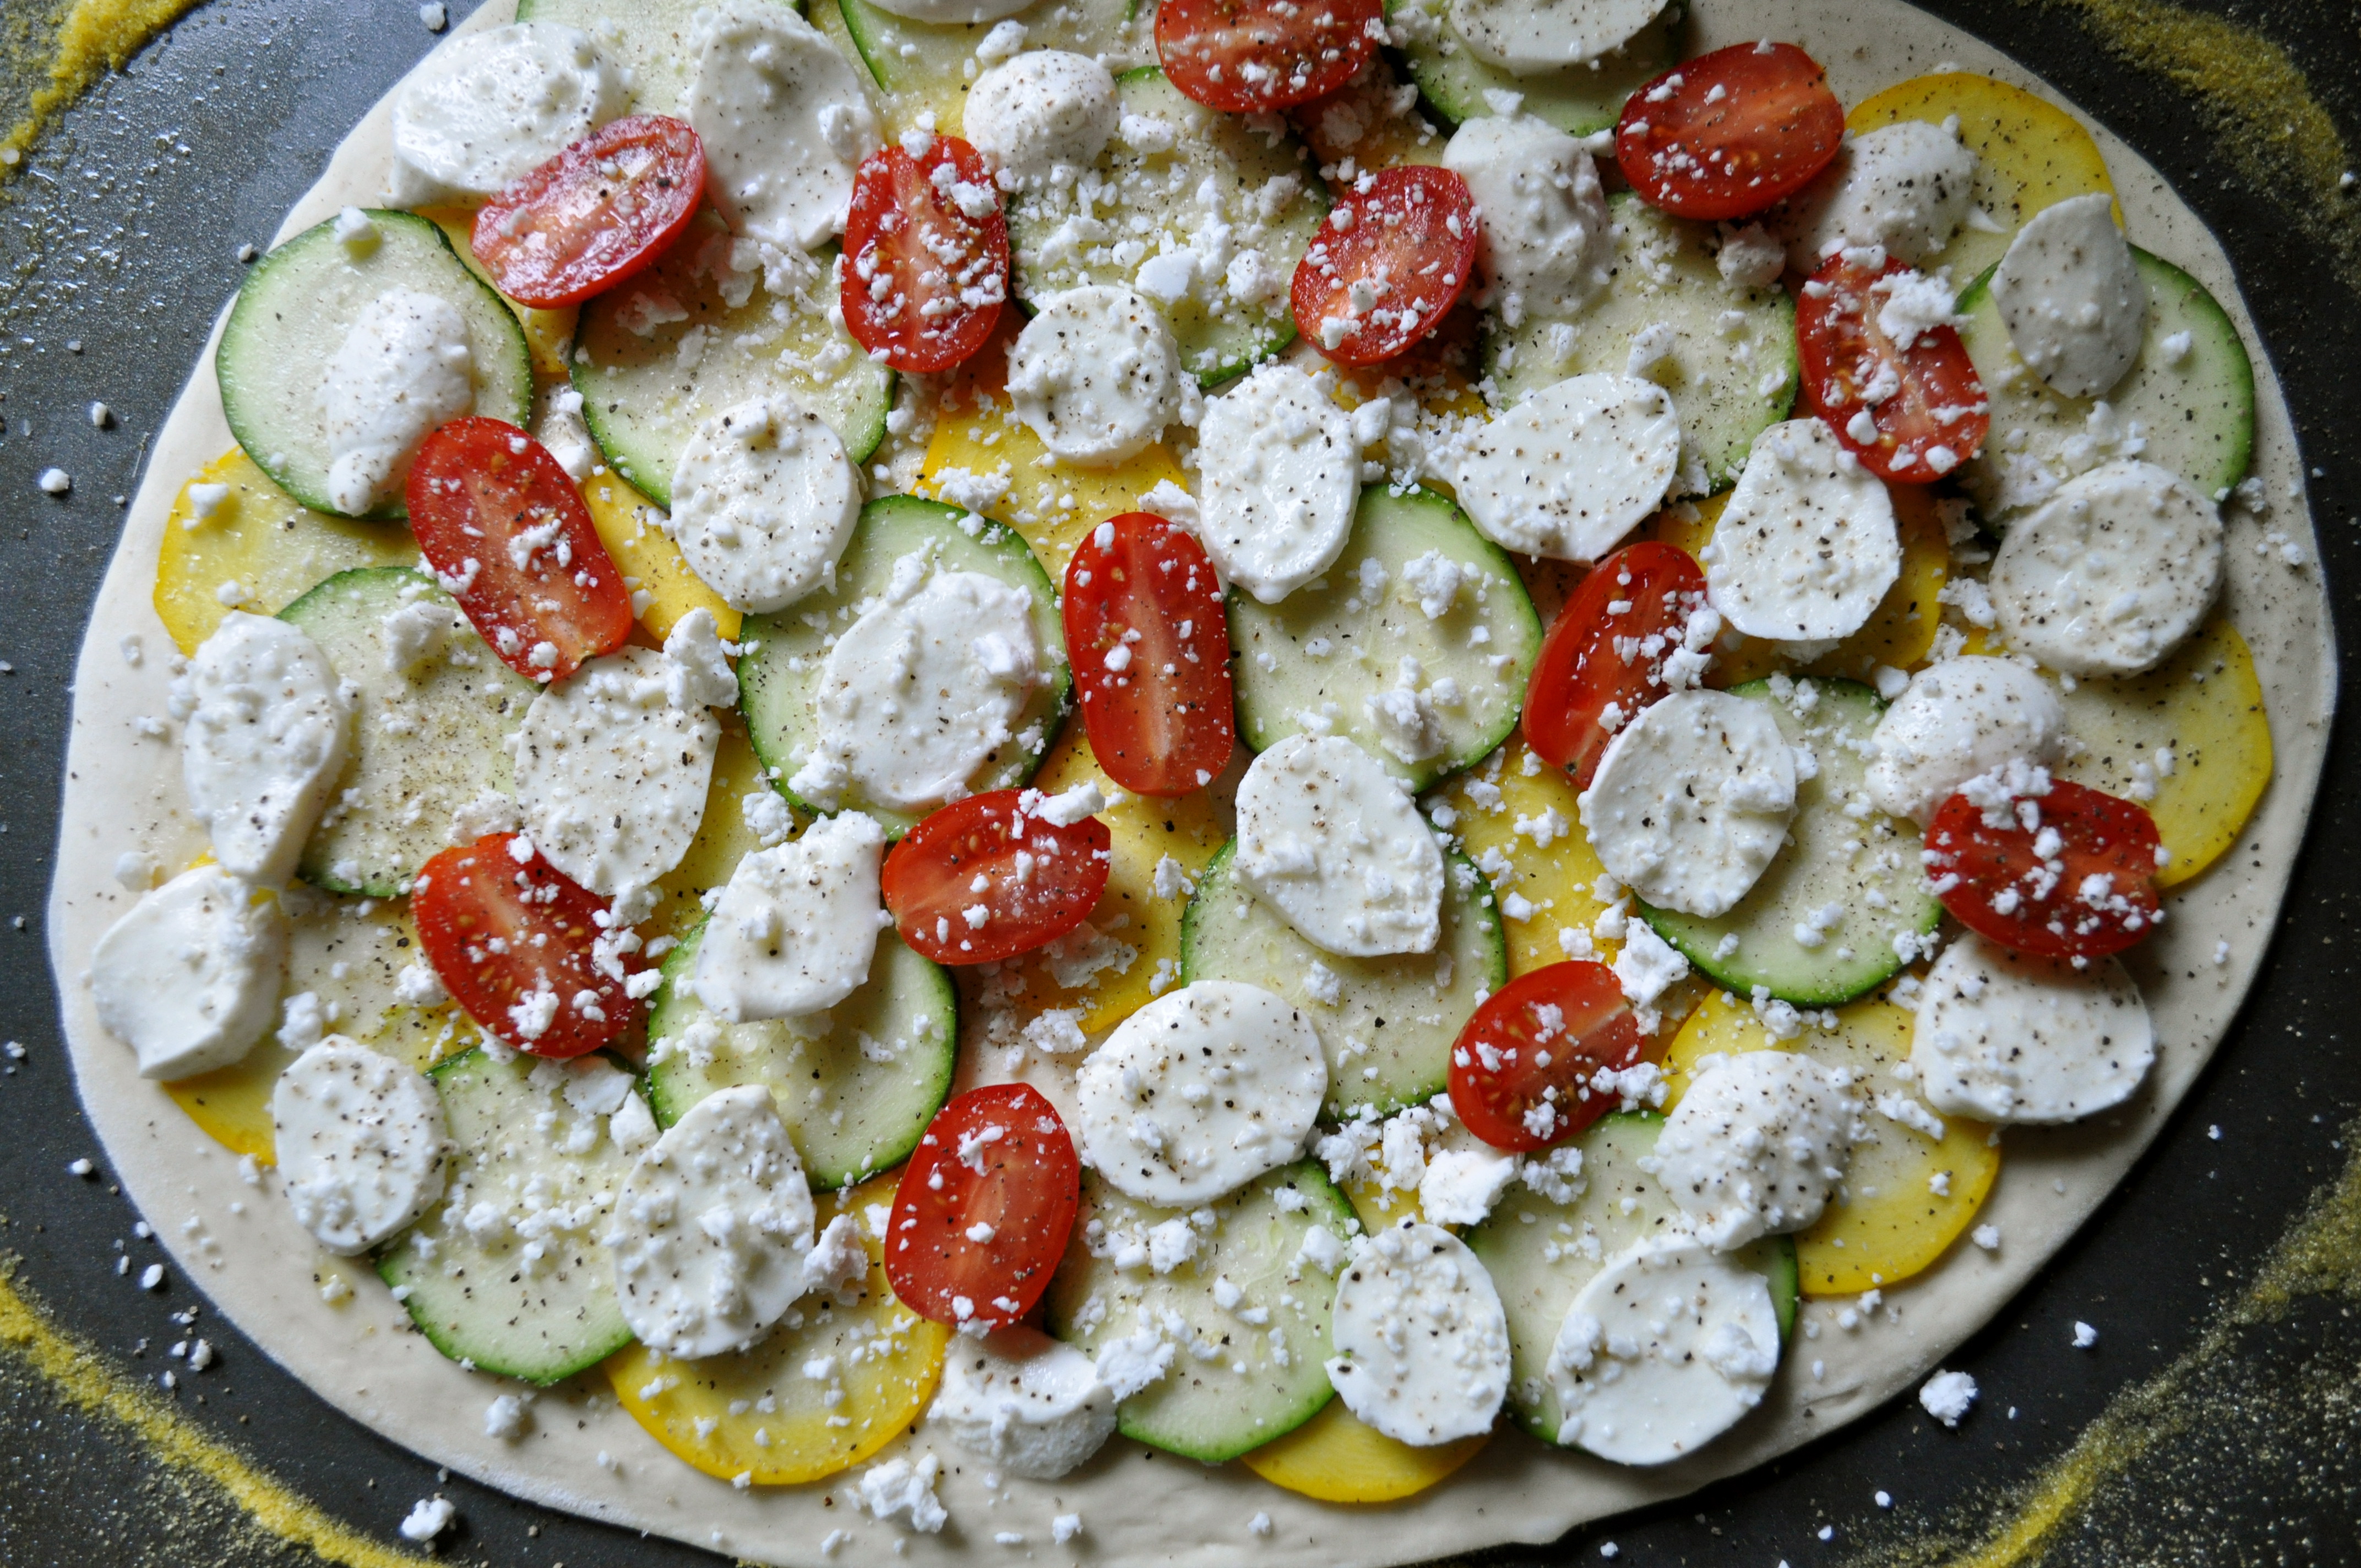
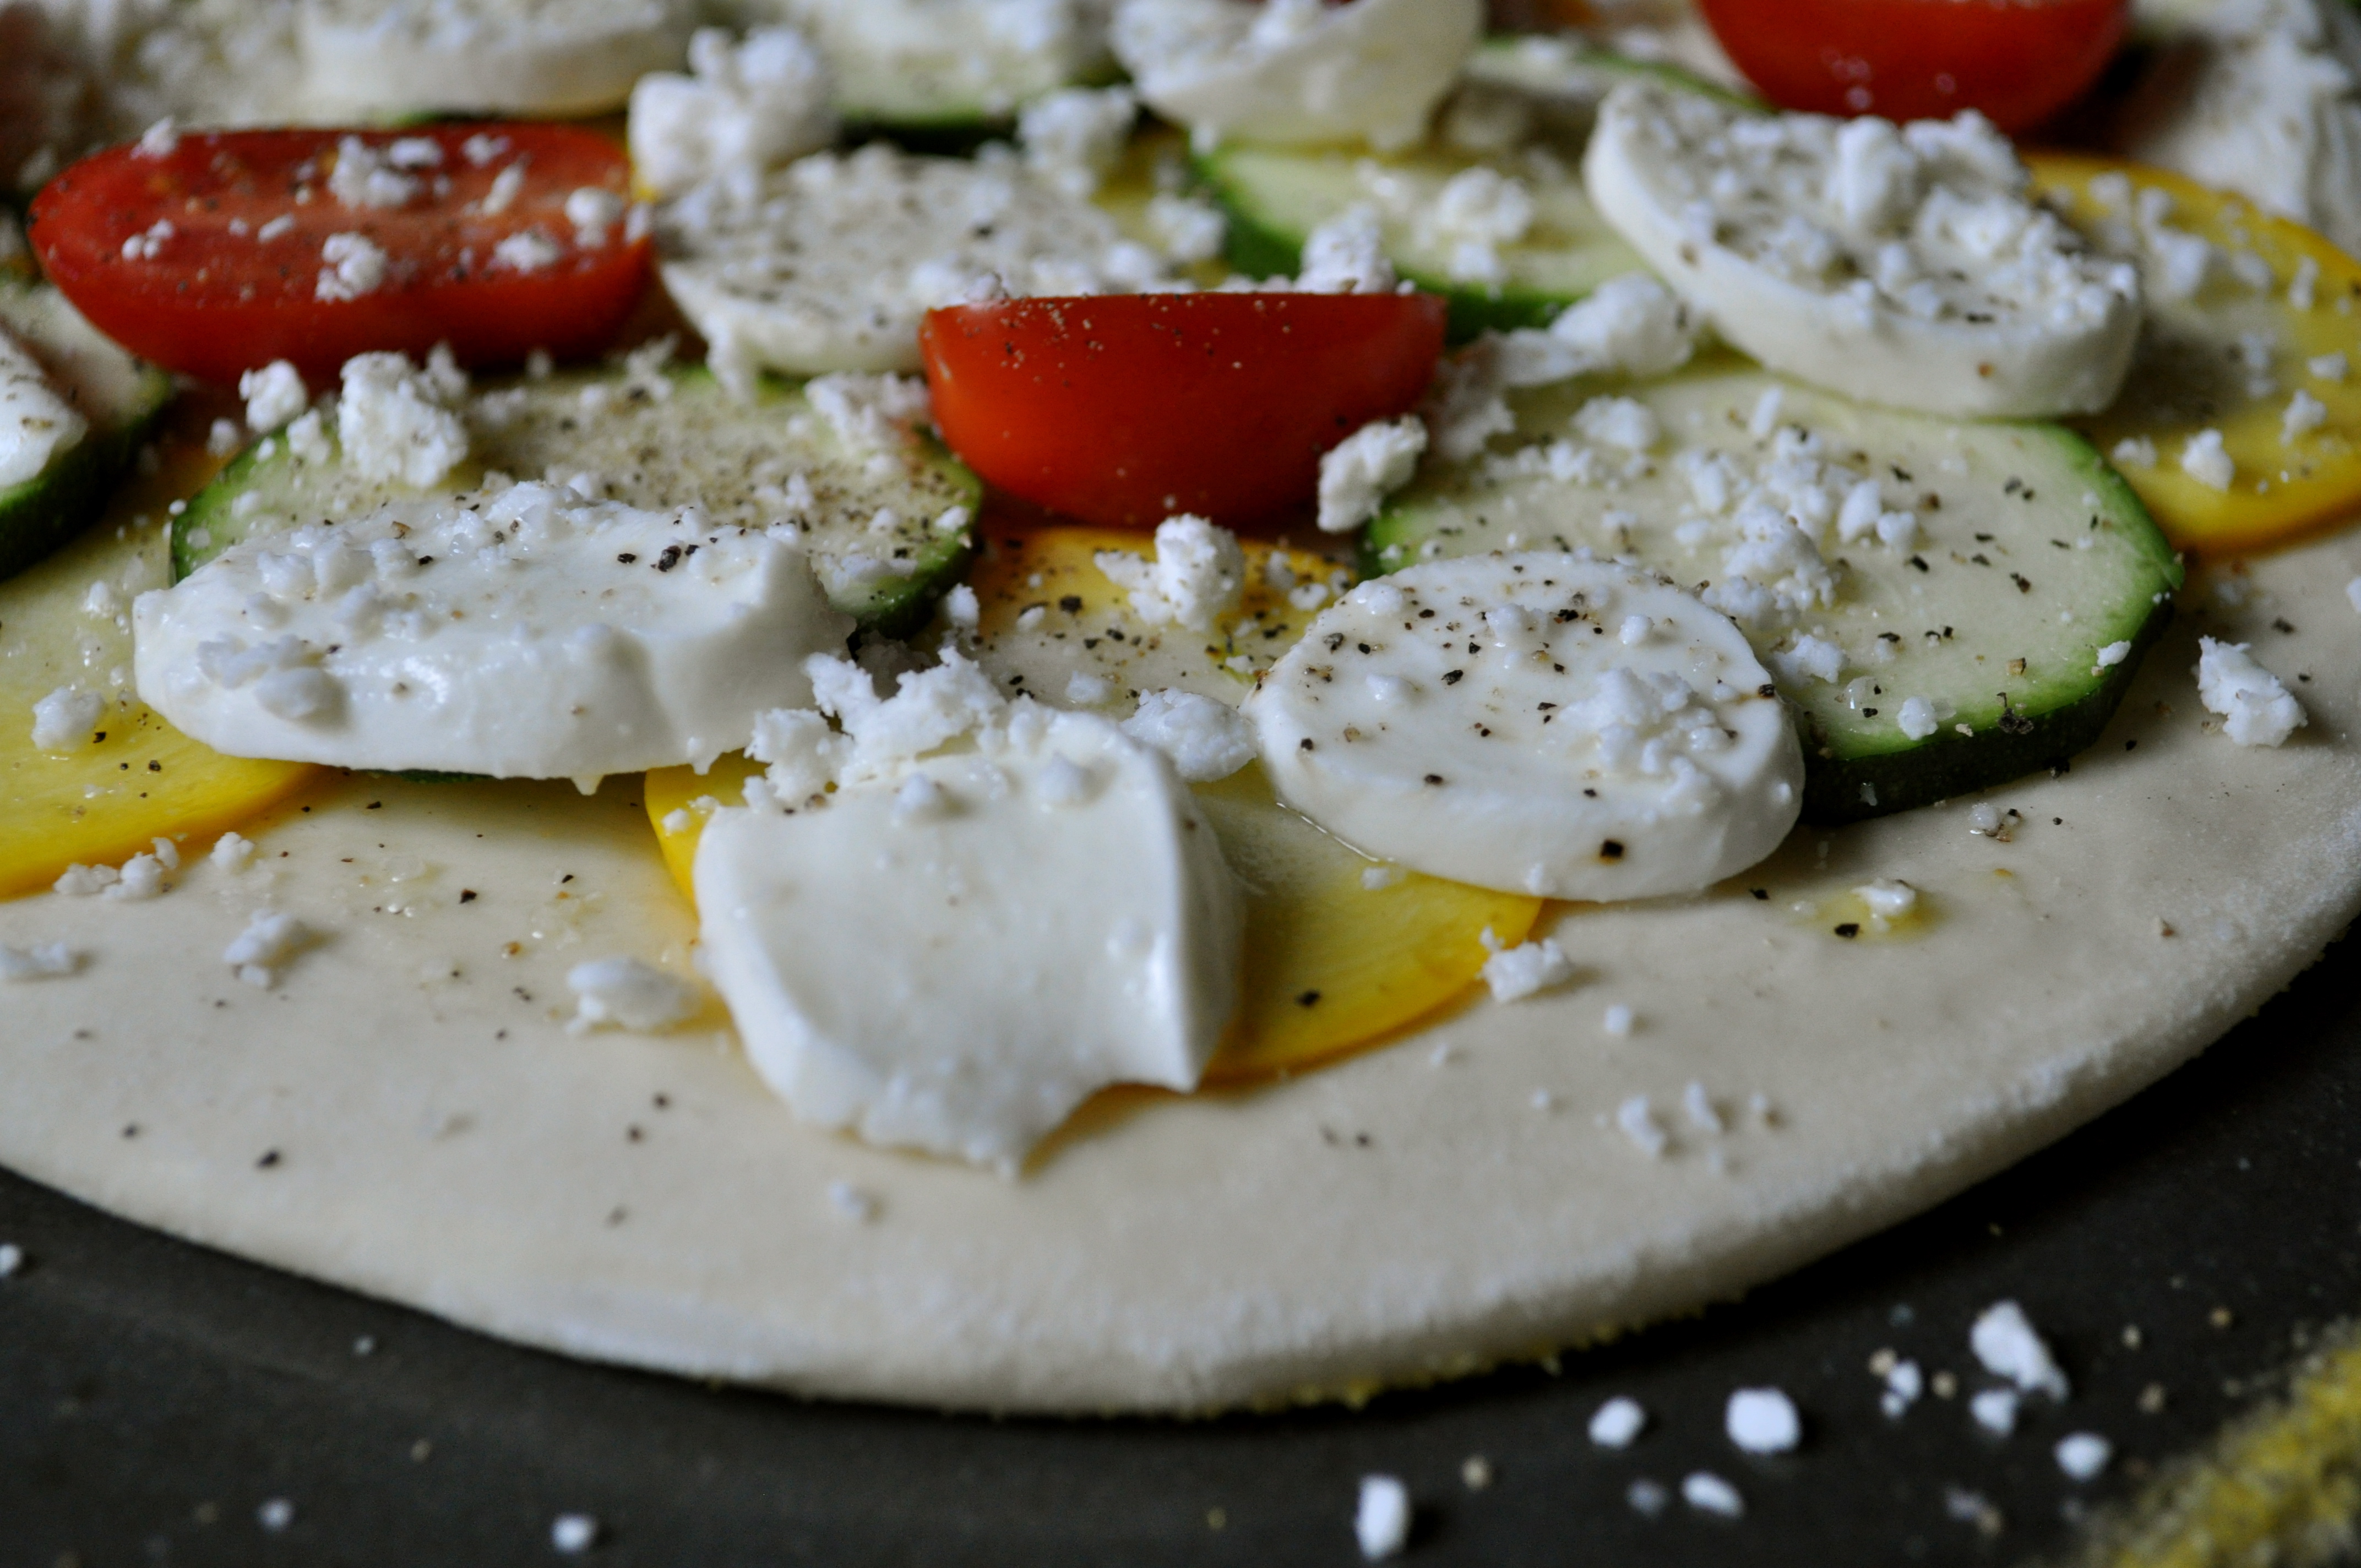
Preheat your oven to 425°F. Spray a large baking sheet with non-stick spray and sprinkle lightly with cornmeal. The cornmeal will help create a nice crispy crust! Stretch out your dough to the desired thickness (I made mine quite thin), and brush with olive oil. Cover with thinly sliced veggies of your choice – I used zucchini and grape tomatoes, as well as thinly sliced fresh mozzarella. Sprinkle with crumbled feta cheese, and season with good sea salt (I used fleur de sel) and freshly ground black pepper. Bake for 16-20 minutes, or until the crust is golden brown and the cheese is bubbly.

You can eat this pizza as is, and it will be delicious. But if you want to take it over the top, make a quick balsamic reduction (pour 1/4 cup of balsamic vinegar into a small saucepan and allow to reduce to about half over medium heat), and drizzle it over the hot pizza. OMG. YOLO, indeed.


More recipes coming up soon friends, pinky swear! xoxo

Leaving On a Jet Plane | Chicken, Spinach, and Feta Burgers

All my bags are packed, I’m ready to go…

I’m standing here outside your door (well, I’m actually sitting at my computer)…

I hate to wake you up to say goodbye (but hopefully I’m not waking you, and you’re reading this when it’s convenient for you)…

But the dawn is breakin’, it’s early morn (almost)…

The taxi’s waiting, he’s blowin’ his horn (actually, my mom is picking me up and driving me to the airport)…

Already I’m so lonesome I could die (not really)…I’m pretty excited to visit my BFF in the Big Apple!

I’m leavin’ on a jet plane…

Don’t know when I’ll be back again (next week)…

Oh babe, I hate to go…(like I said, I’m pretty excited)…

You get the drift. I’m blowin’ this popsicle stand! But before I go, I wanted to share a recipe for some mega delicious and simple chicken burgers that I made last week. They were a huge hit with my dinner guest, and I will definitely be making them again and again this summer. I cooked these up on my little countertop grill, but if you’re lucky enough to own a barbecue, get on out there and grill these pups over an open flame. Serve ’em up with homemade fries (potatoes cut into wedges, tossed with olive oil and salt and pepper, and baked at 400°F for about 35-40 minutes) and a salad, and you’ve got yourself a rather spectacular spring/summer meal.

Chicken, Spinach, and Feta Burgers (adapted from Kitchen Parade)

1 pound ground chicken

6 ounces fresh spinach

1/2 cup feta cheese, crumbled

2 tablespoons bread crumbs (I used Panko)

1/2 tsp. garlic powder

1 tsp. dried basil

1/2 tsp. salt

1/2 tsp. pepper

Fresh buns

For toppings: tzatziki sauce, sliced cucumbers, sliced tomatoes

Rinse the spinach leaves in a colander, then place in a bowl in the microwave and cook on high until tender, for about a minute. Let cool, then roughly chop. You could also use frozen spinach that has been thawed and drained.

Combine the spinach, feta, bread crumbs, garlic powder, basil, salt and pepper and mix well. Gently stir in the chicken and form into five burgers (about half an inch thick). Heat a grill pan on medium high, spray with non-stick spray. Cook the burgers for about 5 minutes on each side, or until done. My highly technical method involves cutting into one of the burgers to determine if it’s cooked through. But if you want to get all fancy, go ahead and use a meat thermometer.

To assemble, grab a bun (I toasted mine slightly under the broiler), grab a burger, and pile high with a generous dollop of tzatziki sauce, cucumbers, and tomatoes. Seriously, those are the only toppings you’ll need.

Enjoy friends, and have a wonderful week! 🙂

Choose Your Own Adventure | Mac ‘N Cheese, Your Way

Remember those “choose your own adventure” books that were popular when you were a kid? The ones that allowed you to determine the main character’s actions and the plot’s outcome? Every few pages you would be given two or three choices, each leading to more choices and ultimately to one of many different endings.

Life is kind of like those books, when you think about it. Every day we are faced with choices. What to have for breakfast, which route to take to work, to strap on those running shoes and pound out that run or sit on the couch and drink wine, what to make for dinner, whether or not to smile at a stranger (which is almost always a good idea, in my opinion).

And all of these choices, no matter how small they might seem at the time, affect the larger twists and turns that our lives take. The moral of the story? Choose wisely friends. But at the same time, don’t take life too seriously. Having fun is important too.

Did you know that you can have fun with mac ‘n cheese? Did you have any idea how many choices you are presented with when it comes to making this delicious and comforting dish?

Let’s talk about these choices, shall we?

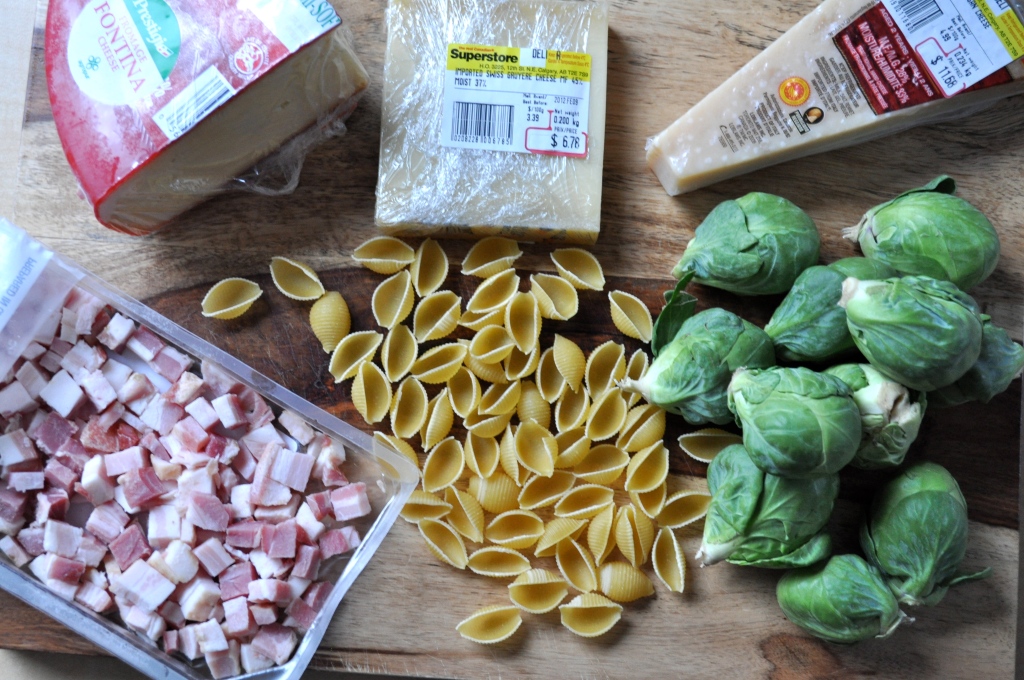
First, let’s talk about cheese. You can go the traditional route with a sharp Cheddar, or you can change it up with Gruyère, Fontina, Havarti, Gouda, you name it! Don’t forget an accent cheese, like Parmigiano-Reggiano, Feta, or Goat cheese.

How about pasta? Macaroni, shells, penne, rotini, any small pasta will do!

And not that cheese and pasta require any help in the deliciousness department, but there are some flavorful and fun things that you can add to the mix! Herbs and spices like fresh thyme, rosemary, sage, parsely, dry mustard, cayenne pepper, and nutmeg add some extra flavor, while add-ins like peas, carrots, brussel sprouts, mushrooms, spinach, bacon, and artichokes give a little more beef to the final product.

Finally, don’t forget the irresistible crispy topping, created with breadcrumbs, butter and garlic!

The possibilities are truly endless! Choose your own adventure friends. Have fun with life, and with your food!

Choose Your Own Adventure Mac ‘N Cheese (adapted from Fine Cooking magazine, Feb./Mar. 2012)

Now, this recipe takes some time to prepare, but I promise you, it is so worth it. Especially if you’re single like me – the leftovers fed me for lunch all week!

Step One: Mix the topping!

1 garlic clove, minced

3 TBSP. butter, melted

2 cups Panko bread crumbs, lightly toasted

Salt and pepper

2 TBSP. finely grated Parmigiano-Reggiano (optional)

Stir the garlic into the melted butter. Put the breadcrumbs into a medium bowl and drizzle the butter over top. Add in the salt and pepper, and Parmigiano-Reggiano (if using). Mix well and set aside.

Step Two: Make the cheese sauce!

4 TBSP. butter

1/4 cup all-purpose flour

3 1/2 cups milk (at least 1%)

Salt, to taste

4 cups cheese of your choice, plus up to one cup of an accent cheese

Herbs and spices (up to three, and up to 1 tsp. of each, depending on what you’re using)

Melt the butter in a heavy saucepan over low heat. Whisk in the flour and continue to whisk over low heat for about 3 minutes. The mixture will be bubbly and frothy. Slowly add the milk, whisking constantly until the sauce is smooth and has the consistency of heavy cream, about 6 minutes. Increase the heat to medium and bring the sauce to a simmer, whisking constantly. Lower the heat to maintain a gentle simmer and cook, whisking occasionally, for about 10 minutes. Remove from heat and add the cheese, as well as the herbs and spices (if using). Season to taste with salt. Set aside, but keep warm.

Step Three: Cook the pasta!

Bring a large pot of water to a boil over high heat. Add 1 lb. of your choice of pasta and cook, stirring occasionally, until al dente, about 1 minute less than indicated on the package. Drain well and return to the pot.

Step Four: Mix it all together!

Add the cheese sauce and your choice of add-ins (up to 3 cups total) to the pasta and gently stir to combine. If you’re using bacon, pancetta, or bacon, cook ’em up first. If you’re using any veggies, like brussels or asparagus, steam or sauté them before adding them in.

Step Five: Bake!

Transfer the pasta mixture to a 9×13 inch baking dish that has been sprayed with non-stick spray. Evenly sprinkle the breadcrumbs over top. Bake at 350°F until the top is golden, about 15-20 minutes. Serve immediately.

For the batch of mac ‘n cheese pictured here, I used small shell pasta, Gruyère and Fontina cheese (accented with Parmigiana-Reggiano), fresh parsely and a pinch of cayenne, and brussel sprouts and pancetta. It was a true masterpiece! Next time, I’m going to try sharp Cheddar with peas and ham, and elbow macaroni for a more traditional mac ‘n cheese. See? Endless possibilities. Let your imagination run wild!

From My Heart To Yours | Whole Wheat Pizza Dough

Obnoxious jewelry ads. Restaurants offering special menus for one night only. Chocolatiers and flower shops preparing for their most lucrative day of the year. An overload of pink and red.

Kids, this can only mean one thing.

(Insert scary music here.) Valentine’s Day.

As suggested by the scary music, Valentine’s Day is not my favorite holiday. Single or attached, this big, commercial, overdone holiday has always failed to wow me. More importantly, I’m a big believer in showing the special people in my life that I love them on a fairly regular basis.

Are you pickin’ up what I’m throwin’ down?

But rather than babble on about this, I want you to do me a favor. Mmmk?

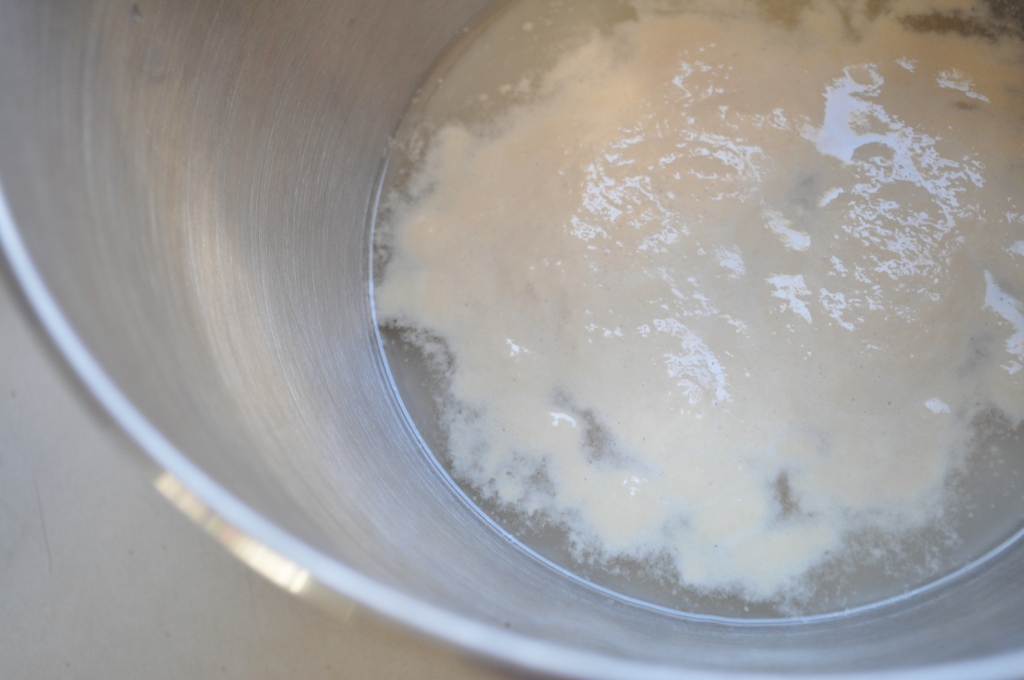
Step One: Mix up some warm water with a little sugar, then sprinkle with yeast. Let these cats get to know each other a little. Maybe they’ll like each other.

After 10 minutes, things will be getting a little foamy. That means there was a love connection. Bow-chica-bow-wow. Things are getting sexy.

Step two: Add in some flour, and mix things up. Get your hands in there, and start kneading. Add a little more flour and work it in there. This is a great opportunity to work out some of your frustrations! Like being single on Valentine’s Day! And when people innocently ask you what you’re doing to celebrate the day of love, you want to yell about drinking copious amounts of wine and eating Chinese takeout over your kitchen sink. (Don’t worry, I’m definitely not going to be doing that tomorrow.) But if I had any frustration about anything, kneading would totally help. Win! After a few minutes, you’ll have a beautiful ball of dough.

Step 3: The dough needs her beauty rest. Cover her up nice and let her rest for about an hour. Go give yourself a manicure, have a glass of wine, relax. You deserve it after all of that kneading!

When you come back, things will look a little something like this.

Pretty, yes? You just made dough! So easy right?!

Step 4: Divide the dough into two equal parts, and let rise again. It’s almost time to make pizza!

Step 5: Cover these sweet things and let them rise again, this time for about 45 minutes.

Get your pizza toppings ready. It’s time to get crazy!

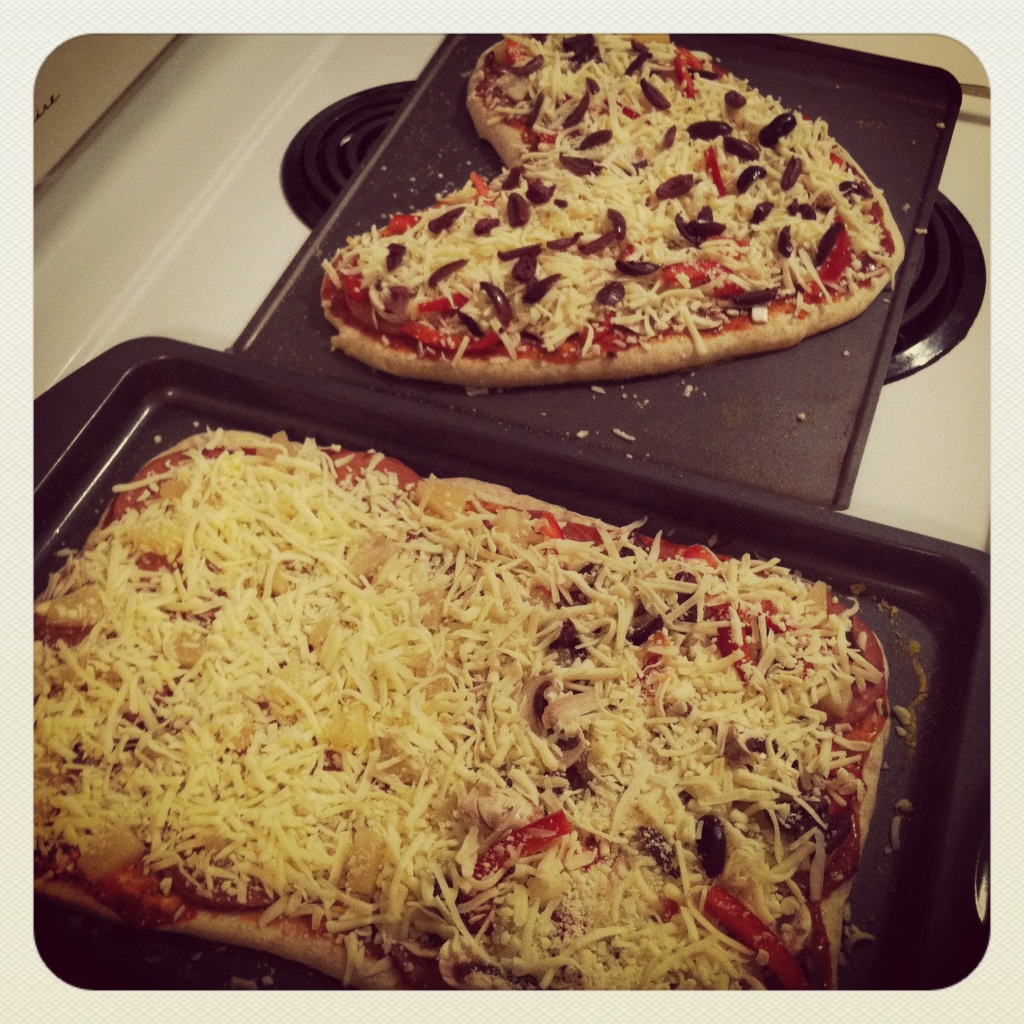
Stretch out the dough, and if you’re feeling the love, why not shape things into a heart? In my opinion, that is how you show someone that you love them. By taking the time to create something with your own hands and your own time. Serve it all up with a bottle (or two) of wine, a few candles, and your wonderful company, and you’ve got yourself a mighty fine Valentine’s Day, or any day of the year.

However you spend February 14, I hope your day is filled with love and happiness. I’ll be drinking wine and eating a ridiculous amount of chocolate. <3

Whole Wheat Pizza Dough (adapted from allrecipes.com)

This pizza dough is perfect – crispy on the outside, light and fluffy on the inside. And it’s made with whole wheat flour, so you can totally feel good about eating an extra slice. Feel free to experiment by adding different flavors into the dough along with the flour (like dried basil or oregano, or even a little parmesan cheese). 

1 1/2 cups warm water (110 degrees F/45 degrees C)

1 tsp. sugar

1 TBSP. active dry yeast

1 TBSP. olive oil

1 tsp. salt

1 tsp. garlic powder

2 cups whole wheat flour

1 1/2 cups all-purpose flour, divided

In a large bowl, dissolve the sugar in warm water. Sprinkle the yeast over the top, and let stand for about 10 minutes, until foamy. Add in the olive oil, salt, and garlic powder, and stir to mix. Add the whole wheat flour plus one cup of the all-purpose flour, and stir until the dough begins to come together. Tip the dough out onto a surface floured with the remaining all-purpose flour, and knead until all of the flour has been absorbed, and the ball of dough becomes smooth, about 5 minutes. Add a bit more flour if the dough is too sticky. Place the dough in an oiled bowl, and turn to coat the surface. Cover loosely with a towel, and let stand in a warm place until doubled in size, about 1 hour.

When the dough is doubled, tip the dough out onto a lightly floured surface, and divide into 2 pieces for 2 thin crust, or leave whole to make one thick crust. Form into a tight ball. Cover with a towel and let rise for about 45 minutes, until doubled.

Stretch the dough out into the desired shape. Place each crust on a baking sheet that has been sprayed with a little bit of oil and sprinkled with corn meal (my newest pizza secret!). Top with your desired sauce and toppings – the possibilities are endless here. Bake at 425°F for 16-20 minutes, or until golden brown and bubbling.

Looking for something sweet to make your Valentine? Allow me to suggest red velvet sandwiches, the perfect chocolate chip cookie, fruit salsa with cinnamon chips, chocolate skor cookie dough toasted marshmallow cupcakes, or bourbon pecan pie brownies. Why choose? Make ’em all! 🙂

A few of the photos in this post were taken with the Instagram app on my iPhone. If you are an Instragram-er, and want to follow the daily happenings of my foodie life, you can find me @onceuponarecipe. 

A Healthy Dose of Optimism | Lentil and Mushroom Bourguignon


Life is full of good days and bad days, and in-between days. Some days you might have difficulty putting one foot in front of the other, other days you might have limitless energy. Some days are productive, others less so. Some days might bring good moods, others might bring sour moods. Some days you might have tunnel vision, other days you’re capable of seeing the bigger picture. That’s just how life works.

But for those less-than-optimal days, I have a suggestion. Actually, Jessica does. Please take a moment to watch.


Seriously, don’t even try to tell me that you’re not smiling right now.

Or giggling.

Or thinking about what you like about your life.


The part where she claps authoritatively after saying “I like my whole house!”…I just can’t not giggle. It’s impossible. Thank you Jessica, for that little dose of optimism – that reminder of all of the good things in my life. I like my haircuts too…well, usually…

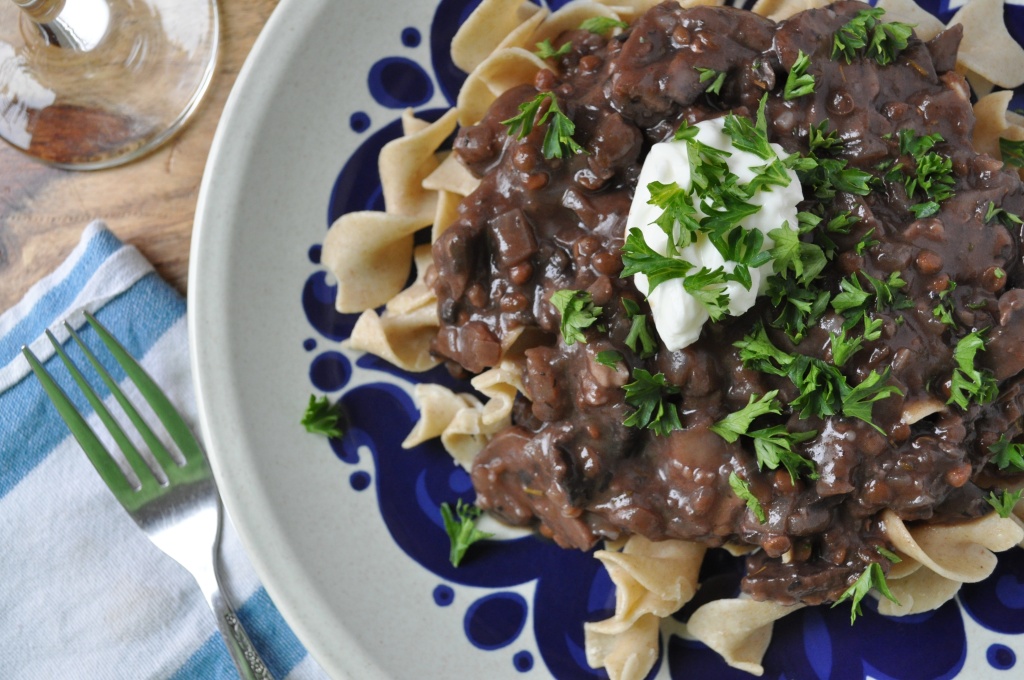
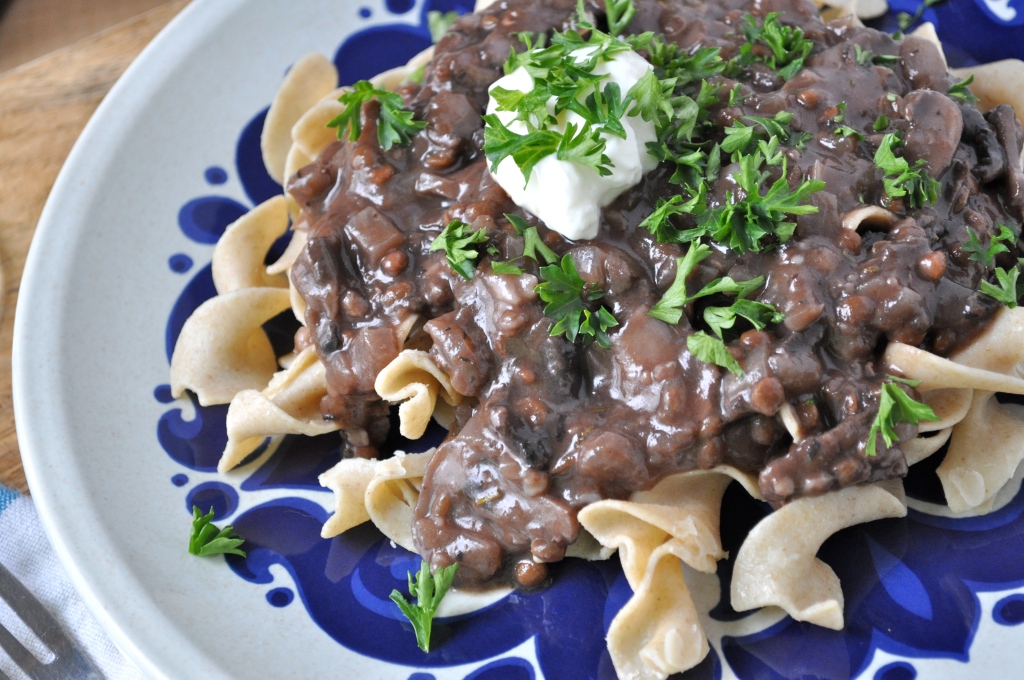
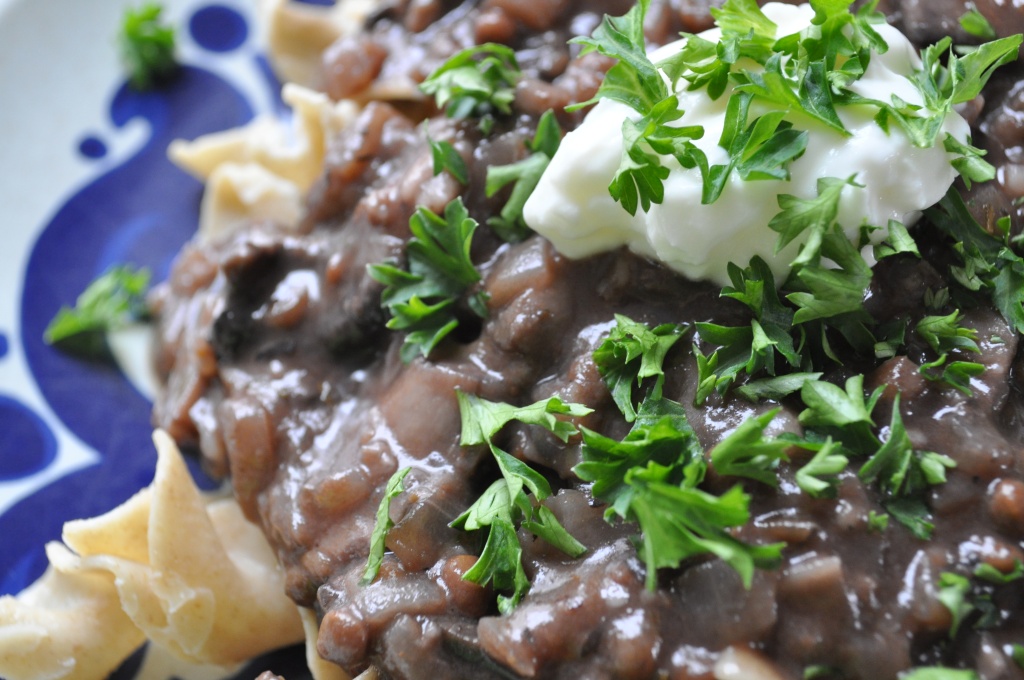
Now that we’re smiling, let’s make some dinner, shall we? I think this hearty lentil and mushroom bourguignon will leave you smiling too…with a happy belly to boot.


Lentil and Mushroom Bourguignon (adapted from Treehugger)

1 TBSP. olive oil
1 small onion, finely chopped
2 TBSP. butter
4 garlic cloves, crushed
1 tsp dried thyme
2 large portobello mushrooms, sliced
3 cups cremini mushrooms, sliced
1 cup cooked brown lentils
1 cup red wine
1 TBSP. flour
2 cups vegetable broth
1 TBSP. tomato paste
Salt and pepper to taste
Sour cream and parsley for garnish (optional)

In a large skillet, heat the olive oil and sauté the onion for 2 to 3 minutes, until soft. Add the butter, garlic, thyme and mushrooms and cook until the mushrooms release their liquid, soften and then just start to brown. Add the lentils and cook for 1 or 2 minutes, then add the wine and cook for a few minutes more, scraping the bottom of the skillet, until the wine has almost cooked off. Sprinkle the flour over the lentil and mushroom mixture and stir to blend, then add the broth and tomato paste. Bring to a simmer and cook, stirring often, for about 10 minutes, or until the sauce is thick and dark and the mushrooms are tender. Serve hot over buttered egg noodles.


Have a great week friends! And remember, you can do anything good. 🙂