Greens for Breakfast | Kale, Oat, and Blueberry Smoothie


So…I did something crazy last night in the wee hours of the morning. It was one of those second-wind moments. I was all ready to tuck myself into bed, but then I got a second wind and stayed up for another hour. No one is safe during my second-wind moments. They typically involve crazy ideas and weird creations in the kitchen.

Last night, I did something crazy.


….I signed up for a half-marathon clinic through my local Running Room. Dudes and dudettes, I’m going to be training to run a half-marathon at the beginning of May 2012. Help.

I’m half excited, half terrified. I’ve always loved running. And by “loved,” I mean that I enjoyed the occasional runner’s high and the subsequent physical and health benefits. But the longest distance I’ve run consecutively is 10km. A half-marathon is 21km. Seriously, help me.

I start my training in two days. For the next 16 weeks, I will be aiming to run 3-5 days per week at varying distances, building on my endurance with each run. Did I mention that it’s also the heart of winter here? And that despite our current lack of snow and mild temperatures, all of that could change in a hot minute and I could be running in snowy, minus 30-degree (celsius) temperatures? Yes, I do wonder about my sanity on a daily basis.


I’ve decided that given recent events, I need to become a smoothie person. A smoothie, when made right, can pack a serious punch! Smoothies can be nutrient-dense, healthy, and can hide away good-for-you ingredients like spinach and kale. I promise you won’t even taste the kale or the oats. Satisfying, healthy, and delicious. Perfect for a quick breakfast that will get you through the morning. Or a half-marathon. No big.

Kale, Oat, and Blueberry Smoothie

Serves 1.

The health benefits of kale are endless. Kale is low in calories, high in fiber, high in anti-oxidants, and high in vitamins K, A, and C. Kale also helps to regulate the body’s anti-inflammatory process, and aids in detoxification. (source) Get on it kids!

1/2 cup kale leaves, torn and packed

1/2 cup blueberries (fresh or frozen)

2 heaping TBSP. greek yogurt

3 TBSP. raw oats

1/2 banana, sliced

1/4 cup milk of your choice

1 tsp. honey (or more, to taste)

3-4 ice cubes

Optional add-ins: ground flax seed, vanilla extract, cinnamon

Add all ingredients to a blender and blend until smooth, about 2-3 minutes, making sure that the kale and oats are pureed. Enjoy! (and be prepared to have copious amounts of blueberry stuck in your teeth afterwards). Get your toothbrush ready.

The In-Between | Cranberry Egg Nog Scones

Holla!

How goes it boys and girls? Did you have a magical Christmas? Did you eat way too much and drink to your heart’s content? Did you get way too little shut-eye over the past few days? Are you totally bummed about going back to work tomorrow? I sure did, and I sure am. Alas, the party must go on.

And there will be another party in, oh…about 4 days. So let’s take a moment to relax and recuperate, shall we?

Yesterday, I took a day for myself. I allowed myself to be a sloth-like couch potato. I didn’t shower. I wore my comfy clothes. I ate dessert for dinner, and dinner for dessert. I watched a Diners, Drive-Ins, and Dives marathon. Which just made me crave poutine and cinnamon-bun french toast, by the way. I probably lost a few brain cells, but they’ll grow back…right?

But the craziest part? I felt bad about it. I felt guilty for being a couch potato when I should have been cleaning, working out, organizing that dang room, and the list goes on. Sometimes we can be so hard on ourselves. But the reality is, there will always be something that needs doing, and unless we press the pause button every so often, we will miss out on opportunities for rest, relaxation, and being kind to ourselves.

This morning, I woke up after a refreshing 8-hour sleep, I went to a hot yoga class, and then I let the rest of my day carry me where it wanted. I put the to-do list away. And clearly the day wanted me to exercise my baking muscle because these scones were born. I had a bag of fresh cranberries in my fridge that I threw into my basket on a whim last week, mostly because they were ridiculously cheap. I also had a carton of egg nog hangin’ out in there. I have to admit, I’m not the biggest fan of egg nog. I like to have a token Egg Nog and Rum (or two) each Christmas, but that’s about all I can handle. Which leaves me with a little too much egg nog on my hands. However, after making a batch of these scones, it might not be enough.

Cranberry and Egg Nog Scones

I love how these scones turned out. They were incredibly light, and honestly, if you weren’t told that there was egg nog in them, you might not be able to guess that it was in there at all. The next time I make these (and there will be a next time), I will add in the zest of an orange – I think it would compliment the flavors so well.

2 cups all-purpose flour

1/2 cup oats

1/3 cup + 2 TBSP. organic cane sugar

1 TBSP. baking powder

1/4 tsp. baking soda

Pinch of salt

1 1/4 cups fresh cranberries, roughly chopped

1/3 cup butter, cold and cut into small cubes

3/4-1 cup egg nog

1 egg white + 1 tsp. water, whisked

Extra sugar for sprinkling on top of scones

Preheat the oven to 400°F. Mix the flour, oats, sugar (reserving the 2 TBSP.), baking powder, baking soda, and salt together. Cut the cold butter into the flour mixture using a pastry blender (or two knives) until the mixture resembles coarse meal. In a separate bowl, combine the cranberries and the 2 TBSP. sugar and toss to coat. Add in to the flour mixture. Slowly add the egg nog to the flour mixture, using only enough to bring it all together. On a lightly floured surface, pat the dough into a rectangle, about 3/4 inches thick. Cut into 8 pieces, and place them on a parchment or Silpat-lined baking sheet. Brush them with the egg white/water mixture, and sprinkle with sugar. Bake for about 15-18 minutes, or until lightly browned. Enjoy immediately!

Giving Thanks | Pumpkin Breakfast Cake


OK, I know what you’re thinking…

Not another pumpkin recipe.

But wait! Don’t run away! Allow me to plead my case.


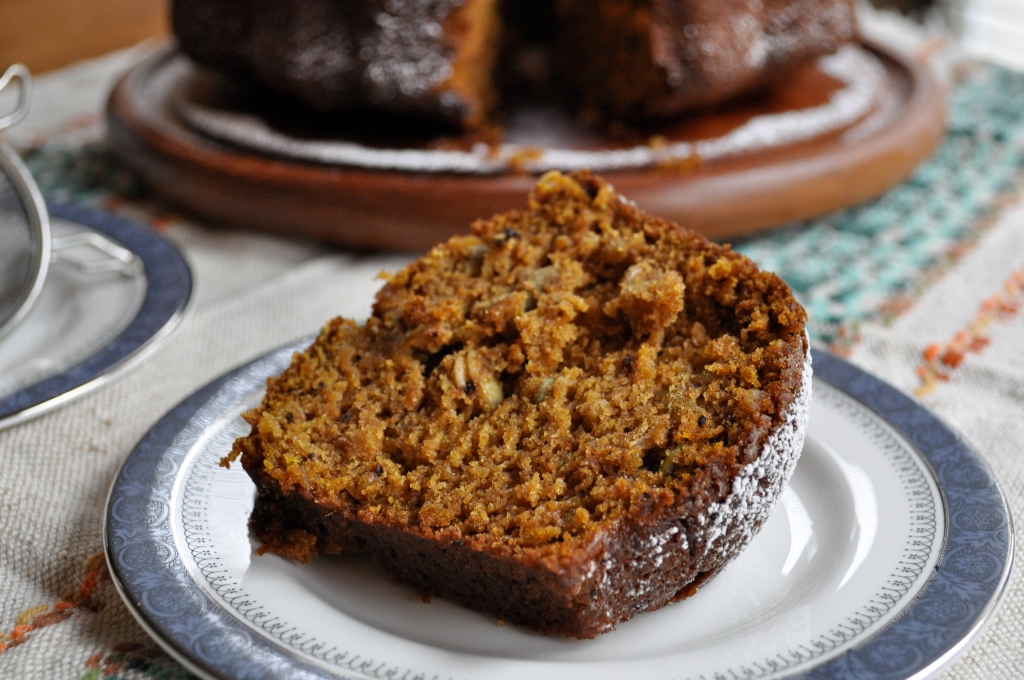
This isn’t just any cake. First of all, and probably most importantly, it’s a cake you can eat for breakfast. Yep, it’s breakfast approved. You know why? Cause it’s full of hearty good-for-you ingredients like whole wheat flour, oats, nuts, and pumpkin! A nice big hunk of this cake with a steaming mug of coffee or tea will start your morning off right.

Secondly, this cake is super adaptable! If the thought of eating another pumpkin anything makes you want to vomit (although really, that would be a bit dramatic of you), then you can change it up! You can use applesauce or banana instead of pumpkin. You can sub in almonds, raisins, coconut, or any other nuts or dried fruit for the pumpkin seeds and walnuts. Or change up the spices! In fact, one of my favorite versions of this cake uses applesauce, cinnamon, almonds and coconut. Delish!


But back to this particular version of the cake, with pumpkin! It’s moist, nutritious, delicious, and seasonal. Just in case you need an excuse to eat cake for breakfast. Personally, I don’t need an excuse. (Don’t you know me by now?!) 🙂 This recipe was shared with me several years ago by a very special lady. I remember awakening to the wonderful aroma of one of these breakfast cakes baking away in the oven on several occasions. And while we probably won’t have another opportunity to share a piece of breakfast cake and tea on a lazy weekend morning, I hope she knows that she will remain in my heart always.
Happy Thanksgiving weekend to you and yours! May we all remember to be thankful for what we have.


Pumpkin Breakfast Cake

1 cup white flour

1 cup whole wheat flour

1 cup oats

2 tsp. baking powder

2 tsp. baking soda

1 tsp. ground cinnamon

1/2 tsp. ground nutmeg (optional)

1/2 tsp. ground allspice (optional)

1/2 tsp. ground cloves (optional)

Pinch of salt

1 cup olive oil

1 cup white sugar

1 cup brown sugar

4 eggs

2 tsp. vanilla

2 cups pumpkin puree (or other fruit)

1/2 cup raw pumpkin seeds (or other nuts/dried fruit)

1/2 cup chopped walnuts (or other nuts/dried fruit)

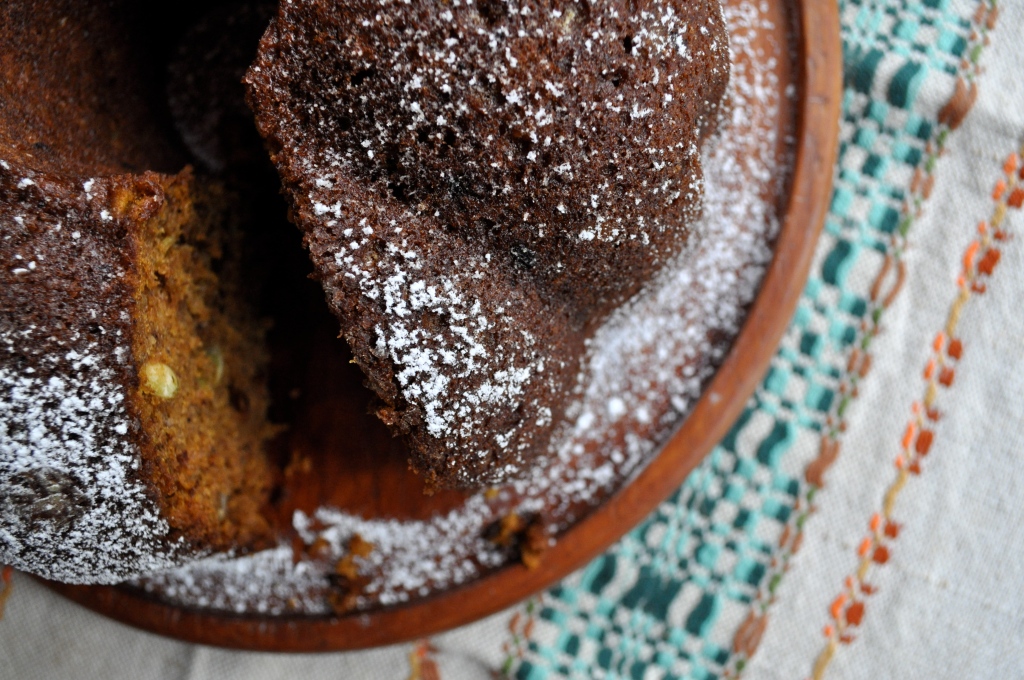
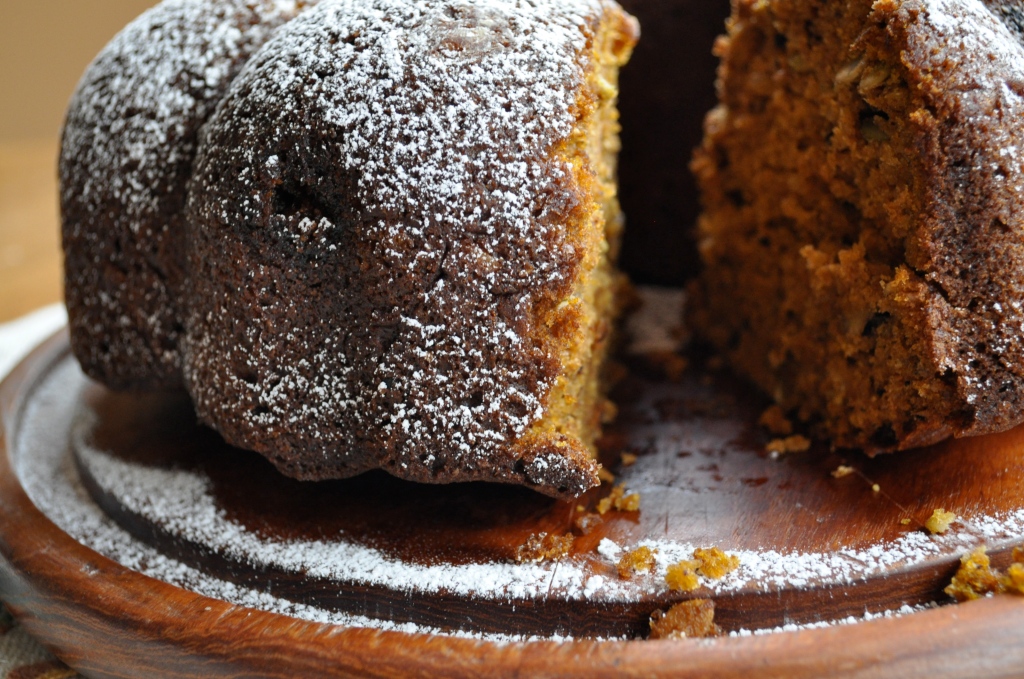
Preheat the oven to 350°F. Whisk together the flours, oats, baking powder, baking soda, spices, and salt in a large bowl. In a separate bowl, combine the olive oil, sugars, eggs, and vanilla. Add to the dry ingredients and mix well. Add in the pumpkin puree and the pumpkin seeds and walnuts. Stir well. Pour/spread into a large greased bundt pan (or two loaf pans). Bake for about 1 hour, or until a toothpick inserted into the cake comes out clean. Allow the cake to cool thoroughly before turning out of the pan(s).

*Please note that you may also halve the recipe and bake the cake in a loaf pan. Or keep the recipe as is and bake two loaves, freezing one for later.

PS. I can’t make any promises that I’m done with the pumpkin recipes…

Welcoming Fall | Whole Wheat Apple Cinnamon Scones

Fall is upon us here in my part of the world. The days are becoming shorter, the leaves have started to turn, and there is an unmistakable chill in the air. While I hate to bid adieu to Summer, I can’t help but look forward to the changing of the seasons. Fall is my favorite time of year, without question. Fall is a beautiful season, with its stunning reds, oranges and yellows. If only it lasted longer than ten minutes, and wasn’t followed by…*shudder*…Winter.
Several nights ago, I had a wonderful visit with some lovely ladies, one of which mentioned that Fall has always signaled the beginning of a new year for her. And for many people, especially those in school, Fall is the start of a new year. New classes, new teachers, new school supplies, and new clothes (always my favorite part growing up). I have been out of school for a few years now, so it’s been a while since September brought with it any feelings of newness or change. This year feels a bit different though. Maybe it’s because my life is very different than it was last Fall, or maybe it’s because I hope that my life will be very different next Fall. It might also have something to do with the fact that I had my tea leaves, tarot cards, and palm read a few months ago. Now, before you go laughing at me, I went for kicks. I’m not sure I actually even believe in psychic abilities. But it certainly made for an interesting experience. I didn’t take much of what the psychic said to me to heart, except that a recurring theme in my tarot cards was the number 9. His interpretation of my cards was that the ninth month (September) would bring some major (and good) changes into my life.
I’m not holding my breath. I’m not the kind of person who lives their life waiting for things to happen. I prefer to make things happen. But it’s comforting to know that I might have some additional positive energy on my side this month.
Fall also brings along delicious flavors. When I think of Fall, I smell cinnamon, nutmeg, and pumpkin pie. I see colorful squash and cute little gourds. I taste warm soups and stews. I feel a cup of hot apple cider between my hands. I get a strong urge to walk through a corn maze and jump into a pile of just-raked leaves. I love what this season does to my senses.
This photo was taken last Fall in Central Park in New York. It was the end of October, and the colors were finally starting to change. The trees in the park were so beautiful, and we spent such a wonderful afternoon there. Such great memories that I will hold dear forever. I won’t be making it back to NY this Fall, but I hope to get there one more time before my BFF and her husband return home next Spring. I did make a promise after all.
This weekend marks the last few days of my summer vacation – the two weeks I took off from work. My “stay-cation” as I called it. I’ve spent most of my days out in the sunshine, reading good books, taking Miss Bella on long walks or to the dog park, enjoying visits with friends, and soaking up the warmth of Summer. But the last few days were cool, grey, and drizzly. So, yesterday morning I decided to bake, and I wanted something that would smell and taste like Fall. Enter these tempting little scones. I could barely wait for them to cool enough to eat after they came out of the oven – they smelled so enticing with their notes of cinnamon and nutmeg. I scarfed down the first scone, and properly enjoyed the second. I barely restrained myself from having a third.

Summer is taunting us again, with warm temperatures expected this long weekend. Mother Nature is a bit bipolar, at least here in Alberta. But I’m not complaining – I can be patient for Fall, especially if it means a few more hot sunny days. Regardless…whether you love Fall or hate it, I can guarantee that you will enjoy these scones. And they’re made with whole wheat flour, so they’re practically a health food.

Whole Wheat Apple Cinnamon Scones (adapted from Cooking Light magazine, Nov. 2006)

1 cup plus 2 TBSP. all-purpose flour
1 cup whole wheat flour
1/4 cup sugar
2 tsp. baking powder
1 tsp. cinnamon
1/2 tsp. baking soda
Pinch of salt
Dash of ground nutmeg
1/4 cup cold butter, cut into small pieces
1 medium Granny Smith apple, grated (about 1 cup)
1/2 cup buttermilk
1 tsp. vanilla
Topping:
2 TBSP. buttermilk
1 TBSP. sugar
1/2 tsp. cinnamon

Preheat your oven to 425°F. In a large bowl, combine the flours, 1/4 cup sugar, baking powder, cinnamon, baking soda, salt, and nutmeg. Whisk together until well mixed. Cut in the butter with a pastry blender or 2 knives until the mixture resembles coarse meal. Add the apple, 1/2 cup buttermilk, and vanilla, stirring just until moist (dough will be sticky).

Turn the dough out onto a lightly floured surface, and knead lightly with floured hands. Shape the dough into a circle about 1 1/2 inches thick. Cut into 8 wedges. Place on a lined or greased cookie sheet. Brush the tops of the wedges with 2 TBSP. buttermilk. Combine the remaining sugar and cinnamon together, and sprinkle evenly overtop of each wedge. Bake for 15-17 minutes or until golden. Serve warm.

Expecting the Expected | My Favorite Blueberry Lemon Muffins


One lesson that I’ve recently been taught by life is that it (life) does not always turn out as you expect it to. Life is a long and winding road, full of unexpected turns, unanticipated road blocks, and even annoying construction. The route that you map out – your plan – does not always work out, and sometimes you need to reroute. I can imagine that lady’s voice – you know, the one that seems to be present on all GPS systems – saying, “Turn around! Wrong way! Recalculating…” Her voice is so annoying.


Figuring out a new route can be difficult, stressful, frustrating. Life tossed me a curve ball a few months back, and I am doing my best to find a new way, to challenge myself and figure it all out. And figuring it out? Well, that’s a whole different ball game. Last week, another curve ball was thrown into my world. A good friend was killed in an accident. A kind, wonderful, sweet, beautiful friend, suddenly taken at age 27. Aren’t you supposed to attend the funeral of your friend when you’re both old and gray, after living a full life? That was my expectation.


I’m not quite ready to write about my friend. It all feels a bit too surreal right now. So instead, I bake. Because with baking, you can have expectations. I can be certain that if I combine the right amount of flour with the right amount of baking powder, sugar, eggs, milk, butter…and if I bake it all up at this temperature for that amount of time…I can expect a delicious outcome. Sure, things can go wrong in the oven from time to time. Cakes can flop, cookies can burn, bread might not rise. But most often, the science of baking delivers expected results. And if a great batch of muffins is all I can count on right now, then so be it.


You can count on these muffins. You can count on them being delicious, and you can count on them being eaten in short order. And you can probably count on the fact that you have blueberries sitting in your fridge or freezer right now.

Win! Use ’em up friends, and make these reliable little muffins. For once, expect the expected.


Blueberry Lemon Muffins  (slightly adapted from Enjoy, The Best of Bridge Series)

2 cups flour

1/2 cup sugar

3 tsp. baking powder

1/2 tsp. salt

Zest from one lemon

1 egg

1 cup milk

1/2 cup butter, melted

1 tsp. vanilla

1 cup fresh (or frozen) blueberries

Topping:

1/4 cup butter, melted

Juice from one lemon

1/3-1/2 cup sugar

Preheat the oven to 425°F. Prepare a muffin tin (12) by greasing or lining the cups. Mix together the flour, sugar, baking powder, salt, and lemon zest in a large bowl. Beat the egg, milk, and butter in a separate bowl. Add the vanilla. Add the egg mixture to the dry ingredients and stir until just mixed (the batter will be lumpy). Fold in the blueberries. Fill muffin cups 2/3 full. Bake for 20-22 minutes.

For the topping: Combine the melted butter and lemon juice in a small bowl. Put the sugar in a separate bowl. When the muffins are slightly cooled (but still warm), dunk the top of each muffin into the butter/lemon juice mixture, and then into the sugar. Enjoy!

An Anytime Treat | Best Ever Rice Pudding

I never really liked rice pudding as a child. Something about the texture turned me off. And hello, rice was a side dish. To be eaten only with soy sauce. Not touching anything else on the plate.

I look back at my food tastes as a child and almost laugh. Children are such particular beings – little food critics that require imaginative reasons for eating certain things. I remember when my brother was little, we had to call broccoli “tree stars,” because the dinosaurs in The Land Before Time movie ate tree stars and enjoyed them to boot. As a result, my brother could not get enough broccoli. Mission accomplished, I suppose.

Many of the foods that I hated as a child have become some of my favorites as an adult. There is not a single vegetable I don’t enjoy nowadays, and salmon is no longer a stinky, disgusting main dish (but rather one of my very favorite things). And I hated rice pudding, or so I thought, until a couple of years ago when one of my coworkers started chowing down on rice pudding from the hospital cafeteria as a post-lunch dessert. Yes, I just said hospital cafeteria.

Fear not, it was a prepackaged rice pudding, not something made on site. She raved about it and ate it so often that my curiosity got the best of me, and I grabbed one for myself one day. Now, the rice pudding was certainly not rave-worthy, but it was enough to shift my feelings about rice pudding from grotesque to tolerable. It also gave me some encouragement to try making it myself. If a packaged rice pudding could taste good, the chance of homemade rice pudding knocking my socks off became a bit more likely.

Eventually, I gave a few recipes a try, but nothing really blew my taste buds away. I tried baked rice pudding, but became a little skeeved out by the eggs that seemed to do their own thing and create a scrambled egg-like custard alongside the rice. I tried a couple of stovetop recipes, but they always glommed together like play-doh once the pudding had cooled. Rice pudding failure.

And then one day, I was feeling sorry for myself and decided to treat myself to a cooking magazine while at the grocery store. Even pity parties require refreshments. I grabbed a copy of Fine Cooking, leafed through it quickly, saw a few interesting recipes, and threw it into my basket. It wasn’t until a day later when I was flipping through the magazine with a little more care that I came upon this recipe. “Best-Ever Rice Pudding” it said. Now, if you’re going to call something “best-ever,” you had better be able to deliver. And this creamy, sweet, rich pudding certainly does that.

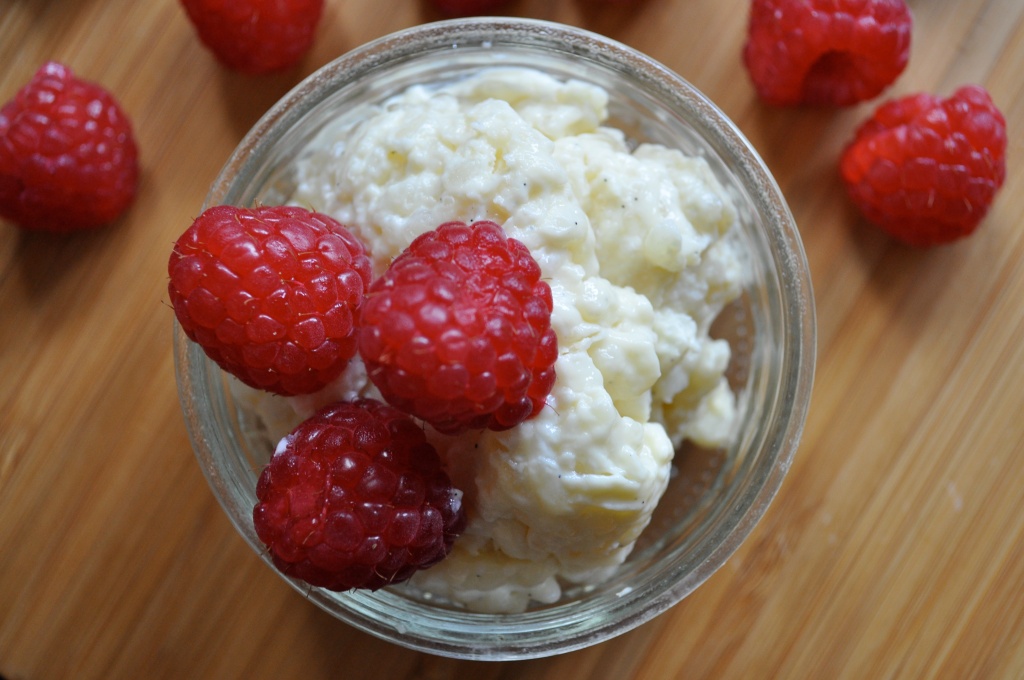
Make this rice pudding. Whether you love rice pudding already, or are a skeptic like I was. It’s so worth it. The blue photos were taken right after the pudding came off the stove, and it was incredible when still warm, all on its own. The red photos were taken the next day, when the pudding was cold out of the fridge. It was amazing with fresh raspberries, and I imagine that any fresh fruit would be delicious company for this creamy treat. Or throw in some raisins if you want to be more traditional. I found myself going back to the fridge over and over, standing in the open door, eating it spoonful by spoonful. Best. Ever. Indeed.

Best-Ever Rice Pudding (slightly adapted from Fine Cooking magazine, June/July 2011)

4 cups whole milk

1/2 cup arborio rice*

5 TBSP. granulated sugar (add another TBSP. or two if you want it to be sweeter)

1 vanilla bean

2 cinnamon sticks

2 large egg yolks

In a medium saucepan, combine the milk with the rice and sugar. Split the vanilla bean lengthwise and scrape out the seeds. Add them to the saucepan, along with the scraped vanilla bean and the cinnamon sticks. Bring the mixture to a boil over medium heat. Reduce the heat to the point where the mixture can continue to simmer, and cook until the rice is tender, about 25 minutes. Stir frequently during this time. Remove the pan from the heat.

In a small bowl, whisk the egg yolks until smooth and pale yellow. Whisk about 1 cup of the hot rice mixture into the yolks, then put the egg mixture back into the pan. The eggs need to be tempered, to avoid that scrambled egg effect. Scrambled eggs for breakfast = super-duper. Scrambled eggs in rice pudding = blech. Stir until well blended, and put the mixture back over medium heat. Cook, stirring constantly, until the mixture just starts to boil, about 2 minutes. Take the pan off the heat and allow to cool for 5-10 minutes. Remove the vanilla bean and cinnamon sticks.

If you’re going to enjoy the pudding right away, spoon into bowls or ramekins and get eating. If you’d prefer to eat the pudding cold, transfer the pudding into a bowl or container and refrigerate for a couple of hours. Try to stay away from the fridge.

*You can use other varieties of rice (ie. long grain, basmati, jasmine), but arborio rice really helps to create a creamy and sticky texture.

This One’s For Nana | Cinnamon Buns

I made you a promise yesterday. I like to keep my promises.

Raise your hand if you like cinnamon buns.

I don’t know about you, but my hand is in the air.

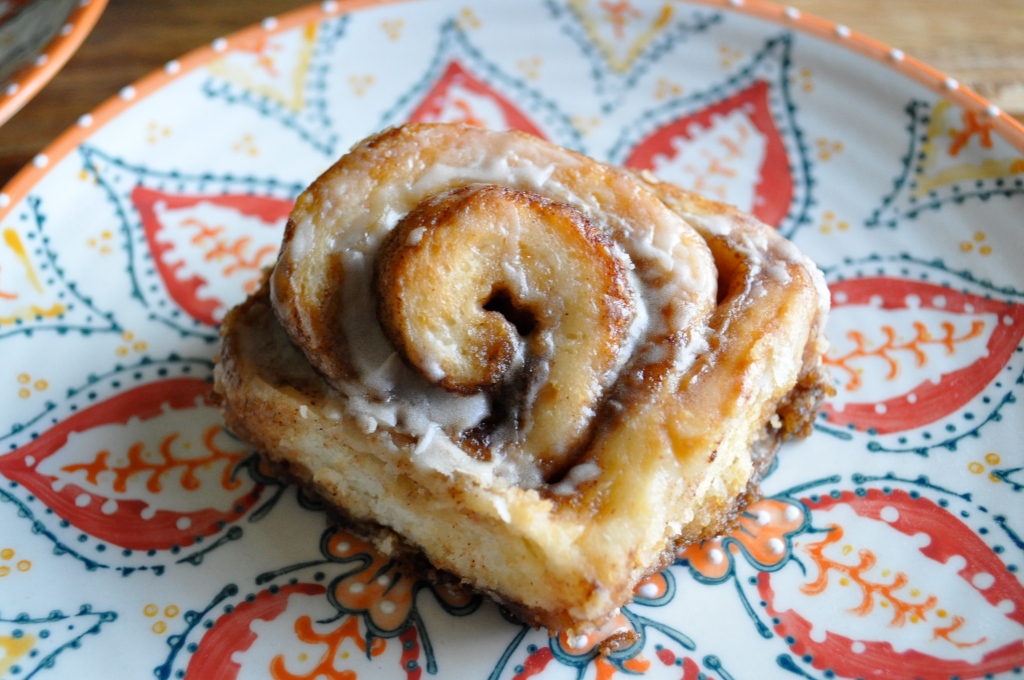
One of my fondest memories is making cinnamon buns with my Nana when I was a little girl. While it was a long process, especially for a child, I loved the fact that at the end of it all, we had such a special treat waiting for us to eat. We cheated a little and used a breadmaker to make the dough, but Nana taught me the care and patience required to roll the dough out into a perfect rectangle, spread it generously with butter, sprinkle it with brown sugar and cinnamon, and then wait until the little rolls had blossomed into pillowy buns waiting to be baked. The sweet aroma would fill the kitchen, and I would anticipate that first delicious bite of a freshly baked, warm cinnamon bun.

Shortly after Nana passed away, just over 4 years ago, I tried to make our cinnamon buns again. I followed the same recipe, even used the same breadmaker, and the buns were a total flop…twice. The first batch never rose, and the second batch just didn’t taste anything like I remembered. Clearly I was missing Nana’s special touch. I decided that cinnamon rolls were better left as a wonderful memory of Nana, and that I would stop trying to replicate those special treats that Nana and I created together.

And then, a few days before this past Mother’s Day, I asked my mama what she wanted for the Mother’s Day brunch I wanted to make her. “Cinnamon buns,” she replied. And I knew that store-bought cinnamon buns would not cut it. I started my search for an amazing cinnamon bun recipe, one that would live up to my Nana memories. I remembered how Pioneer Woman’s recipe for Cinnamon Rolls had called out to me the first time I saw it. And I decided that there was no time like the present to give it a try, adding my own little twist, one that Nana taught me.

The cinnamon rolls exceeded my expectations, and were declared by my mom as the best cinnamon buns she ever had. Nana would be proud.

Cinnamon Buns (adapted from Pioneer Woman)

2 cups whole milk

1/2 cup canola oil

1/2 cup white sugar

1 package  active dry yeast (2 1/4 tsp.)

4 1/2 cups all-purpose flour, divided

1/2 tsp. baking powder (heaping)

1/2 tsp. baking soda (scant)

1/2 TBSP. salt

3/4 cup melted butter

1 1/2 cups brown sugar

Lots of cinnamon

For the glaze:

1 1/2 cups icing sugar

1 tsp. vanilla

1 TBSP. (plus extra if needed) milk

To start, I follow Pioneer Woman’s recipe for the dough to a tee, except that I cut it in half. In a saucepan over medium heat, mix together the milk, canola oil, and white sugar. Scald the mixture (take it off the heat just before boiling), remove from heat, and allow to cool for about half an hour. When I can stick my pinky finger into the mixture without burning it, I know it’s ready! Sprinkle the package of yeast over top, and let it mingle with the milk mixture for a couple of minutes. Add 4 cups of all-purpose flour, and mix together with a wooden spoon. Cover with a towel and allow it to rise for at least an hour.

Then add the remaining 1/2 cup of flour, the baking power, baking soda, and salt. Stir the mixture together, or do as I did and mix it together with your hands. Once everything is blended together, you’re ready to make some cinnamon buns!

Sprinkle your work surface with flour to prevent the dough from sticking. Using a rolling pin, roll the dough out into a large rectangle. I roll my dough out quite thin (about 1/8″ thick). Drizzle it with about 1/2 cup of melted butter. You’re not allowed to think about how many calories these cinnamon buns have while you do this. Deal?

This is where I started to add my own spin. First, I used brown sugar instead of white sugar for the filling of the rolls. Sprinkle about 1 cup of the brown sugar over the butter, and top it with a very generous coating of cinnamon. You’ll also want to prepare your pans. I used one 9 x 13″ pan and one 9″ pan. I used the remaining 1/4 cup of butter to coat the bottom of the pans. Then I used the remaining 1/2 cup of brown sugar to sprinkle into the bottom of the pans, finishing with another healthy dose of cinnamon. My Nana taught me this trick of coating the bottom of the pans with the same mixture that fills the cinnamon buns. The end result is cinnamon buns with a lovely oooey-gooey bottom. Yum!

Begin rolling the dough up, trying to keep it tightly rolled. Once finished, pinch the end of the roll into itself, so that it doesn’t start to open up when you begin cutting. Using a sharp knife dipped in hot water (to make the job easier), slice the rolls about 1 inch thick and lay them flat into your pans. I fit 12 rolls in the larger pan, 9 rolls into the smaller pan. Cover the pans and let them rise again, for at least half an hour (or longer if you have time).

Preheat your oven to 350°F, and bake the rolls for about 15-20 minutes, or until lightly browned. Mix together the glaze ingredients. Add more milk if the mixture is too thick, or more icing sugar if too thin. Pour over warm cinnamon buns so that the glaze can seep into them. Enjoy while warm. You’ll find it hard to stop at one. Happy eating!

Here Comes The Sun | Orange Strawberry Muffins

Happy Mother’s Day to all of the wonderful mamas out there! I was able to spend the morning with my fabulous mama, and celebrated her with the most fabulous cinnamon buns ever. In fact, those present at our little brunch exclaimed that they were the best cinnamon buns they had ever tasted. Don’t worry, I will share later this week, but I’m going to hold out on you for now. I have been meaning to share this muffin recipe for a couple of weeks now, and little old life has gotten in the way of me doing so. Spring brings with it the start of many outdoor activities, like soccer and Ultimate frisbee, and at present three of my weeknights are occupied with these activities. Little Miss Bella is in love with this new season, and its new sights and smells, and we are trying to let her enjoy it as much as possible. This means long evening walks, playing fetch in the park, and joining honey and I on the occasional run. When is a girl supposed to blog with that schedule?

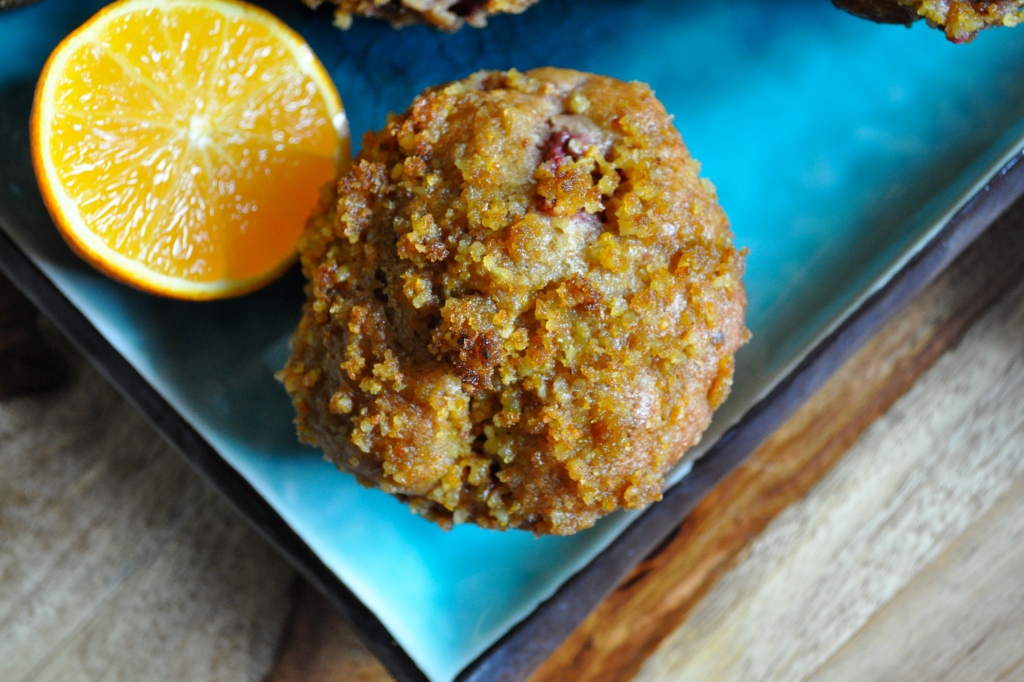
My papa spends his winters in Phoenix to escape the frigid Canadian weather, and when he returned in April, he brought back with him 600…yes, six hundred oranges. Six hundred of the most juicy, sweet, amazing oranges I have ever tasted. He threw about 40 oranges my way, and I enjoyed several oranges per day for the first few days before I soon realized that I would not be able to consume all of those delicious oranges before they were past their prime. So I scoured recipe books, foodie magazines, and blogs for some orange recipes. One failed orange cake (which used 12 oranges!) and a batch of orange butter (think lemon butter, but with oranges) later, I stumbled upon this recipe for Orange Strawberry Muffins. I was intrigued by a few aspects of the recipe, including the almond topping and the addition of strawberries. These muffins baked up tender and sweet, with a lovely little hit of orange flavor. And they are quite healthy in comparison to other muffin recipes out there. Give these muffins a try if you’re looking for something a little bit different than the every day muffin. They just might be that little ray of sunshine that gets the day off to a good start.

Orange Strawberry Muffins (slightly adapted from eatingwell.com)

3/4 cup all-purpose flour

1 cup whole wheat flour

2 tsp. baking powder

1 tsp. baking soda

1/4 tsp. salt

1/2 cup brown sugar

2 tsp. orange zest

1/4 cup canola oil

3/4 cup buttermilk

1/4 cup orange juice

1 egg

1 tsp. vanilla

1 1/2 cups chopped fresh or frozen (not thawed) strawberries

Topping:

3 TBSP. almonds

2 TBSP. flour

2 TBSP. brown sugar

1 tsp. orange zest

1/4 tsp. salt

2 TBSP. canola oil

Preheat the oven to 400°F. Prepare a 12-cup muffin tin (with cooking spray or muffin liners). In a food processor, combine the almonds, 2 TBSP. all-purpose flour, 2 TBSP. brown sugar, 1 tsp. orange zest and 1/4 tsp. salt and pulse until finely ground. Transfer to a small bowl, add the 2 TBSP. oil and stir to combine. Set aside.

In a large bowl, whisk together the 3/4 cup all-purpose flour, whole-wheat flour, baking powder, baking soda and the remaining 1/4 teaspoon salt. In a separate bowl, combine the remaining 1/2 cup brown sugar, 2 tsp. orange zest, 1/4 cup oil, buttermilk, orange juice, egg, and vanilla and mix well. Make a well in the center of the dry ingredients and pour in the wet ingredients; stir until just moistened. Add the strawberries; stir just to combine. Divide the batter among the prepared muffin cups. Sprinkle generously with the topping.

Bake the muffins until golden brown and a toothpick inserted in the center comes out clean, about 18 to 20 minutes. Let cool on a wire rack for at least 15 minutes before serving.

Happy eating!


Some Things Just Go Together | Banana Peanut Butter Muffins

Hello long lost friends. It seems like ages since I have shared any deliciousness with you. It practically has been ages. It has been a stressful few weeks. The biggest stress of all has been preparing to list my condo for sale. Honey and I, and mostly our little (but rapidly growing) Bella have outgrown the condo, and are preparing to look for a cute little house. However, first things first, we must sell my condo. It was finally listed for sale this week, after many hours of cleaning, decluttering, and all-out stress. And unfortunately, the stress is only beginning, as we now have to be prepared to get out of dodge at a moment’s notice if someone wishes to view our condo. Which is not easy when we have a pup to worry about.

My body has done a fantastic job of protecting me from all of the sickness that everyone seems to be dealing with…until yesterday. I have succumbed. I now have one of those annoying cold/flus that don’t necessarily make you feel completely terrible, but just overall pooped and blah. With a very sore throat to boot. *sigh* Life may feel rough right now, but then I think about those people who have it far worse. The current crisis in Japan has definitely made me feel thankful for my life, despite some difficult days here and there. (Boogie over at The Boogie blog has some great suggestions for how to help).

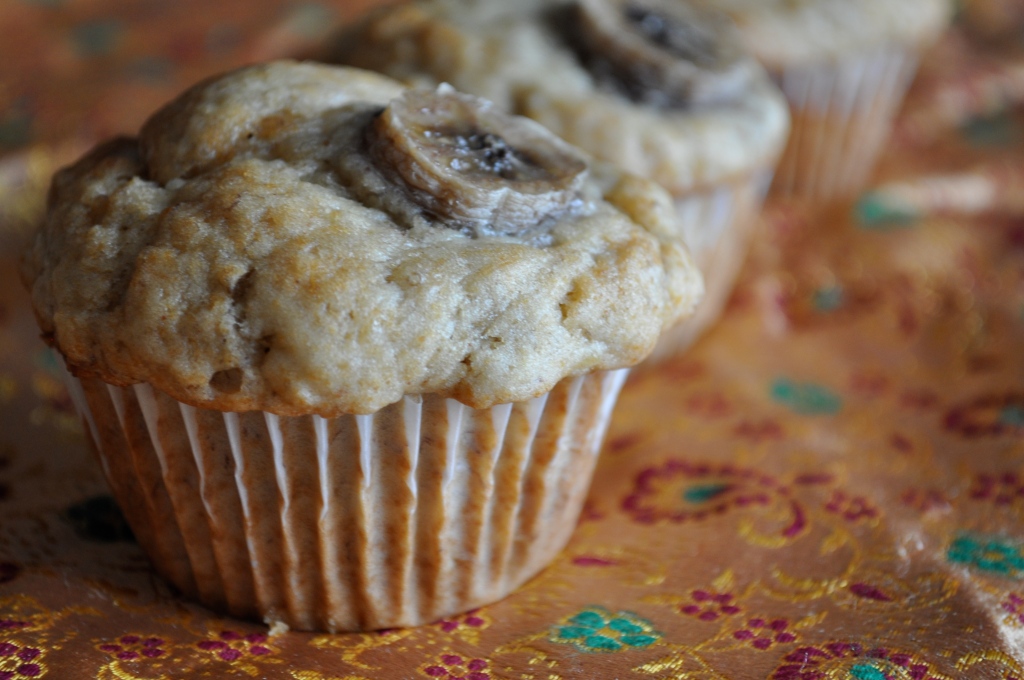
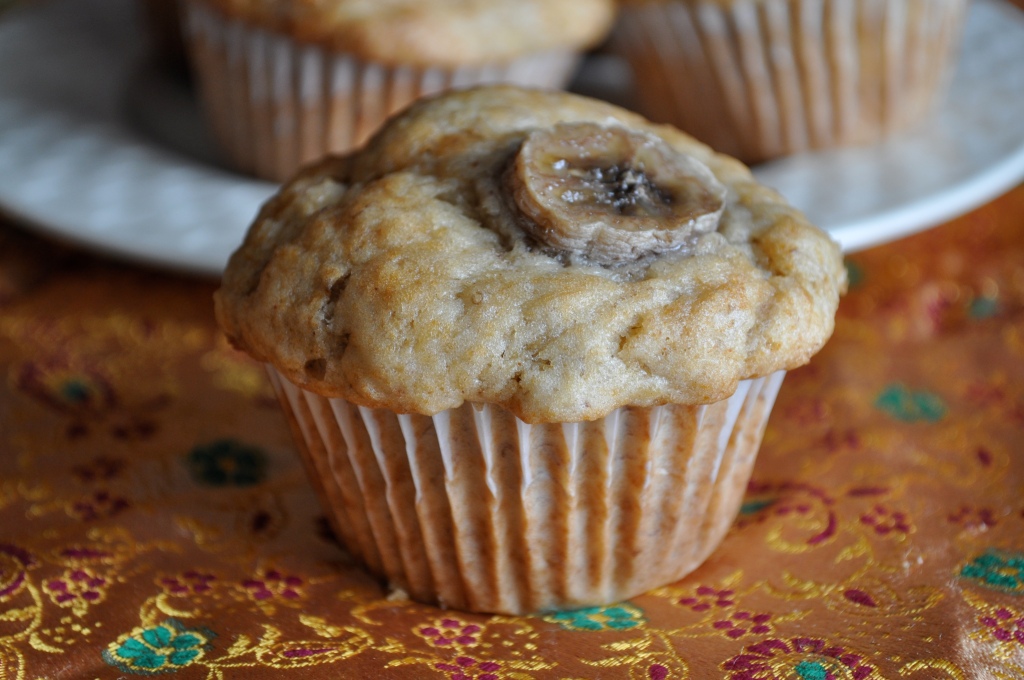
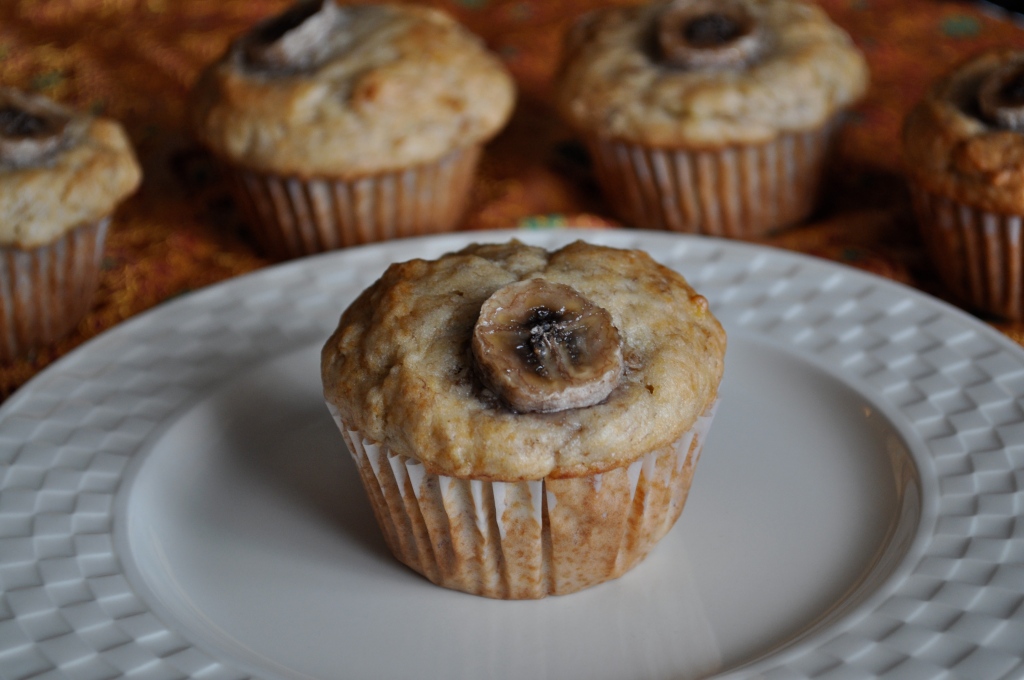
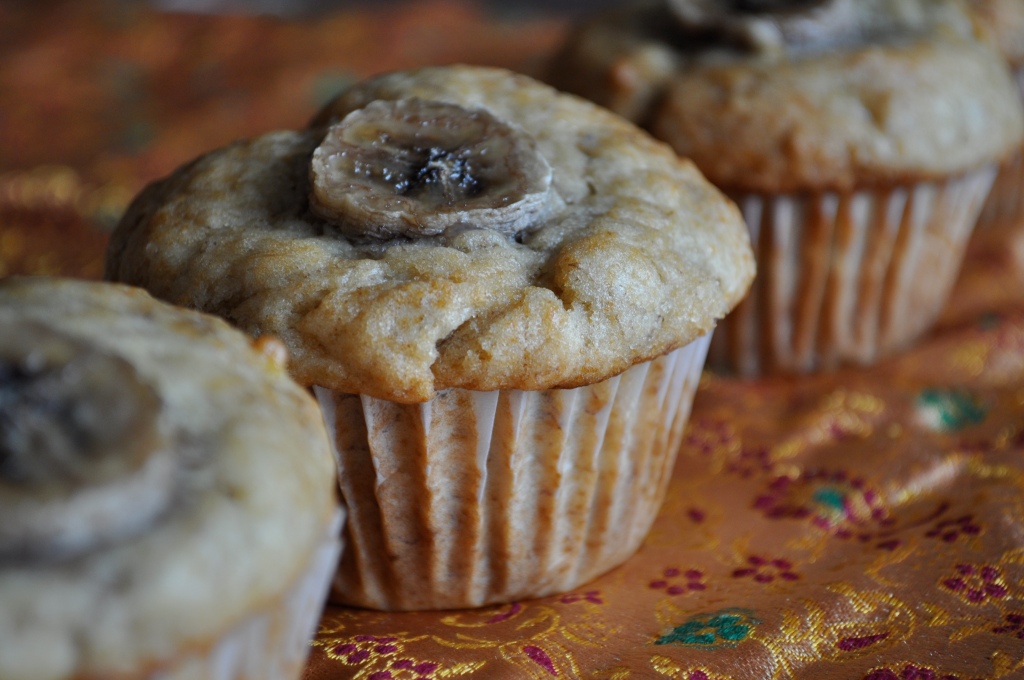
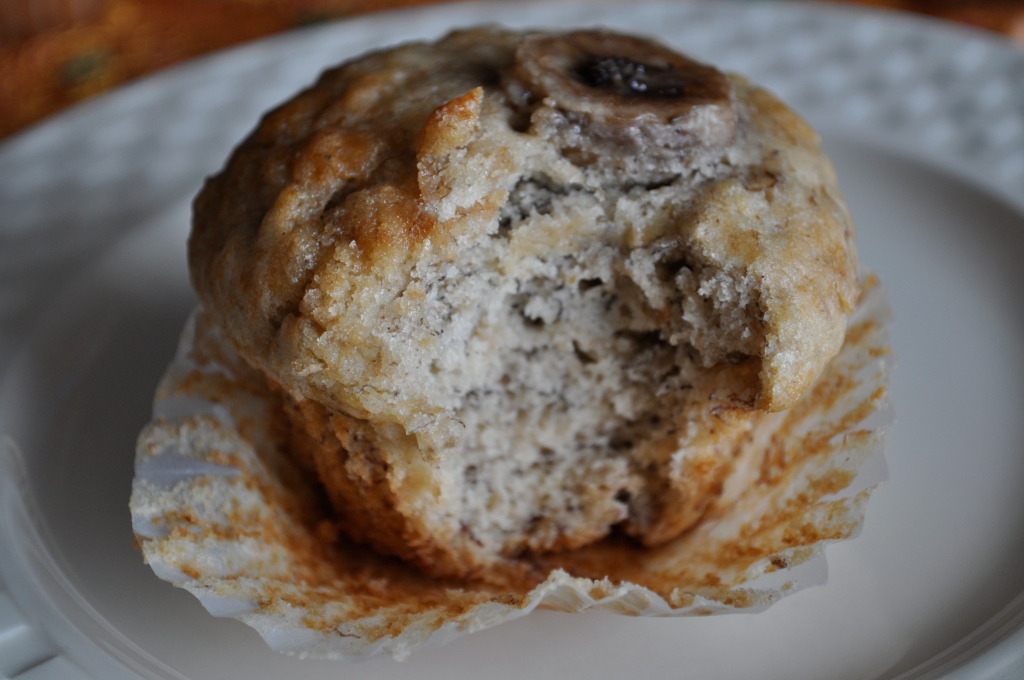
One of my favorite stress-relieving activities is baking. I find calm and serenity in measuring out ingredients and building something warm and comforting. Not to mention the bonus of eating said deliciousness when it’s all said and done. Last night, after lying on the couch watching bad TV for much of the evening, I threw these muffins together. Banana and peanut butter just go together. At first bite, these muffins took me back to my childhood of peanut butter and banana sandwiches. Lots of banana flavor with a hint of peanut butter. Yum. And comforting indeed.

Banana Peanut Butter Muffins (from Lululu at Home)

1 3/4 cups all-purpose flour (next time I will try whole wheat)

1 tsp. baking powder

1/2 tsp. baking soda

1/4 tsp. salt

3/4 cup sugar

1/4 cup butter, softened

1/4 cup peanut butter (I used natural smooth PB)

2 eggs

3 large bananas, mashed (I used 4)

1 sliced banana for garnish

Preheat oven to 350°F. Prepare your muffin tin with liners or grease.

Whisk together the flour, baking powder, baking soda, and salt in a small bowl. In a separate bowl, cream together the butter and sugar until light and fluffy. Beat in the peanut butter. Add in the eggs, one at a time, followed by the mashed bananas. With the mixer on low speed, slowly add in the flour mixture until just combined.

Fill the muffin cups with batter. Top with a slice of banana. Bake for about 25 minutes, or until a toothpick inserted into the center comes out clean. Cool on a wire rack. Enjoy!

PS. Chocolate chips would be a great addition to this recipe for some added richness, although they taste just fabulous the way they are. I bet peanut butter chips would be incredible as well. Oh the possibilities!

Holy Oats! | Favorite Granola

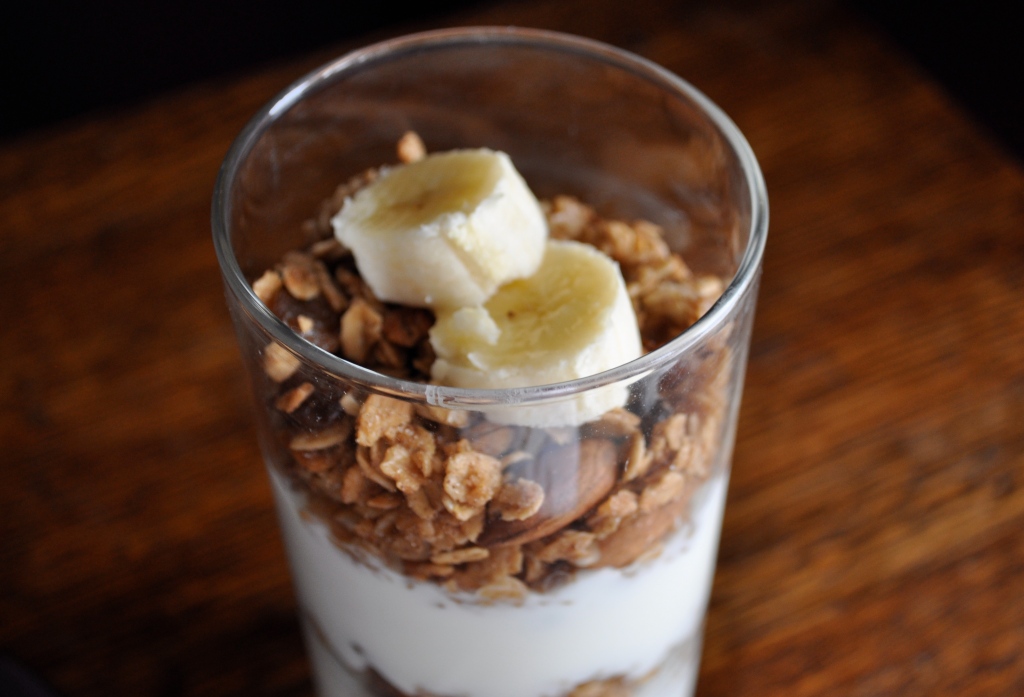
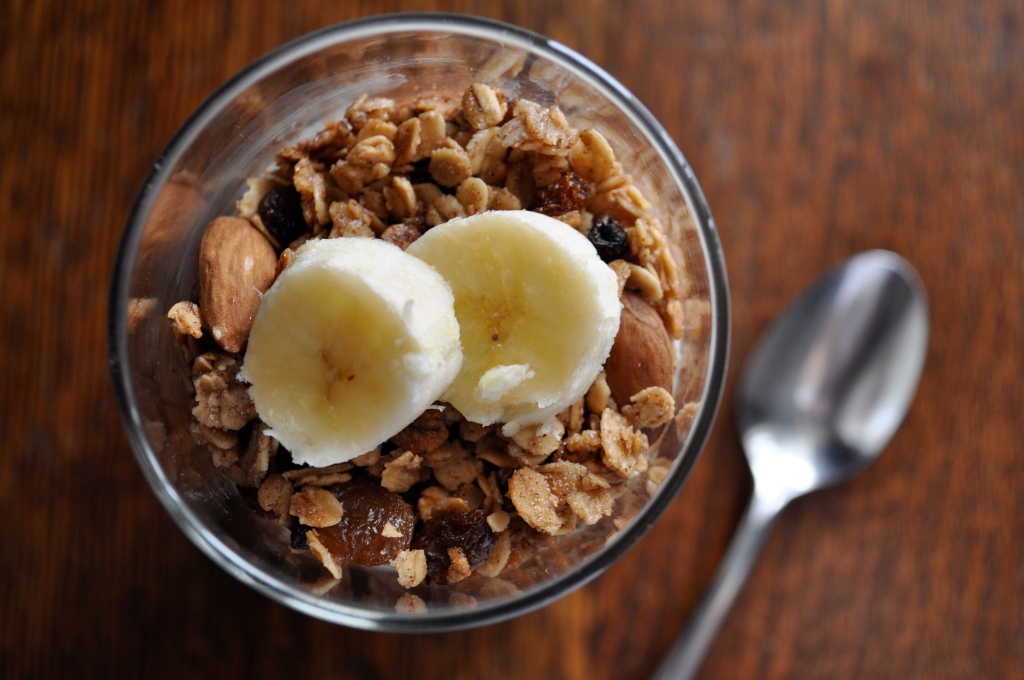
Granola is an old friend of mine. We’ve been having breakfast together for the past, oh, 10 years or so. We usually invite yogurt to the party, and occasionally milk. Unfortunately, I only discovered making homemade granola within the past few years. Kind of ridiculous, considering how easy it is to make, and definitely a travesty when considering all of the delicious varieties of granola you can make it your own kitchen.

 It was love at first bite with this granola. Sweet, chewy clusters with the crunch of whole nuts and dried fruit. Tastes amazing with plain yogurt or milk, and fantastic over ice cream. Yes, this granola doubles as dessert! You might even catch yourself eating handfuls of it as a snack! This recipe is doubled from the original because even with a double recipe, I can still eat my way through a batch of this in less than a week. Give it a try – granola loves to make new friends. Happy eating!

Favorite Granola (adapted from Baked: New Frontiers in Baking)

4 cups oats

2 tsp. cinnamon

1 tsp. salt

Pinch of nutmeg

1/4 cup canola oil

1/2 cup honey

1/2 cup firmly packed brown sugar

2 tsp. vanilla

2/3 cup whole almonds (and/or hazelnuts)

2/3 cup raisins (and/or dried cherries)

Preheat the oven to 325°F. Line a baking sheet with parchment paper. In a large bowl, toss the oats with the cinnamon, salt, and nutmeg. In a medium bowl, stir together the oil, honey, brown sugar, and vanilla. Whisk until completely combined. Pour the honey mixture over the oats mixture and use your hands to combine them (oh yeah!).

Pour the mixture onto the prepared baking sheet. Spread it out evenly, but leave a few clumps here and there for texture. Bake for 10 minutes, then remove from the oven and use a metal spatula to lift and flip the granola. Sprinkle the almonds (and/or hazelnuts) over the granola and return the baking sheet to the oven. Bake for 5 minutes, then remove from the oven and flip again. Sprinkle the raisins over the granola and return the baking sheet to the oven for another 5 minutes. Let cool completely, then transfer to an airtight container.