Beans, Beans, the Musical Fruit | Black Bean and Corn Salad

 It is a miracle that I am able to post this recipe right now. That I can type these words to you on this laptop. You see, the sweet little puppy mentioned a couple of weeks ago continues to wreak havoc on my life. In fact, I think she came into my life to teach me how to be a more patient person. Unfortunately it is a rather difficult and damaging process. Damaging to my material possessions that is. For one thing, the carpet in our condo is going to need to be steam-cleaned about 40 times over in order to remove the invisible stains of approximately 2956 “accidents”. Shoes have been chewed, scarves and mittens have been ripped, tables and chairs have been munched on. Several books are missing parts of covers. My tea towels will never be the same. All of this, I have been able to take in stride. Quite easily I think.

However…there was an incident last night that almost put me over the edge. You see, my parents brought us back a bottle of delicious pineapple wine from a recent trip to Hawaii. Last night, honey and I decided to enjoy it with our dinner. We were feeling rather badass, so we decided to just drink the wine straight from the bottle. We were eating dinner in front of the TV (yes, we do that), and had left the bottle of wine sitting on the kitchen table. A certain little munchkin around here has a tendency to jump up on the coffee table if any food or beverages are within her sight. How tricky we were, leaving it on the kitchen table instead. And then there was a crash. I jumped up and ran the approximately 10 feet from the couch to the kitchen table to find that the aforementioned munchkin had jumped up onto the kitchen table and knocked the bottle of wine over, spilling it all over the table, floor, and…my laptop.

Now, I realize that it is dumb to leave your laptop sitting open on the kitchen table. But I do dumb things, rather often. Anyways, after one meltdown and many failed attempts at getting my laptop to start up again, honey advised me to shut it down, leave it overnight, and hope for the best. I’m happy to report that my laptop is working, although my keys are currently making a nice crunching noise with each keystroke, and my space bar wants to stick down every time I press on it. Small steps, I suppose. *sigh* The other miracle was that the wine bottle managed to stay half full following the catastrophe, as it landed on it’s side. Drinking the remainder of the wine was very helpful indeed. And now that I’ve wasted your time with this pointless story, I give you a delicious, fresh salad recipe, great for curing the winter blues. It has some fantastic colors going on, and is so simple and tasty. The original recipe comes from one of the Best of Bridge cookbooks. Happy eating!

Black Bean and Corn Salad

2 cans of black beans, rinsed and drained

1 can of corn, drained

1 red pepper, chopped small

1/2 cup cilantro, chopped

Juice and zest of two limes

1/4 cup olive oil

2 TBSP. cumin

1 tsp. chili powder

Salt and pepper to taste

Combine the black beans, corn, red pepper, and cilantro in a large bowl or container. Combine the remaining ingredients in a separate bowl, and then pour over the black bean mixture. Toss well. Taste and add more salt or pepper if needed. This salad tastes great right away, but has even better flavor if you give it a couple of hours to mingle in the fridge.

A Successful Quest | The Perfect Chocolate Chip Cookie

Hello friends. Do you like cookies?

Do you like thick, chewy cookies?

Thick, chewy, chocolate chip cookies?

 If you answered yes to the above questions, then hold onto your hats. Because I have the perfect cookie for you.

My quest for the perfect chocolate chip cookie started when I was just a tyke, learning my way around the kitchen. Don’t get me wrong, the cookies always tasted delicious, but much of the time the end result was a big cookie pancake, created by the cookies all flattening out and running into each other. Unfortunately, I wanted individual thick, chewy cookies, not one big, thin cookie. *sigh*

And then, a miracle happened. A few days ago, I was perusing a few of my favorite food blogs. And I came upon this post by Joy from Joy the Baker. My heart started racing as I read about cookies that did not flatten into a cookie pancake, cookies that would stay thick and chewy! Cookies that were made with melted butter (what?) and bread flour (huh?) – a recipe very unlike all the others that have failed (for me at least). Well, I just had to try them for myself. Immediately. I braced myself – it was probably too good to be true.

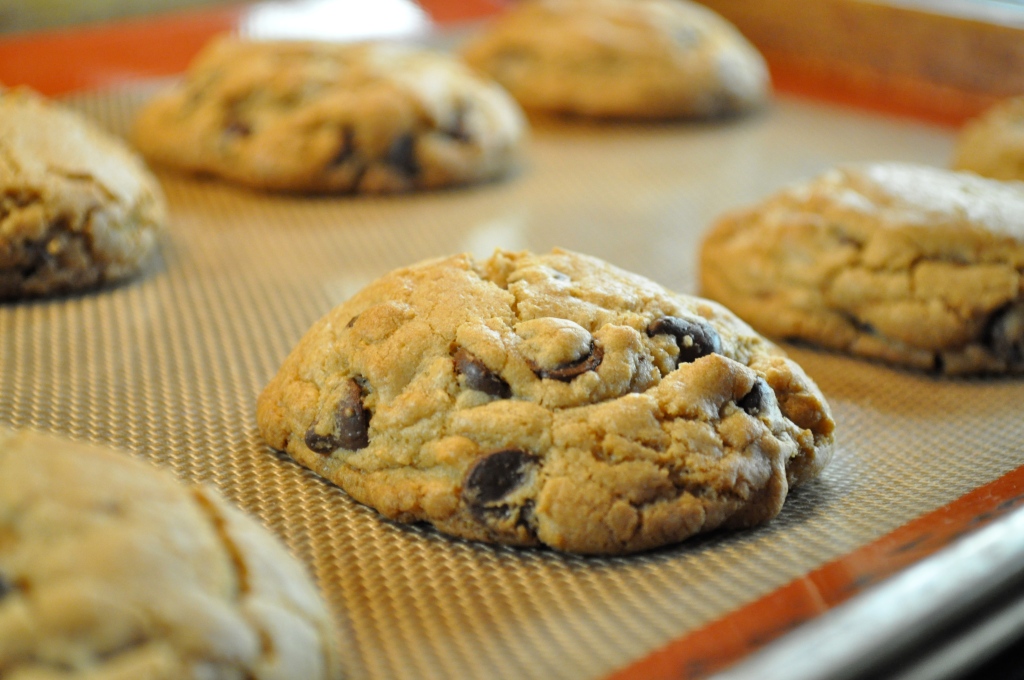
Imagine my delight when the cookies popped out of the oven, thick and perfectly round! And my surprise, when they didn’t sink as soon as they were out of their warm oven cave! And my happiness when I sunk my teeth into one of these cookies, in awe of its moist chewiness! Seriously people, these cookies are top notch. Very worthy of the “perfect” in their name. The secret must be the bread flour. Or the melted butter. Or the combination of the two. Who knows? They taste amazing and that’s really all that matters. Try them today. Happy eating!

The Perfect Chocolate Chip Cookie (via Joy the Baker, originally from Alton Brown)

1 cup (two sticks) unsalted butter

2 1/4 cups bread flour

1 tsp. kosher salt

1 tsp. baking soda

1/4 cup sugar

1 1/4 cups brown sugar

1 egg

1 egg yolk

2 TBSP. milk

1 1/2 tsp. vanilla

2 cups semisweet chocolate chips

Preheat the oven to 375°F.Melt the butter in a heavy-bottom saucepan over low heat. Sift together the flour, salt, and baking soda and set aside.Pour the melted butter into a bowl. Add the sugar and brown sugar. Cream the butter and sugars on medium speed (it takes a few minutes to get the butter and sugars to come together, so be patient). Add the egg, yolk, milk and vanilla and mix until well combined. Slowly incorporate the flour mixture until thoroughly combined. Stir in the chocolate chips.

Chill the dough (for at least 30 minutes), then scoop onto parchment-lined baking sheets. Bake for 10-12 minutes or until golden brown, but don’t overbake. Rotate the baking sheet for even browning. Cool completely and store in an airtight container. Eat!

PS. I know I have been posting a lot about sweets lately, but contrary to the impression I may be making, I do eat healthier things than cookies and cakes and delicious frozen desserts. Stay tuned for some savory and healthy recipes on the way!

Update: I made these cookies again this weekend and used 1 cup chocolate chips, 1 cup butterscotch chips, and OMG, it was an explosion of amazing deliciousness! I bet this cookie recipe would make a good base for any mix-ins you wanted to use (instead of chocolate chips) – nuts, white chocolate, peanut butter chips, M & Ms, etc.

Love Tastes Good | Red Velvet Sandwiches

It’s that time of year again. The time where card, flower, chocolate, and lingerie shops make a killing off of the lovestruck population. Truth be told, Valentine’s Day doesn’t hold that much meaning in my life. Single or attached, I’ve never been blown away by what the love holiday has to offer. I mean, shouldn’t every day be Valentine’s Day? Shouldn’t we take every opportunity we can to show our love for the special people in our lives?

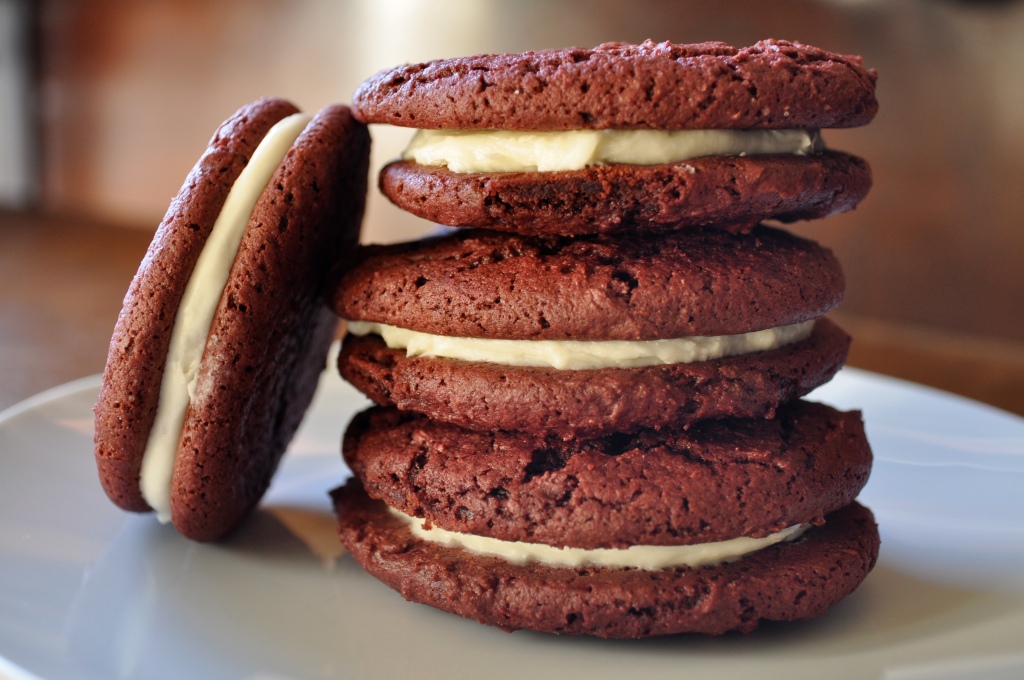
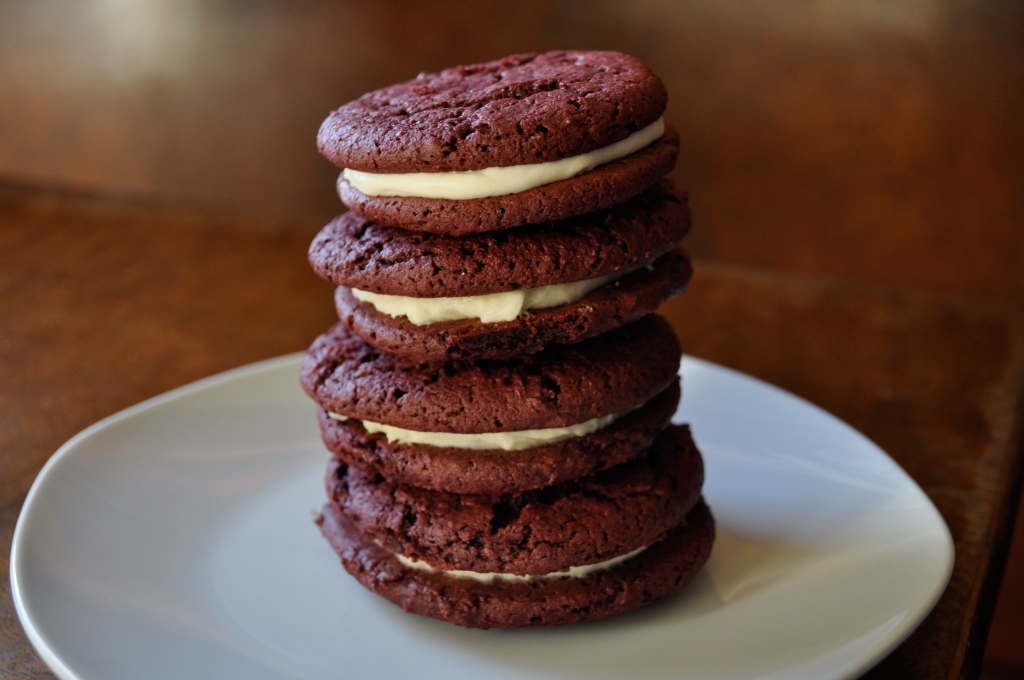
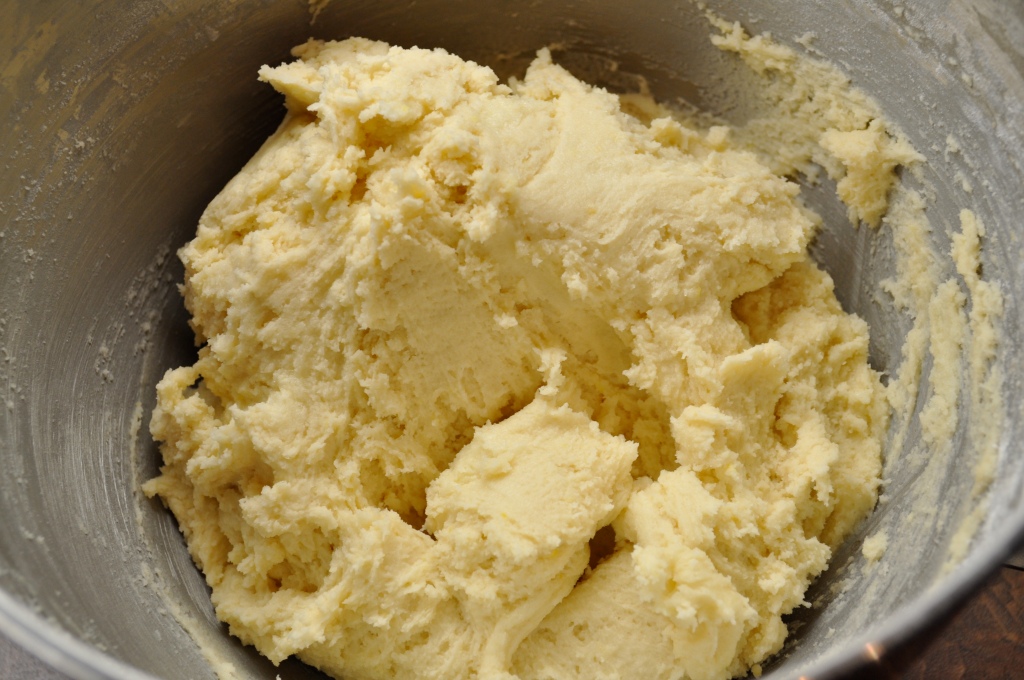
This year, I’m going to share my love via baked goods! Instead of supporting the traditional V-day market, I’m going to make homemade goodies for the special people in my life. What better way is there to share love  than through the belly? I came across this recipe on Bakerella and decided to give it a try, based on two things. 1. It looked easy. And 2. It looked delicious. I had no idea there was a mix for red velvet cake. And unfortunately, my local grocery store didn’t have it, so I decided to improvise with a chocolate cake mix and red food coloring. I was slightly concerned when my cookie dough became a sticky gum once everything was mixed together, but I decided to forge ahead. I’m sure glad that I did, because these babies are rather tasty. My cookies were a bit more dense than Bakerella’s cakey creations, likely due to the necessary changes that I made. So, if you decide to try this (and I definitely suggest that you do), try and find a red velvet cake mix. But if that task proves impossible, try my adaptation! Happy eating! And happy love day! <3

Red Velvet Sandwiches (adapted from Bakerella)

1 box red velvet cake mix (or 1 box chocolate cake mix plus 1 oz. red food coloring)

1/2 cup butter, softened

2 eggs

Preheat the oven to 350°F. Combine all of the ingredients in a large bowl and mix together. Spoon the dough onto prepared baking sheets. Bakerella suggests using a mini ice cream scoop – I just used 2 small spoons. Bake for 10-12 minutes. Cool on wire racks until completely cooled. Fill with the icing recipe below. Makes 24 cookies, and therefore, 12 sandwiches.

Cream Cheese Icing

8 oz. cream cheese

1/2 cup butter, softened

1 tsp. vanilla

1 box powdered sugar

Cream the cream cheese and butter together. Add the vanilla. Gradually add the powdered sugar until desired consistency is reached. Spread between two cookies and sandwich them together. Eat and enjoy!

*This makes a large quantity of icing. I doubled the cookie recipe and found that the amount of icing was just right. However, if you’re just making one batch of cookies, it might be wise to cut the icing recipe in half.

When Life Gives You Lemons | Lemon Crinkles

I’m having one of those weeks. The kind of week where exhaustion hits you like a train, you don’t get enough sleep, and you literally count the hours until the weekend – those two wonderful days that give you the opportunity to catch up on rest, relax, and do all the things that you wanted to do during the week, if you didn’t have work and other commitments to worry about. Not that I expect to get much sleep this weekend…

See this sweet little face? Those mismatched puppy-dog eyes? That little deformed nose? Do not, I repeat, DO NOT let those impressively cute features fool you. Honey and I adopted our little Bella from the Humane Society at the beginning of January. Don’t get me wrong, we absolutely adore her, we love her to bits. But…she hasn’t let us sleep through the night since. Not since the very first night we brought her home, and she tried to deceive us with her too-good-to-be-true behavior. As a result, we are both completely and utterly exhausted. She wakes up several times each night, and then it takes her nearly an hour to fall back to sleep (if she even does), barking all the while. Standing between me and REM sleep. *sigh* What are we doing wrong?

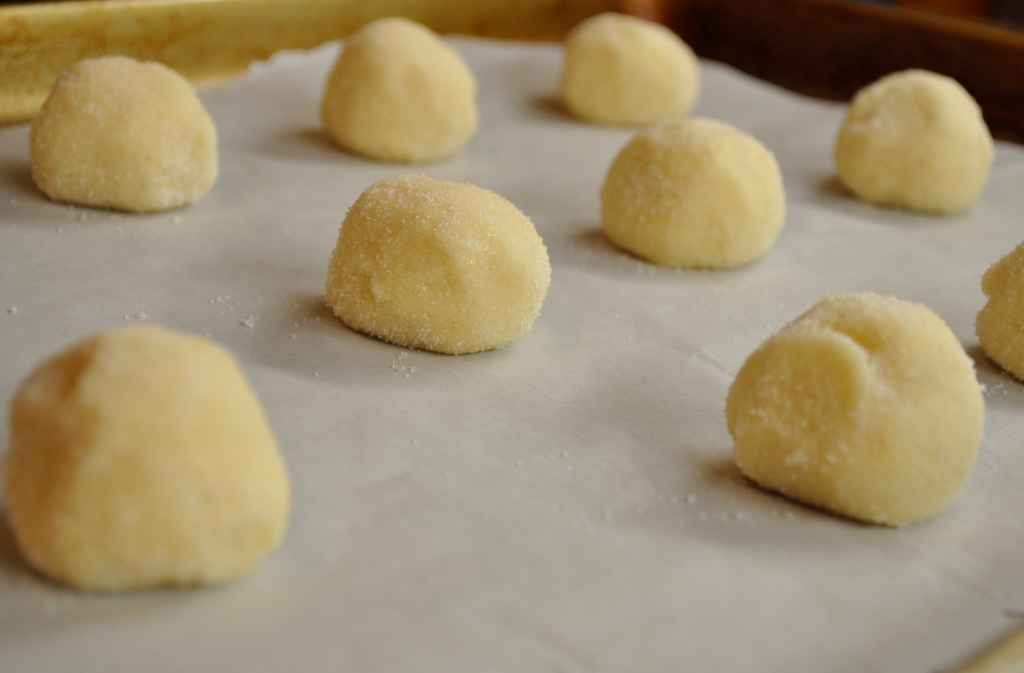
Perhaps I sound a bit melodramatic here, it must be the sleep deprivation talking. Sorry, I’ll get back on track. I made these cookies during the holiday season, and found them to be quite delightful. They remind me of a light shortbread cookie, but with a hint of lemon flavor (next time I whip these up I think I will double the lemon zest for a stronger lemon taste). These little lemon crinkles go very well with a hot cup of tea or coffee. Remember, when life gives you lemons, make lemon cookies! That’s my current philosophy.

Lemon Crinkles

2 3/4 cups all-purpose flour

1 tsp. baking soda

1/2 tsp. baking powder

1/2 tsp. salt

1 cup butter, softened

1 1/2 cups white sugar

1 egg

1/2 tsp. vanilla

Zest of one lemon

4 TBSP. fresh lemon juice

1/2 cups sugar for rolling cookies

Preheat your oven to 350°F. Line two cookie sheets with parchment paper. In a small bowl, whisk together the flour, baking soda, baking powder and salt. In a larger bowl, beat together the butter and sugar until light and fluffy. Beat in the egg, vanilla, lemon zest and juice.

Add in the dry ingredients, beating until just combined. Roll rounded spoonfuls of dough into balls and then roll in sugar. Place on lined cookie sheets, about 1 or 2 inches apart. Bake for 8 to 10 minutes. Remove from the oven and let stand on cookie sheet for 2 minutes before removing to cool on wire racks. Makes 24 – 36 cookies. Happy eating!

An Easy Side | Orzo with Parmesan and Basil

I’m dreaming of summer. Cool refreshing mornings, warm breezy nights, deliciously hot days. Amazing garden vegetables, fresh herbs, fruit that is actually in season! *sigh* Sadly, I will have to keep dreaming for another few months or so. Although, apparently the groundhog didn’t see his shadow, which means spring is on its way…right? I get confused by the groundhog theory. Anyway…

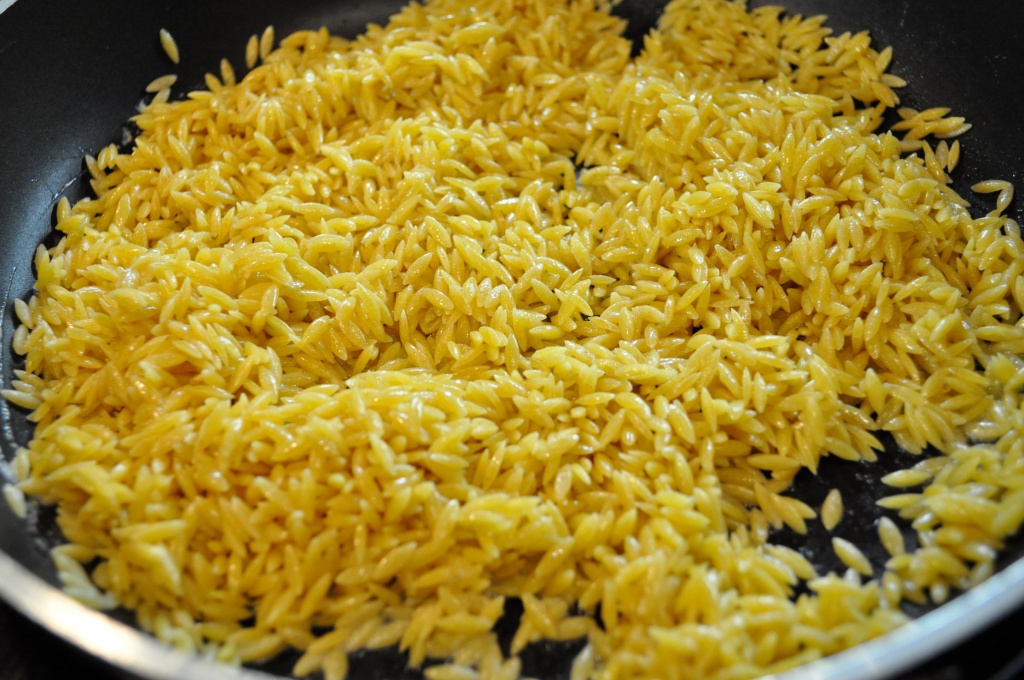
The first time I had orzo was a few years ago, when my mom made this recipe. Orzo is such a fun pasta – about the size of rice, but with the bite of pasta. It makes a great pasta salad (which I have another great recipe for), a fantastic side dish, and also goes well in soups. Now, this orzo with parmesan and basil tastes best with fresh basil, but sadly, the “fresh” basil currently available at my local grocery store tends to be half brown and less than delightful. Not to fret if you have the same problem – dried basil does the trick when necessary. Whether you use fresh or dried, give this recipe a try. It really is a fantastic example of the amazing orzo! Happy eating!

Orzo with Parmesan and Basil (a la my mama)

3 TBSP. butter

1 1/2 cups orzo pasta

3 cups broth (chicken or vegetable)

6 TBSP. fresh basil (or 2 tsp. dried)

1/2 cup fresh parmesan

Salt and pepper to taste

Melt the butter over medium high heat. Add the orzo and saute for several minutes, until the orzo starts to become golden brown. Add the broth, cover and simmer for about 20 minutes, or until the orzo has absorbed the broth. Remove from heat, add the basil and parmesan, and season with salt and pepper to your liking. Add more parmesan if you want it to be really gooey and cheesy.

This orzo is SO good. It will serve 4 very healthy portions (although honey and I can eat one batch to ourselves – piggish, right?), but if you’re having company, make sure you double the recipe. Enjoy!


Holy Oats! | Favorite Granola

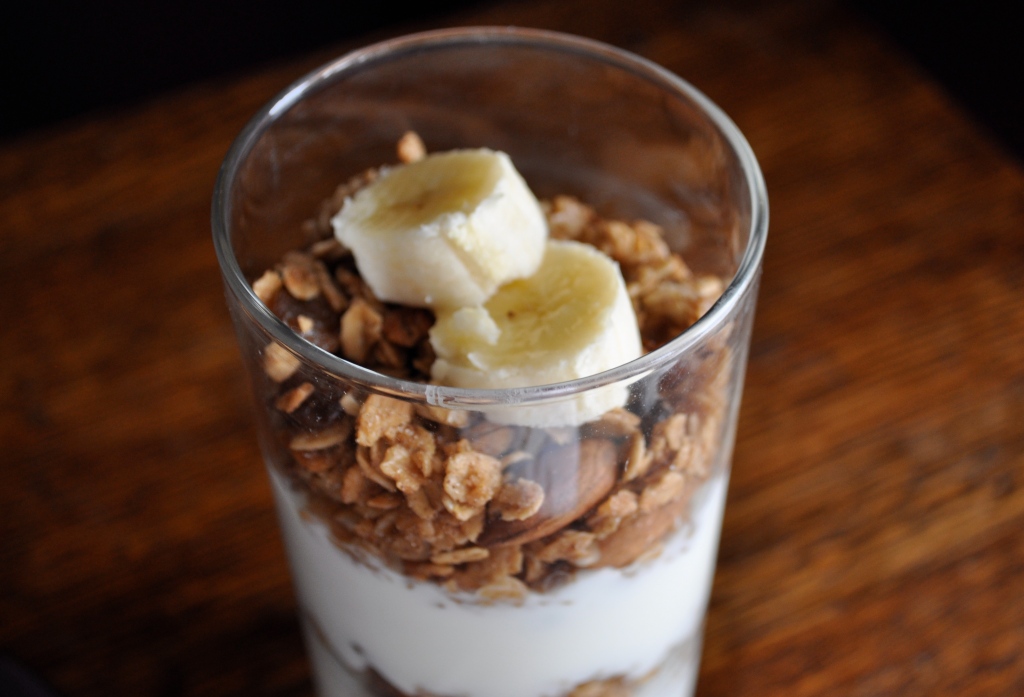
Granola is an old friend of mine. We’ve been having breakfast together for the past, oh, 10 years or so. We usually invite yogurt to the party, and occasionally milk. Unfortunately, I only discovered making homemade granola within the past few years. Kind of ridiculous, considering how easy it is to make, and definitely a travesty when considering all of the delicious varieties of granola you can make it your own kitchen.

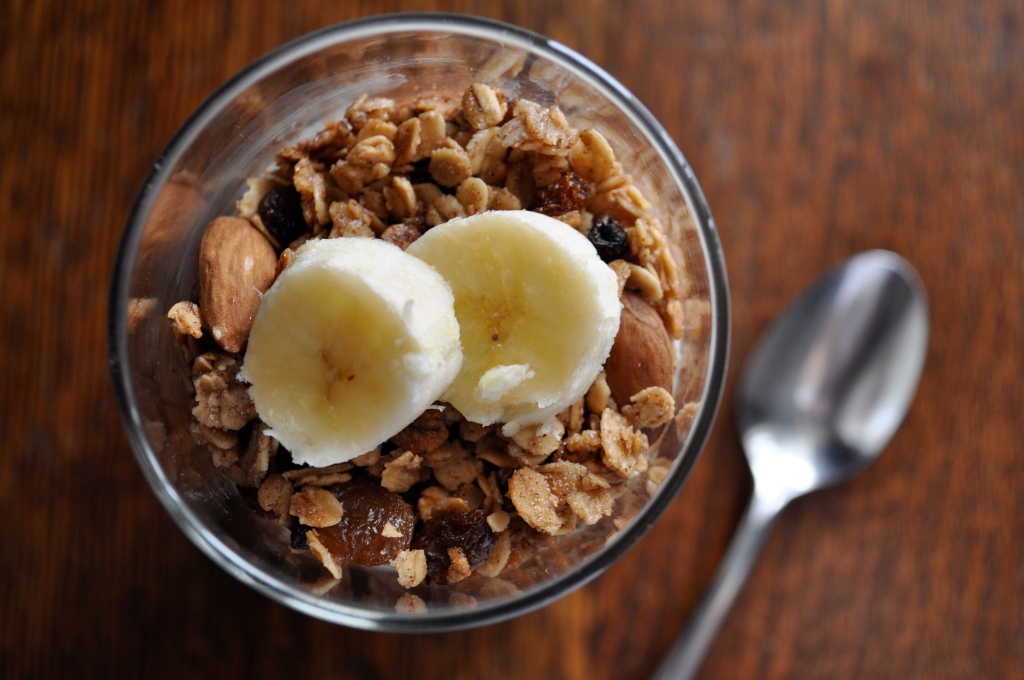
 It was love at first bite with this granola. Sweet, chewy clusters with the crunch of whole nuts and dried fruit. Tastes amazing with plain yogurt or milk, and fantastic over ice cream. Yes, this granola doubles as dessert! You might even catch yourself eating handfuls of it as a snack! This recipe is doubled from the original because even with a double recipe, I can still eat my way through a batch of this in less than a week. Give it a try – granola loves to make new friends. Happy eating!

Favorite Granola (adapted from Baked: New Frontiers in Baking)

4 cups oats

2 tsp. cinnamon

1 tsp. salt

Pinch of nutmeg

1/4 cup canola oil

1/2 cup honey

1/2 cup firmly packed brown sugar

2 tsp. vanilla

2/3 cup whole almonds (and/or hazelnuts)

2/3 cup raisins (and/or dried cherries)

Preheat the oven to 325°F. Line a baking sheet with parchment paper. In a large bowl, toss the oats with the cinnamon, salt, and nutmeg. In a medium bowl, stir together the oil, honey, brown sugar, and vanilla. Whisk until completely combined. Pour the honey mixture over the oats mixture and use your hands to combine them (oh yeah!).

Pour the mixture onto the prepared baking sheet. Spread it out evenly, but leave a few clumps here and there for texture. Bake for 10 minutes, then remove from the oven and use a metal spatula to lift and flip the granola. Sprinkle the almonds (and/or hazelnuts) over the granola and return the baking sheet to the oven. Bake for 5 minutes, then remove from the oven and flip again. Sprinkle the raisins over the granola and return the baking sheet to the oven for another 5 minutes. Let cool completely, then transfer to an airtight container.

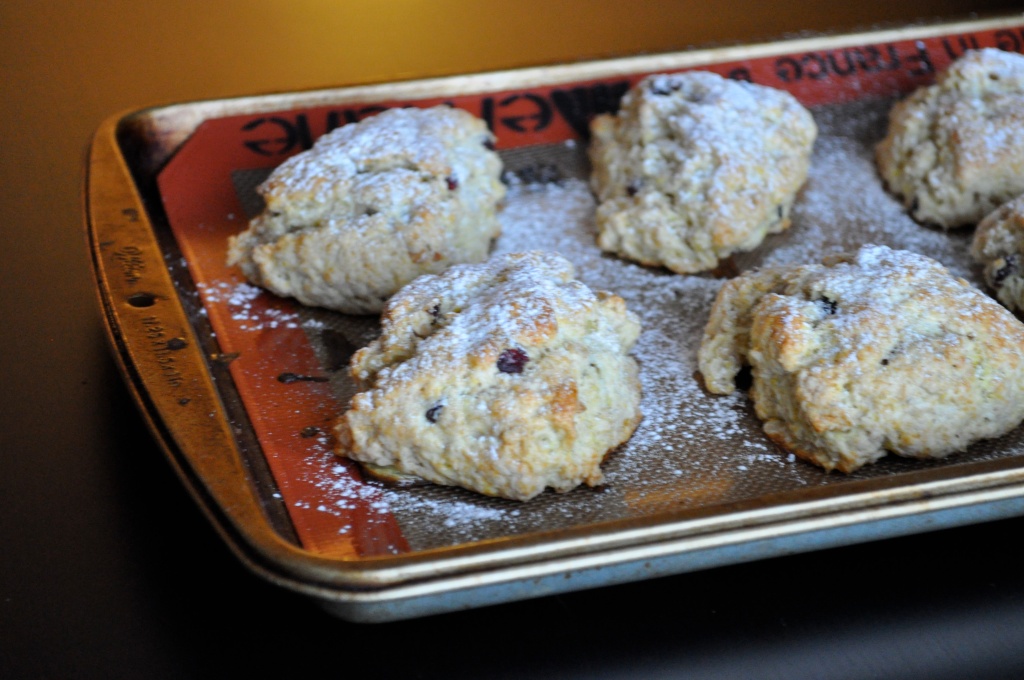
A Queen’s Breakfast | Cranberry Oat Scones

I’m on a baking binge this week. I have decided to do the no grains diet again for the month of February. I know, I know, I’m CRAZY. This coming from the girl that eats granola every morning, loves a big ‘ol sandwich for lunch, and adores pasta, bread, and everything grain-y in between. Consequently, I’m trying to get my grain fix in these last few days of January by baking some of my favorite treats. Fortunately, I have a few posts lined up, so the rest of you will not have to suffer in grain-free hell with me. I know, I’m too kind. 🙂

Baked goodies are a real breakfast treat for me. Knowing that a tender muffin, a warm cinnamon bun, or a crumbly scone is waiting for my empty stomach in the morning…almost makes getting out a bed a little easier. I haven’t tried a lot of scone recipes since I came across this one a couple of years ago. It is such a good recipe – I’ve never felt the need to search for another. The sweetness from the cranberries and the little bit of sugar requires no additions to these yummy scones, so leave the jam in the fridge and try them out on their own. The fresh lemon zest and buttermilk give such a fresh flavor. These are keeper scones right here.

Cranberry Oat Scones (adapted from joyofbaking.com)

1 3/4 cups all-purpose flour

1/3 cup sugar

1/4 tsp. salt

3/4 tsp. baking soda

1 tsp. baking powder

1/2 cup cold butter, cut into small pieces

3/4 cup old-fashioned rolled oats

1/3 cup dried cranberries

zest of one lemon

2/3 to 3/4 cup buttermilk

Egg wash: 1 large egg + 1 TBSP. milk

Preheat the oven to 375°F and place rack in the center of the oven. In a large mixing bowl, whisk together the flour, sugar, salt, baking soda, baking powder. Add the butter and cut it into the flour mixture with two knives or a pastry blender until it resembles coarse crumbs. Add the rolled oats, dried cranberries, and zest. Mix until combined. Stir in the buttermilk (start with 2/3 cup and add more if necessary) and mix just until the dough comes together.

Transfer to a lightly floured surface and press the dough into a circle that is approximately 7 inches round and about 1.75 inches thick. Cut the circle into 8 triangular section. Place the scones on a baking sheet lined with parchment paper. Make an egg wash of one beaten egg mixed with 1 TBSP. of milk and brush the tops of the scones with the egg mixture.

Bake for 15-18 minutes or until lightly browned. Remove from the oven and lightly dust with icing sugar. Enjoy (and try not to eat all 8 scones in one sitting would ya?)! Very happy eating to you all.

Another Keeper | Sweet Potato Chickpea Curry

Hello lovelies! I hope you are all having a great weekend. If you are in Edmonton, you are probably digging your way out of all of the snow over the past week. Where is it all coming from? I can’t remember the last winter that saw us getting several feet of snow at once! Makes me want to just hibernate and wake up in April. Only 3 more months to go. *sigh*

Cold weather warrants warm, spicy, and fragrant stews around here. Honey and I are big curry fans, and typically eat some type of curry concoction at least once per week. We also try to eat a couple of vegetarian meals each week. This sweet potato chickpea curry kills two birds with one stone and has a lovely flavor from the peanut butter and orange juice. Not to mention the thai curry paste. I’m not a huge fan of very spicy dishes, but if you like your curries on the hotter side, increase the amount of curry paste you use. You could also substitute green or yellow curry paste, depending on your preference (green is the spiciest, yellow is the mildest). Enjoy my friends ~ happy eating!

Sweet Potato Chickpea Curry (adapted from The Best of Chef at Home, Michael Smith)

A splash of vegetable oil

1 large onion, diced

4 cloves of garlic, chopped

A small knob of frozen ginger

2 tsp. of Thai red curry paste

2 sweet potatoes, peeled and cubed

1 19-oz. can of chickpeas, drained

1 14-oz. can of coconut milk

1 cup of orange juice

1/2 cup of peanut butter

1/2 tsp. sea salt

1 cup frozen green peas

Several handfuls of baby spinach

Chopped cilantro

Add a splash of vegetable oil to a stockpot over medium-high heat. Toss in the onion and garlic and saute them until they are lightly browned, about 5 minutes.

Grate the frozen ginger into the pan and add the Thai curry paste. Continue cooking until the spices are heated through and fragrant, another few minutes.

Add the sweet potatoes, chickpeas, coconut milk, orange juice, peanut butter, and salt. Brig to a simmer, lower the heat and continue simmering until the sweet potatoes are tender, about 30 minutes. Stir in the peas, spinach, and cilantro. Serve over rice.

The Best Dessert Ever in the History of the World | Butter Brickle

Ok ladies and gents, pay attention. I’m about to share one of the most incredible recipes with you. I was going to be selfish and keep it to myself, but it is too good not to share. If I could only eat one dessert for the rest of my life, I would eat the masterpiece known as Butter Brickle, or Brickle Brackle if you are a member of honey’s family. No matter what you call it, this frozen delight is fantastic. Another family favorite and the birthday “cake” of choice for several people in my life.

Heaven in a pan. Two layers of crumbly cookie and nuts, drizzled with butterscotch, surrounding a thick layer of vanilla ice cream. Does that not sound absolutely delicious?! But beware…if you make this once, you will make it again, and again, and again…and if you share this delectable goodness with anyone else, you will never be able to return to them again without another pan of Butter Brickle. Consider yourselves warned!

But don’t let that stop you from trying this dessert! Immediately! Just drop what you’re doing and make this right now! And keep the first batch for yourself, and eat it out of the pan while laying around your house in your pyjamas on a cold and snowy winter afternoon. I mean, I would never do that, but you should. At least once. 🙂 Enjoy my friends! Happy eating!

Butter Brickle

2 cups flour

1/2 cup oats

1/2 cup brown sugar

1 cup chopped pecans

1 cup (2 sticks) of butter, melted

1 box of vanilla ice cream

1 jar of butterscotch sauce

Preheat your oven to 400°F. Mix together the flour, oats, brown sugar, and pecans in a large bowl. Add the butter and mix thoroughly. Spread the mixture evenly on a baking sheet and bake for 15 minutes. Watch closely during the last few minutes, as the edges can start to burn.

Using a 9 x 13 inch pan, crumble half of the mixture into the bottom. Top with half of the jar of butterscotch sauce. Cover with ice cream.* Sprinkle the remaining cookie mixture over top of the ice cream and top with the rest of the butterscotch sauce. Cover and freeze for at least a couple of hours before serving.

*Tip: Open your box of ice cream completely and slice the ice cream into 1-inch slices. The ice cream will start to soften slightly once on top of the warm cookie mixture, so let it sit for a few minutes and then spread the ice cream so that it is an even layer.

Happy New Year! | Pumpkin Spice Layer Cake with Caramel and Cream Cheese Frosting

Happy New Year! I am still adjusting back to real life after an amazing Christmas with family and friends. I have already had 10 glorious days off from work (and a couple left!), and lots of time spent with the most important people in my life. After having Christmas with my family, I hopped on a plane and joined honey and his family in Manitoba for 5 more days of rest and relaxation. It was so great to get away from the hustle and bustle of the city, and lounge around on a farm for a few days. Thanks to all who made it memorable!

January usually brings with it a sense of dread – the holiday season is over, yet we still have 4 months (or more) of winter left! Yuck. But somehow, we manage to make it through each year, and I know that this year will be no different. I’m sure that planning a trip to an exotic location wouldn’t hurt either…

Over the holidays, I made this pumpkin spice layer cake and brought it to Christmas dinner at my aunt’s house. The cake was deliciously moist, and the caramel and cream cheese frosting added a wonderful richness. This would be a great dessert year round, but especially over fall and winter because of the warm spicy pumpkin flavor. Happy eating!

Pumpkin Spice Layer Cake with Caramel and Cream Cheese Frosting (adapted from Bon Appétit, Nov. 2008)

For the cake:

3 cups all-purpose flour

2 tsp. baking soda

2 tsp. baking powder

1 tsp. cinnamon

1/2 tsp. ground ginger

1/4 tsp. ground cloves

1/4 tsp. ground nutmeg

1/4 tsp. ground allspice

1/4 tsp. ground cardamom

1 15-ounce can pure pumpkin

1 1/2 cups sugar

1 1/4 cups vegetable oil

4 large eggs

2 tsp. finely grated orange peel

For the frosting:

4 cups icing sugar, divided

1/2 cup plus 1 TBSP. heavy whipping cream

1 tsp. vanilla extract

1/4 tsp. salt

1 8-ounce package cream cheese, room temperature

1/4 cup unsalted butter, room temperature

For the cake: Preheat the oven to 350°F. Butter and flour two 9-inch cake pans, tapping out any excess flour. Whisk first 9 ingredients in a large bowl. Using an electric mixer, beat the pumpkin, sugar, and oil in another large bowl. Add the eggs one at a time, beating to incorporate between additions. Mix in the orange peel. Add flour mixture; beat on low speed just to blend. Divide the batter between prepared pans. Bake the cakes for about 35 minutes, or until a toothpick inserted into the center comes out clean. Cool the cakes in the pans for about 10 minutes. Invert onto a cooling rack, then turn top side up and cool completely.

For the frosting: Sprinkle 1/2 cup of icing sugar over the bottom of a non-stick skillet. Cook over medium heat until the sugar melts (do not stir). Continue cooking until the sugar turns a deep amber color, stirring occasionally, about 4 minutes. Carefully stir in 1/2 cup cream, vanilla, and salt (mixture will bubble vigorously). Stir until any caramel bits dissolve. Stir in remaining 1 TBSP. cream. Strain into a small bowl. Cool caramel to room temperature.

Sift 2 cups of icing sugar into a medium bowl. Using an electric mixer, beat the cream cheese and butter in a large bowl. Gradually beat in the icing sugar. Beat in cooled caramel. Gradually add in the remaining 1 1/2 cups of icing sugar until a good icing consistency is reached (you may not need to use all of the sugar). Cover and chill the frosting until firm enough to spread, about 2 hours.

Using a long serrated knife, trim rounded tops from cakes. Place one cake layer on the cake plate, cut side up. Spread 3/4 cup of frosting over top. Place second cake layer, cut side down, atop frosting. Cover top and sides of cake with remaining frosting, creating a smooth surface. You can make this up to two days ahead. Cover the cake and chill in fridge. Let stand at room temperature 2 hours before serving. For an extra garnish, sprinkle candied orange peel over the top of the cake (which I could not find anywhere!).